Zum Hauptinhalt wechseln
Gemeinsam reparieren - Jetzt registrieren

Samsung Gear VR with Controller Motherboard Replacement

Was du brauchst

    1. Samsung Gear VR with Controller Motherboard Replacement, Controller Batteries: Schritt 1, Bild 1 von 3 Samsung Gear VR with Controller Motherboard Replacement, Controller Batteries: Schritt 1, Bild 2 von 3 Samsung Gear VR with Controller Motherboard Replacement, Controller Batteries: Schritt 1, Bild 3 von 3
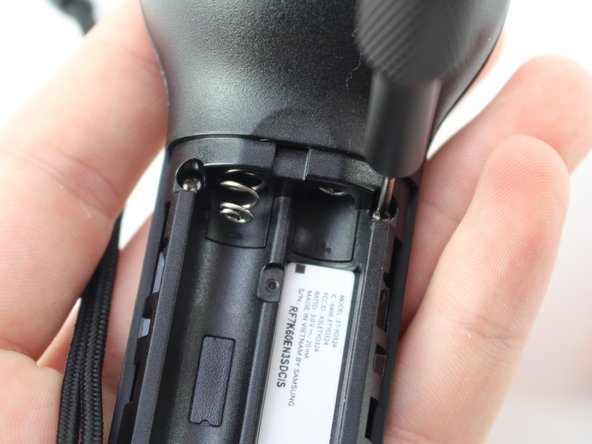
      • Turn the controller upside down to access the battery compartment.

      • The battery compartment is located on the opposite side of the buttons.

      • Press on the top of the battery plate and slide down to remove the cover.

      Frag FixBot

      Kommentar hinzufügen

    2. Samsung Gear VR with Controller Motherboard Replacement: Schritt 2, Bild 1 von 3 Samsung Gear VR with Controller Motherboard Replacement: Schritt 2, Bild 2 von 3 Samsung Gear VR with Controller Motherboard Replacement: Schritt 2, Bild 3 von 3
      • Remove the AAA batteries using your fingers.

      Frag FixBot

      Kommentar hinzufügen

    1. Samsung Gear VR with Controller Motherboard Replacement, Controller Motherboard: Schritt 3, Bild 1 von 2 Samsung Gear VR with Controller Motherboard Replacement, Controller Motherboard: Schritt 3, Bild 2 von 2
      • Remove the four 5mm Phillips #000 screws.

      Frag FixBot

      Kommentar hinzufügen

    2. Samsung Gear VR with Controller Motherboard Replacement: Schritt 4, Bild 1 von 1
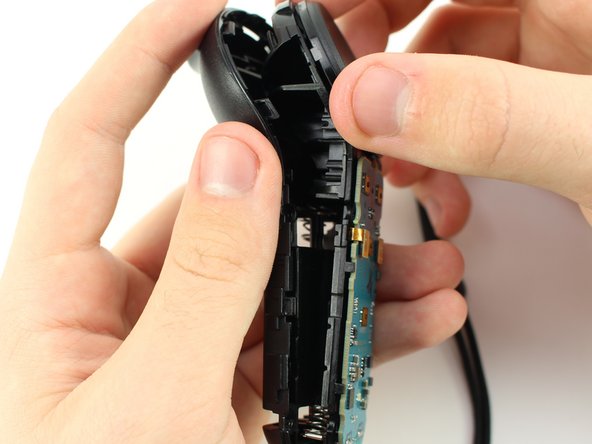
      • Use the metal spudger to pry the back side of the controller apart from the front.

      • You will have to use the spudger in many different spots along the divide before trying to separate the pieces.

      Frag FixBot

      Kommentar hinzufügen

    3. Samsung Gear VR with Controller Motherboard Replacement: Schritt 5, Bild 1 von 2 Samsung Gear VR with Controller Motherboard Replacement: Schritt 5, Bild 2 von 2
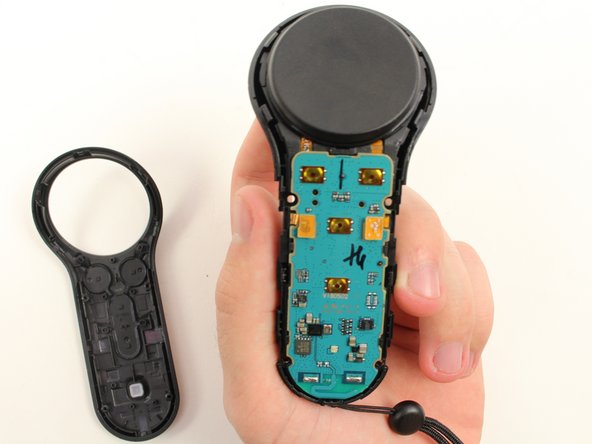
      • Pull apart the two halves of the controller to access the motherboard.

      Frag FixBot

      Kommentar hinzufügen

    4. Samsung Gear VR with Controller Motherboard Replacement: Schritt 6, Bild 1 von 3 Samsung Gear VR with Controller Motherboard Replacement: Schritt 6, Bild 2 von 3 Samsung Gear VR with Controller Motherboard Replacement: Schritt 6, Bild 3 von 3
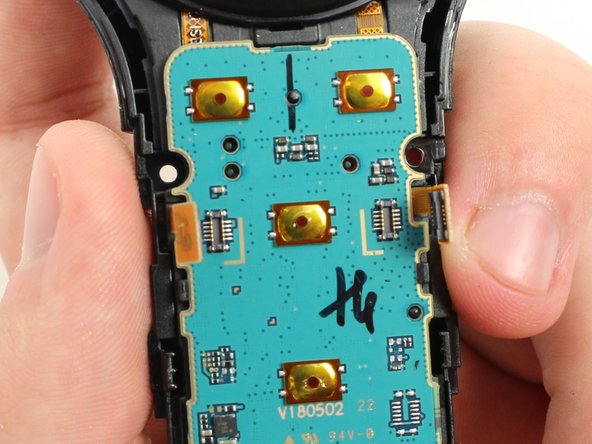
      • Pry on the two pop connectors with the plastic opening tool to detach the motherboard.

      • Separate the motherboard and trackpad from the rear part of the controller.

      Frag FixBot

      Kommentar hinzufügen

Abschluss

To reassemble your device, follow these instructions in reverse order.

Rückgängig: Ich habe diese Anleitung nicht absolviert.

2 weitere Personen haben diese Anleitung absolviert.

Team

Cal Poly, Team S18-G3, White Winter 2019 Mitglied von Cal Poly, Team S18-G3, White Winter 2019

CPSU-WHITE-W19S18G3

4 Mitglieder

84 Anleitungen geschrieben

0 Kommentare zur Anleitung

Kommentar hinzufügen

Seitenaufrufe:

Letzte 24 Stunden: 3

Letzte 7 Tage: 10

Letzte 30 Tage: 26

Insgesamt: 1,347