Einleitung
If your backpanel is cracked or you wish to change the color with one you found online, here is the guide you are looking for! Be sure to turn off the camera and remove the battery before you begin the replacement.
Was du brauchst
-
-
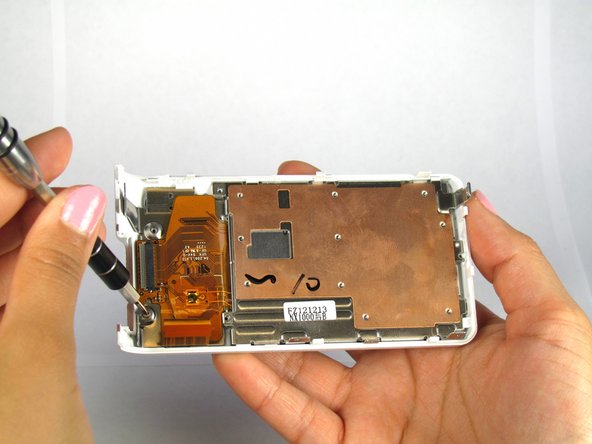
Remove all five 3mm Philips #000 screws from the inside of the back panel using the Philips #000 Screwdriver.
-
-
-
-
Lift up the grey tab on the ZIF connector with the spudger to remove the ribbon.
-
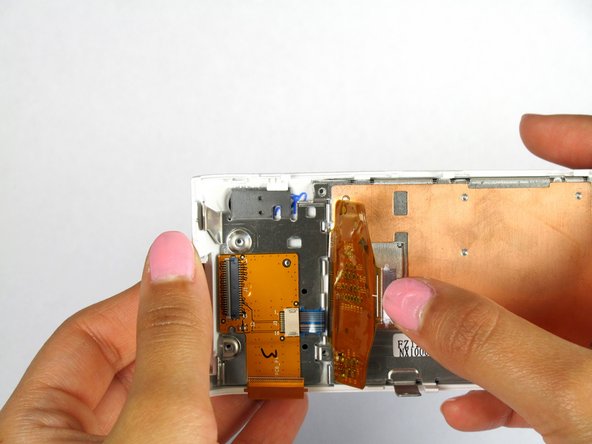
Using both thumbs push the ribbon out of the ZIF connection.
-
-
-
Use the metal spudger to pick the bottom of the plastic piece while simultaneously using your index finger to push down on the larger metal slab. This will cause the metal plate with the large ribbon to slide down and out of the plastic back panel.
-


To reassemble your device, follow these instructions in reverse order.
To reassemble your device, follow these instructions in reverse order.
Team

Cal Poly, Team 20-13, Maness Winter 2015 Mitglied von Cal Poly, Team 20-13, Maness Winter 2015
CPSU-MANESS-W15S20G13
4 Mitglieder
14 Anleitungen geschrieben