Diese Version enthält möglicherweise inkorrekte Änderungen. Wechsle zur letzten geprüften Version.
Was du brauchst
-
Dieser Schritt ist noch nicht übersetzt. Hilf mit, ihn zu übersetzen!
-
First remove the battery and SD Card
-
Then use the screwdriver to remove the 6 screws that need to be removed to take off the outer case.
-
2 screws are located on the bottom.
-
2 screws are located on the left side (near the HDMI port).
-
2 screws are located on the right side (opposite side of the HDMI port).
-
-
Dieser Schritt ist noch nicht übersetzt. Hilf mit, ihn zu übersetzen!
-
Once the screws are removed, use the blue opening tool to open the back case from the sides - it should come off easily.
-
-
-
Dieser Schritt ist noch nicht übersetzt. Hilf mit, ihn zu übersetzen!
-
Use the screwdriver to remove the small silver screw holding down the control panel (located on the bottom right next to the screen).
-
Use the blue opening tool to lift up the control panel from where the screw was just removed.
-
-
Dieser Schritt ist noch nicht übersetzt. Hilf mit, ihn zu übersetzen!
-
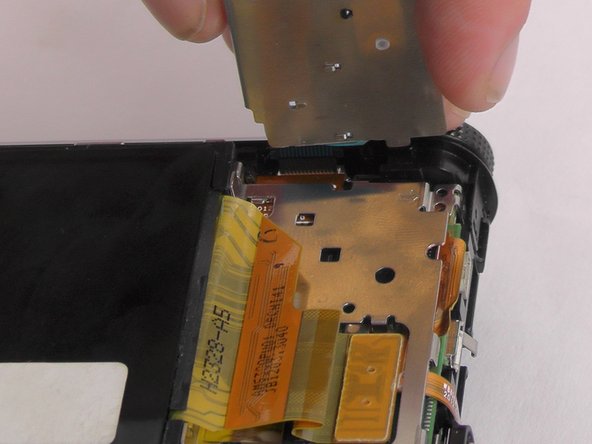
Use the tweezers to gently pull the yellow control board ribbon cable out of its connector.
-
The display cable stands straight up and pops out easily. Pull up on it to remove the screen from the camera.
-
-
Dieser Schritt ist noch nicht übersetzt. Hilf mit, ihn zu übersetzen!
-
Connect the new screen by gently pressing the display cable on to its connector (on the motherboard).
-


Rückgängig: Ich habe diese Anleitung nicht absolviert.
2 weitere Nutzer:innen haben diese Anleitung absolviert.
Team

USF Tampa, Team 12-4, Eyestone Spring 2016 Mitglied von USF Tampa, Team 12-4, Eyestone Spring 2016
USFT-EYESTONE-S16S12G4
4 Mitglieder
8 Anleitungen geschrieben
2 Kommentare
I previously mentioned that I had a sticky substance seeping from my camera. I spent quite a long time, using acetone to remove this fluid stuff from the LCD and the clear screen which was stuck to the LCD. It was not an easy task because of the quick evaporation of the acetone. Now, must I stick the LCD and the part/clear lens together? If so, with what glue? The second part to my question is that there was a second plate (?) with a rubbery surface on one side and I did not notice which side faces the lens because it fell out before I noticed it, rubber or plain metal? Any help will be appreciated. :-(
Is it normal from such a renowned company? I even got some instability in installed programs.