Diese Version enthält möglicherweise inkorrekte Änderungen. Wechsle zur letzten geprüften Version.
Was du brauchst
-
Dieser Schritt ist noch nicht übersetzt. Hilf mit, ihn zu übersetzen!
-
Place thumb on the tab located at the back of the phone and slide button towards your hand and away from phone.
-
While holding down the button, pull cover off with other hand.
-
-
Dieser Schritt ist noch nicht übersetzt. Hilf mit, ihn zu übersetzen!
-
Use fingers to grip the battery and remove it from the phone.
-
-
Dieser Schritt ist noch nicht übersetzt. Hilf mit, ihn zu übersetzen!
-
Using a spudger, remove the four rubber coverings on the lower back plate.
-
-
-
Dieser Schritt ist noch nicht übersetzt. Hilf mit, ihn zu übersetzen!
-
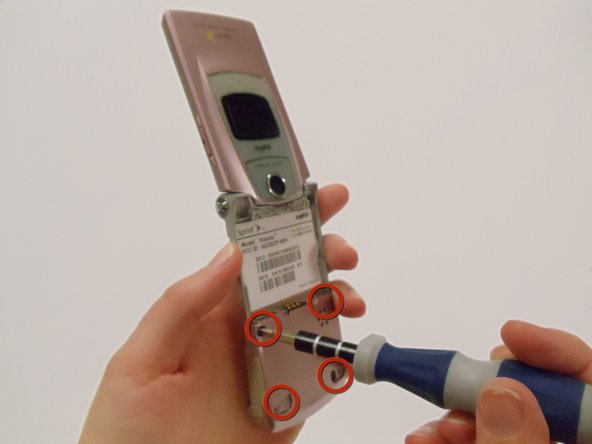
Using a Tri-wing Y0 screwdriver, remove the four 4.4mm screws securing the back plate.
-
-
Dieser Schritt ist noch nicht übersetzt. Hilf mit, ihn zu übersetzen!
-
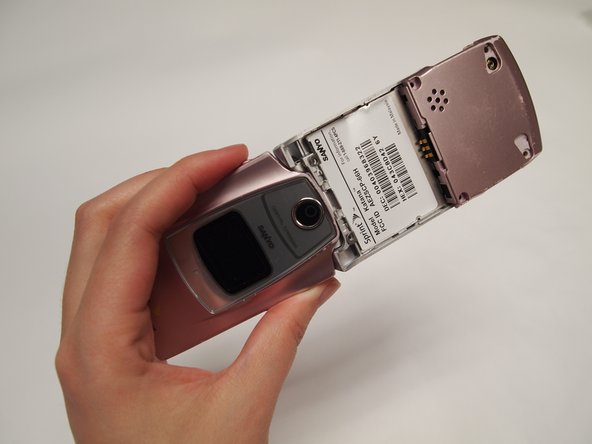
Remove the lower back cover to reveal part of the motherboard and the circular speaker housed in the back cover plate.
-
-
Dieser Schritt ist noch nicht übersetzt. Hilf mit, ihn zu übersetzen!
-
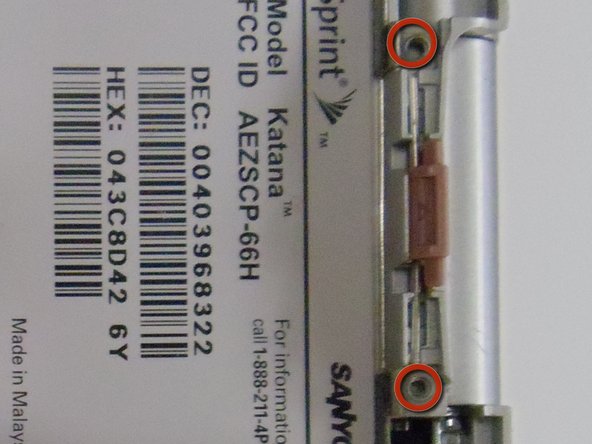
Unscrew the 4.4mm screws at the top of the phone with the Tri-wing Y0 Screwdriver.
-
-
Dieser Schritt ist noch nicht übersetzt. Hilf mit, ihn zu übersetzen!
-
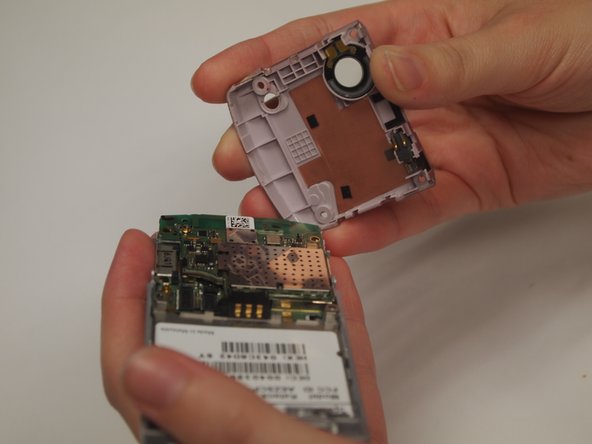
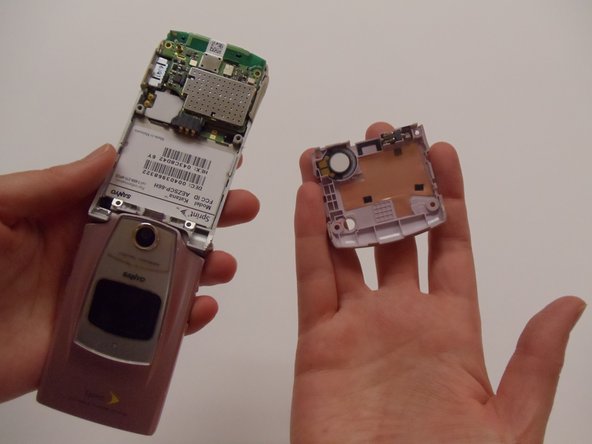
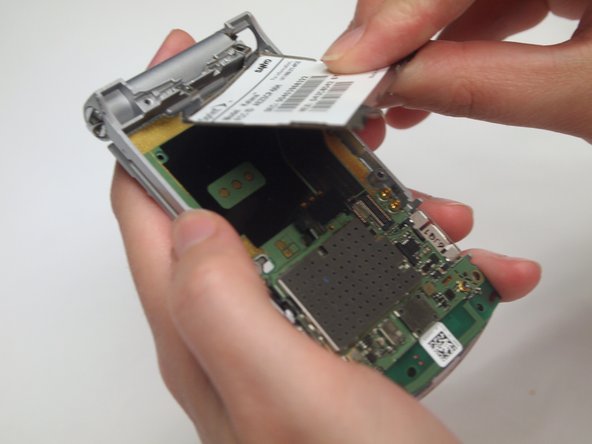
Using a spudger, remove the thin aluminum plate to access the upper motherboard.
-
-
Dieser Schritt ist noch nicht übersetzt. Hilf mit, ihn zu übersetzen!
-
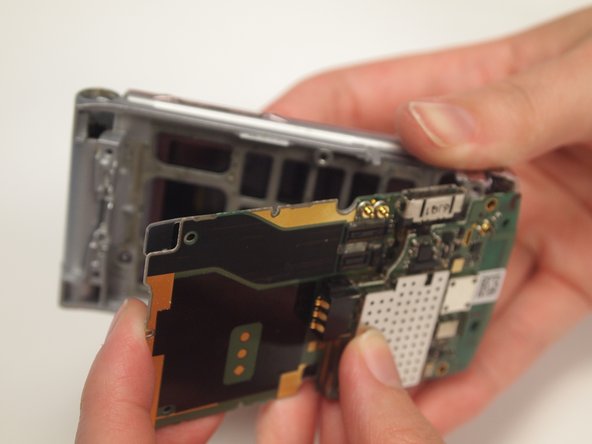
Use the flat end of the spudger to remove two ribbon cables from the back of the motherboard.
-
-
Dieser Schritt ist noch nicht übersetzt. Hilf mit, ihn zu übersetzen!
-
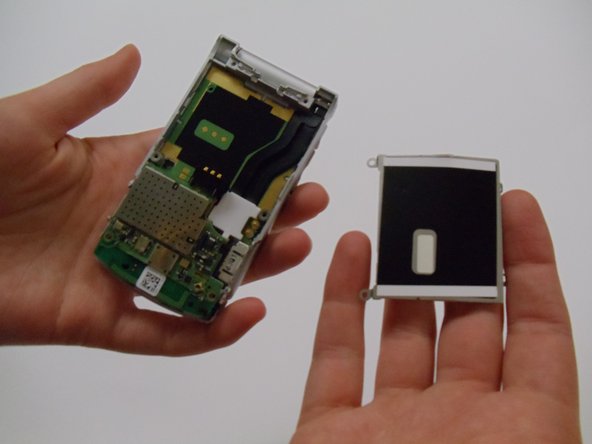
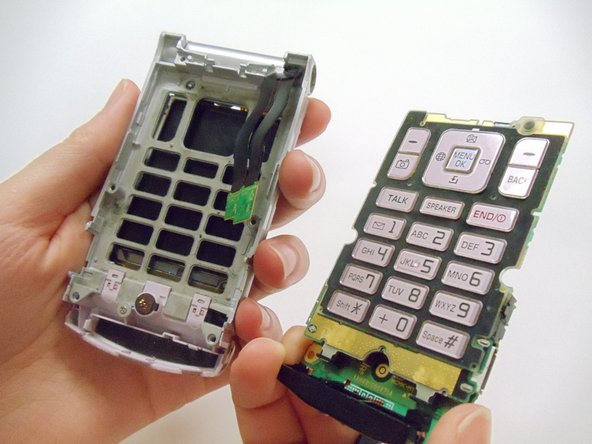
Open the phone and firmly hold the phone casing with one hand and push the motherboard out of the case with the other by pushing on the keys.
-
Once the keys are free from the casing, close the phone and pull the motherboard from the back of the phone the remainder of the way with your fingers.
-


Rückgängig: Ich habe diese Anleitung nicht absolviert.
Ein:e weitere:r Nutzer:in hat diese Anleitung absolviert.
Team

Clemson, Team 12-1, Benson Spring 2013 Mitglied von Clemson, Team 12-1, Benson Spring 2013
CLEM-BENSON-S13S12G1
4 Mitglieder
20 Anleitungen geschrieben