Einleitung
This guide will show you how to access and replace the scanner head on your HP PSC 2410 Photosmart All In One Printer.
Was du brauchst
-
-
Remove the back panel by inserting your fingers into the indentations next to the tabs. Press the tabs inward towards each other while pulling the back panel toward you.
-
-
-
Using the T10 Torx Security Bit Screwdriver, unscrew the screws on the upper left and right corners of the inner panel to remove the inner back panel.
-
-
-
Press down on the two plastic hinges to remove the upper portion of printer.
-
-
-
Grasp the plastic plug on the end of the speaker wire, then gently pull the plug away from the printer until the wire is removed.
-
-
-
-
Rotate the printer so the paper tray is facing towards you.
-
Gently lift the scanner tray up and away from the printer.
-
Press the gray plastic tabs inward to release the tabs from the printer.
-
-
-
Returning to the back of the printer, remove the scanner from the back hinges.
-
-
-
Unplug the white plastic multi-wire connector (with orange, black, red, and brown wires) from it's port.
-
-
-
Detach the scanner tray from the printer by lifting the scanner tray off the printer body.
-
-
-
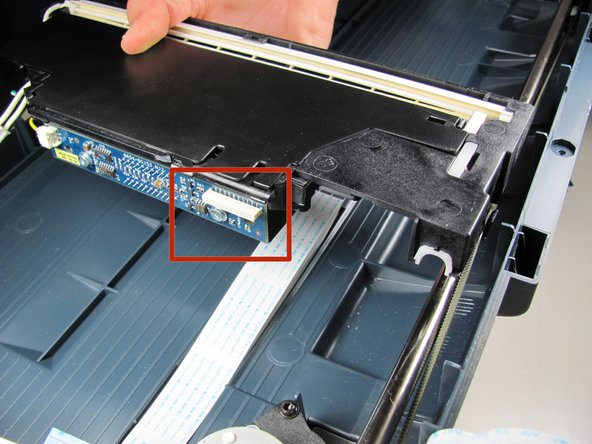
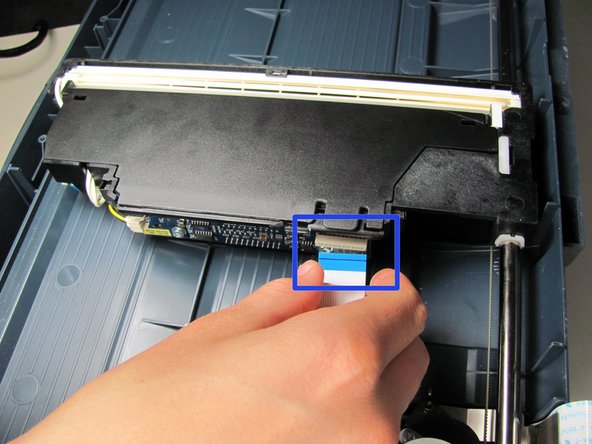
Detach the white ribbon wire from the scanner head by pulling gently at the connection.
-
-
-
Lift the gray drive belt from the black tab to disconnect the drive belt from the scanner head.
-
Remove the scanner head from the scanner by gently rotating and then lifting.
-
-
-
Place the new scanner head in the scanner tray by fastening the drive belt into the black tab.
-
Once the drive belt is secured, rotate the scanner head back into position.
-
Re-attach the white ribbon wire to the connection from Step 10.
-


To reassemble your device, follow these instructions in reverse order.
To reassemble your device, follow these instructions in reverse order.
Rückgängig: Ich habe diese Anleitung nicht absolviert.
3 weitere Nutzer:innen haben diese Anleitung absolviert.
Team

Cal Poly, Team 12-31, Maness Spring 2011 Mitglied von Cal Poly, Team 12-31, Maness Spring 2011
CPSU-MANESS-S11S12G31
5 Mitglieder
9 Anleitungen geschrieben
2 Kommentare
Ok, but where do I purchase a new scanner head???
the step between 9 and 10 doesn't seem to make sense. it never established that the scanner head is broken...I couldn't identify where step 10 scanner head came up ...no where did it show the scanner between step 1 and step 9...Please offer an explanation...
by step 9 the scanner package had already removed...i m afraid I wont here from ifixit because the printer is about 20 years old.