Zum Hauptinhalt wechseln

Screen replacement for the Samsung Galaxy A50

Archivierte Anleitung
Diese Anleitung wurde ausschließlich für historische Zwecke erhalten. Verwende die aktualisierte Version dieser Anleitung, um deine Reparatur durchzuführen.
  1. Screen replacement for the Samsung Galaxy A50, Eject sim card tray: Schritt 1, Bild 1 von 1
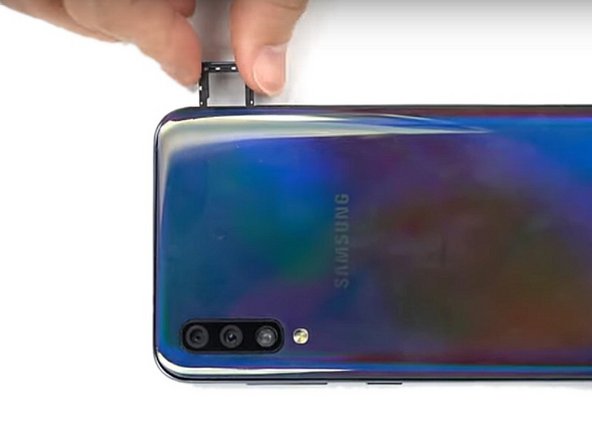
    • Turn off your phone before you start

    • Eject sim card tray

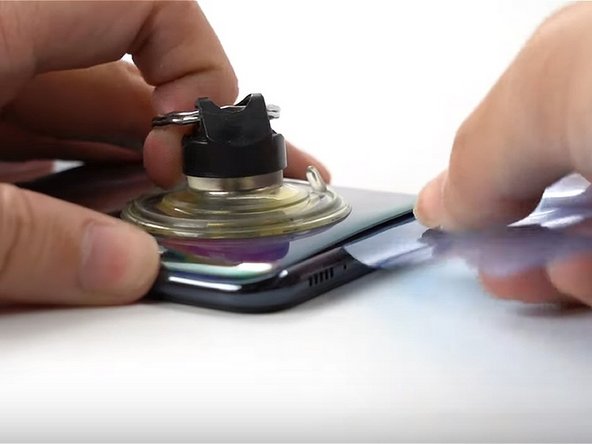
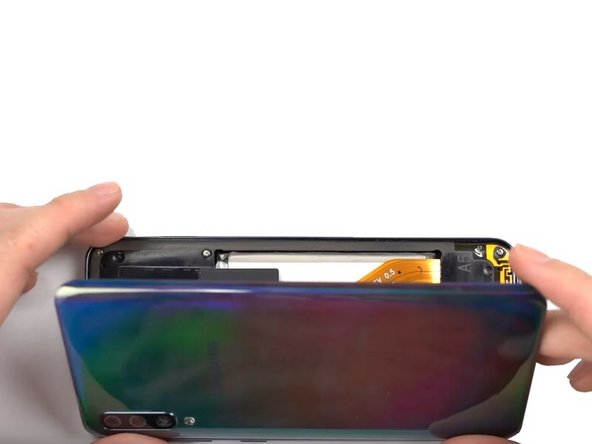
  2. Screen replacement for the Samsung Galaxy A50, Remove the back glass: Schritt 2, Bild 1 von 2 Screen replacement for the Samsung Galaxy A50, Remove the back glass: Schritt 2, Bild 2 von 2
    In diesem Schritt verwendetes Werkzeug:
    Suction Handle
    $2.99
    Kaufen
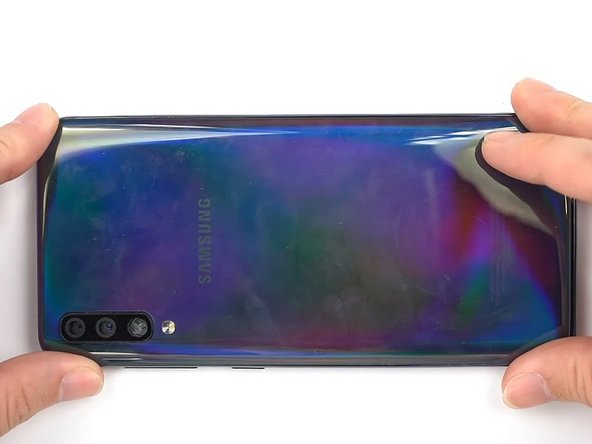
    • Heat the back of the phone for 5 minutes at 65°C

    • Slowly lift the back glass off the phone using a suction cup

    • Insert a pick into the gap created.

    • Slide the pick around the edge, using more picks to keep the gap open.

    • You can heat the back multiple times during this process to aid in removal of the back glass

  3. Screen replacement for the Samsung Galaxy A50, Open the phone: Schritt 3, Bild 1 von 1
    • Carefully remove the rear glass and set it aside.

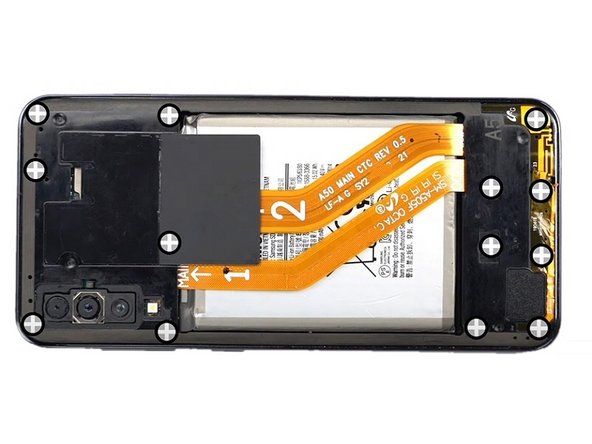
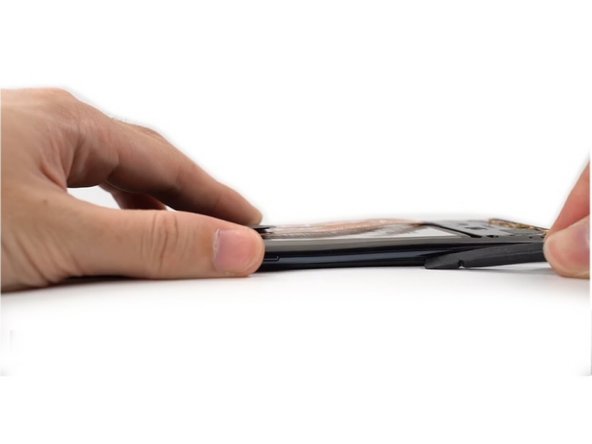
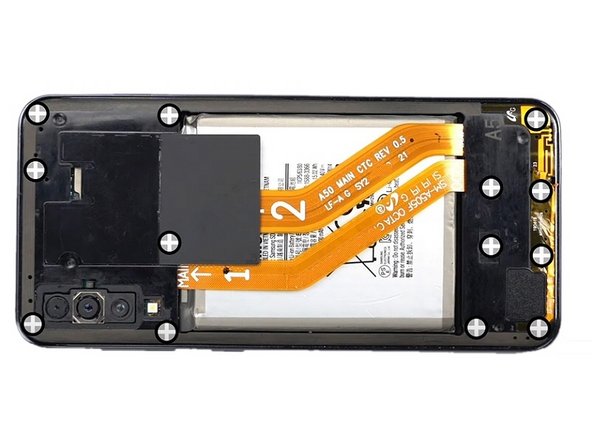
  4. Screen replacement for the Samsung Galaxy A50, Remove all the screws: Schritt 4, Bild 1 von 3 Screen replacement for the Samsung Galaxy A50, Remove all the screws: Schritt 4, Bild 2 von 3 Screen replacement for the Samsung Galaxy A50, Remove all the screws: Schritt 4, Bild 3 von 3
    In diesem Schritt verwendetes Werkzeug:
    Spudger
    $3.99
    Kaufen
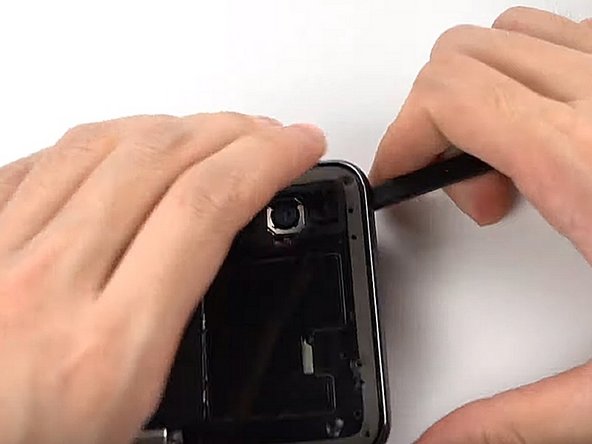
    • Remove all the screws using a 4mm Philips #00 screwdriver

    • Slide a spudger in between the screen and the frame

    • Slide the spudger around the entire perimeter of the phone to unclip the screen and separate it from the midframe

  5. Screen replacement for the Samsung Galaxy A50, Remove the midframe: Schritt 5, Bild 1 von 2 Screen replacement for the Samsung Galaxy A50, Remove the midframe: Schritt 5, Bild 2 von 2
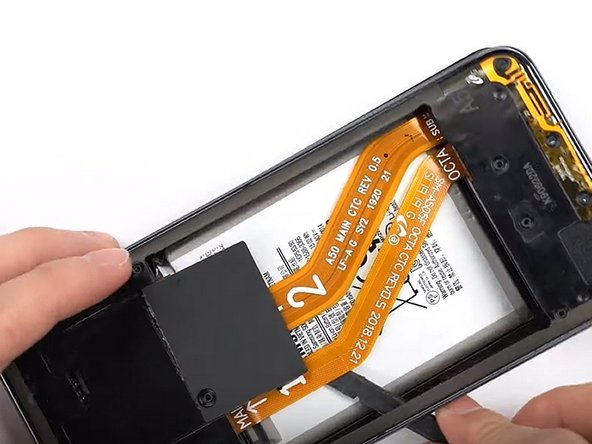
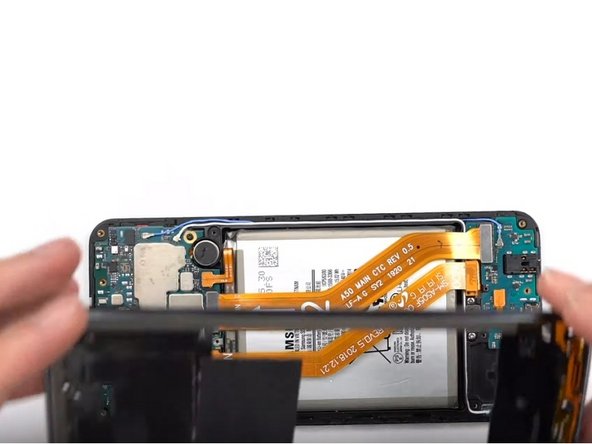
    • Separate and remove the midframe

  6. Screen replacement for the Samsung Galaxy A50, Disconnect the battery: Schritt 6, Bild 1 von 2 Screen replacement for the Samsung Galaxy A50, Disconnect the battery: Schritt 6, Bild 2 von 2
    • Disconnect the battery

    • Unscrew the Phillips screw holding the motherboard

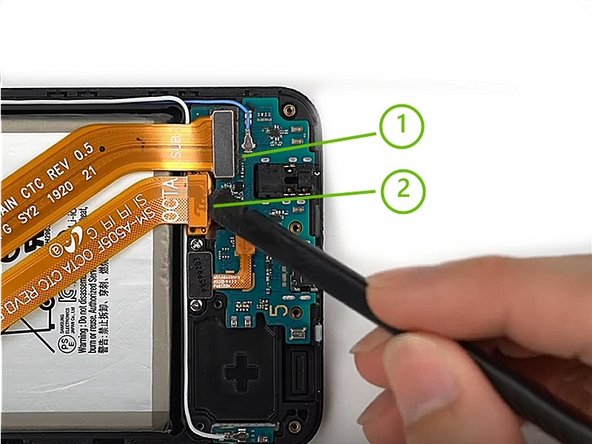
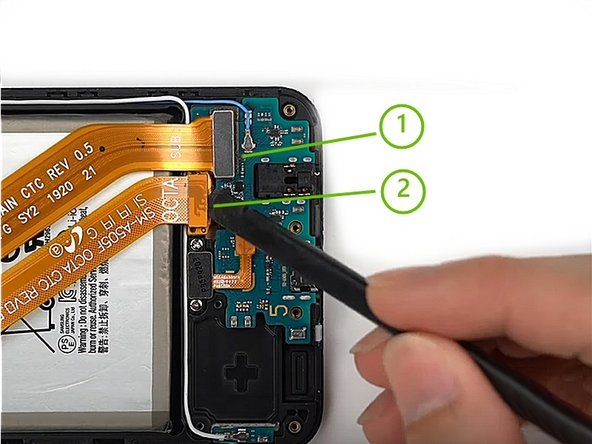
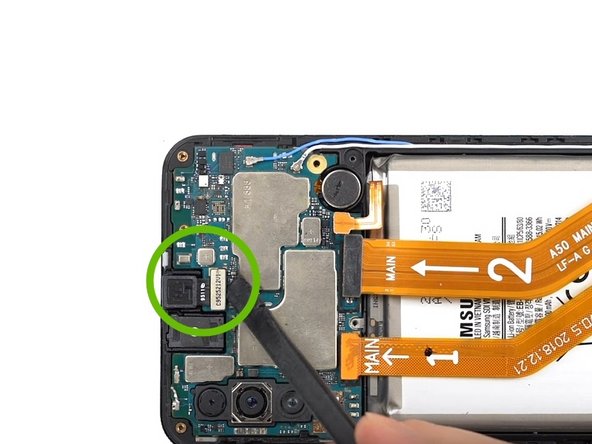
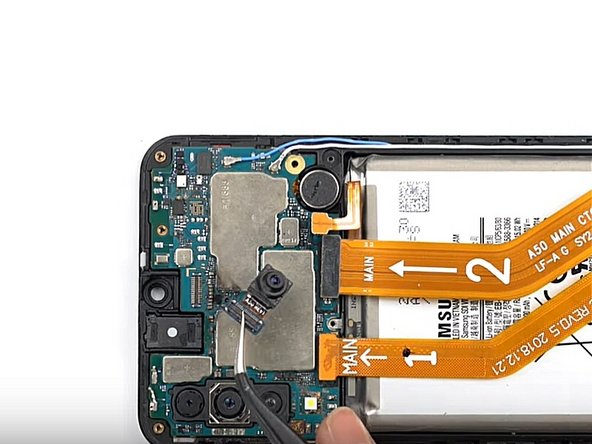
  7. Screen replacement for the Samsung Galaxy A50, Disconnect the cables: Schritt 7, Bild 1 von 3 Screen replacement for the Samsung Galaxy A50, Disconnect the cables: Schritt 7, Bild 2 von 3 Screen replacement for the Samsung Galaxy A50, Disconnect the cables: Schritt 7, Bild 3 von 3
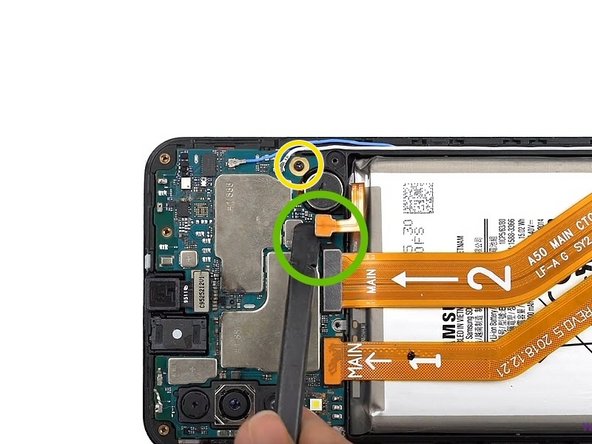
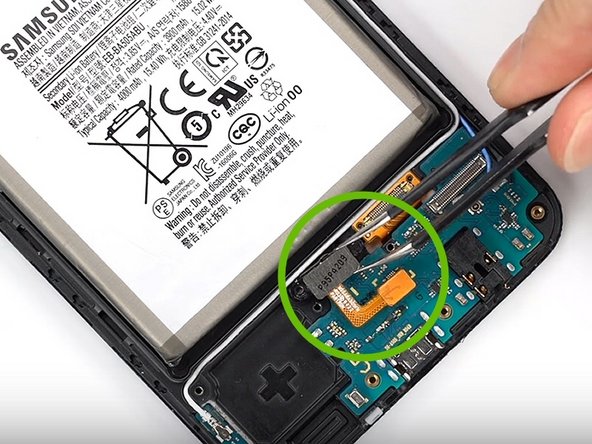
    • Disconnect cables 1 and 2

    • Unplug and remove the front camera (FaceTime)

  8. Screen replacement for the Samsung Galaxy A50, Unplug the coaxial cables: Schritt 8, Bild 1 von 3 Screen replacement for the Samsung Galaxy A50, Unplug the coaxial cables: Schritt 8, Bild 2 von 3 Screen replacement for the Samsung Galaxy A50, Unplug the coaxial cables: Schritt 8, Bild 3 von 3
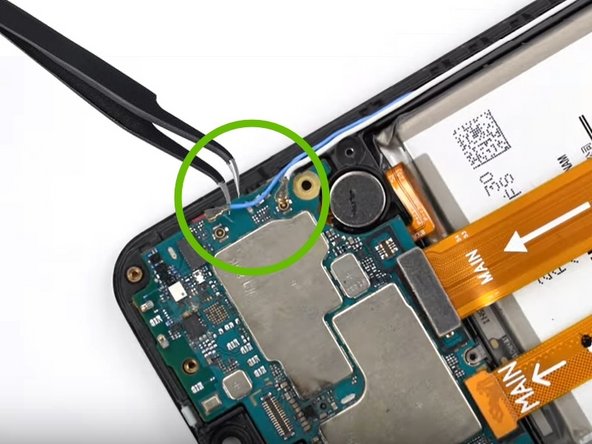
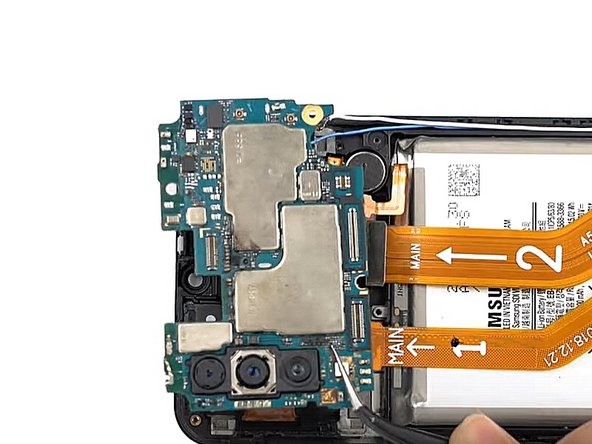
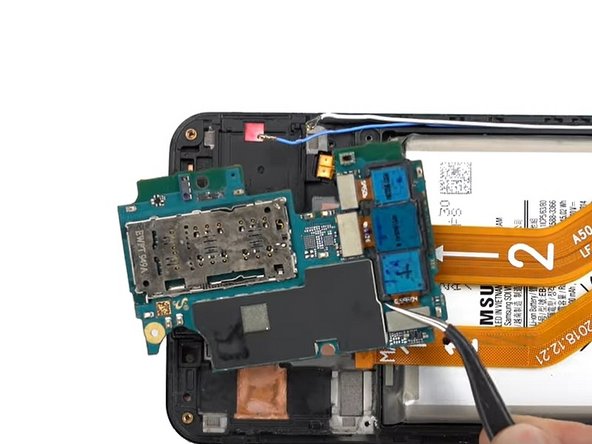
    • Disconnect the blue and white coaxial cables

    • Gently remove the motherboard by lifting it up.

  9. Screen replacement for the Samsung Galaxy A50, Remove components: Schritt 9, Bild 1 von 3 Screen replacement for the Samsung Galaxy A50, Remove components: Schritt 9, Bild 2 von 3 Screen replacement for the Samsung Galaxy A50, Remove components: Schritt 9, Bild 3 von 3
    In diesem Schritt verwendetes Werkzeug:
    Tweezers
    $3.99
    Kaufen
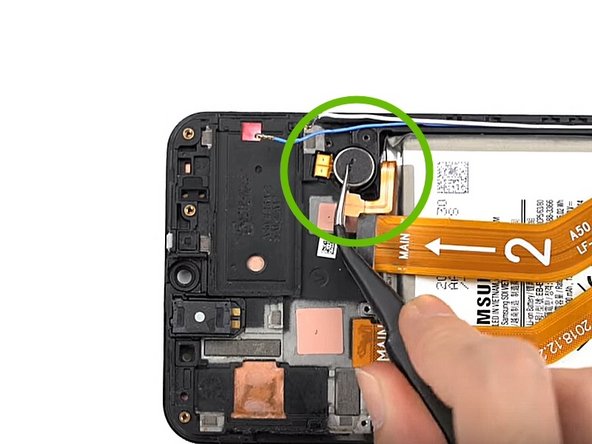
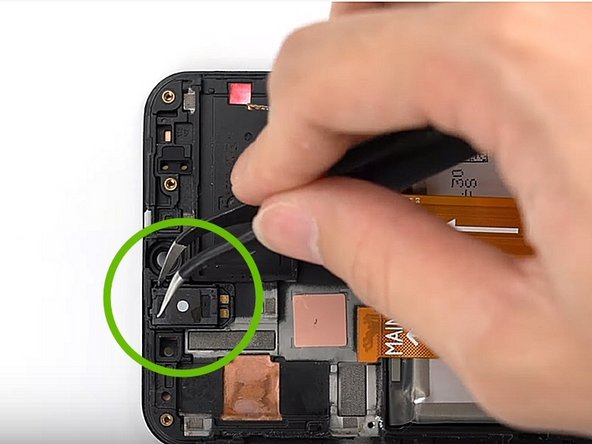
    • Using Tweezers, remove the vibrator

    • Remove the speaker that way as well

    • Remove the two Phillips screws, unplug and remove the fingerprint sensor.

  10. Screen replacement for the Samsung Galaxy A50, Remove the charging board: Schritt 10, Bild 1 von 2 Screen replacement for the Samsung Galaxy A50, Remove the charging board: Schritt 10, Bild 2 von 2
    In diesem Schritt verwendetes Werkzeug:
    Spudger
    $3.99
    Kaufen
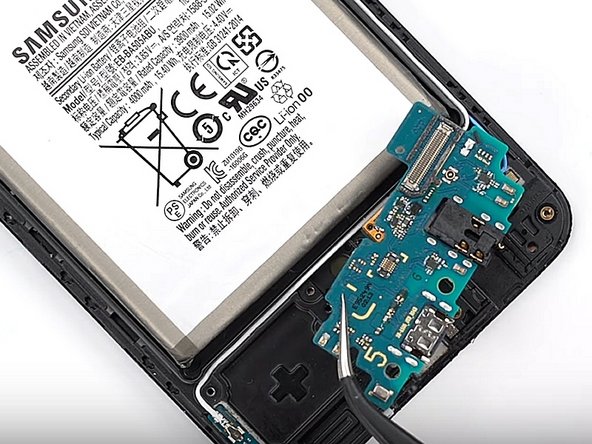
    • Remove the charging board

    • Pull out the coaxial cables

    • Carefully remove the battery with a Spudger

    • Wear Safety Glasses to protect your eyes and be careful not to puncture the battery.

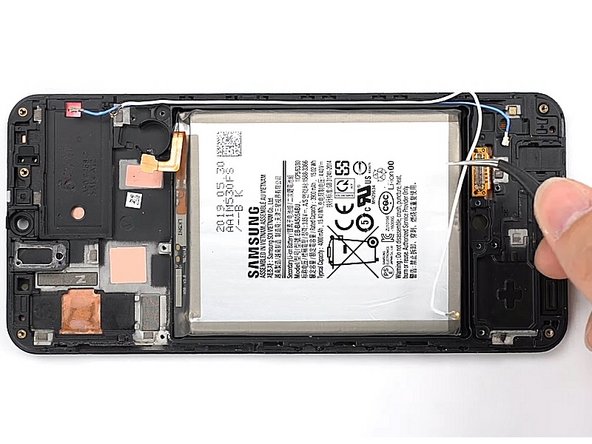
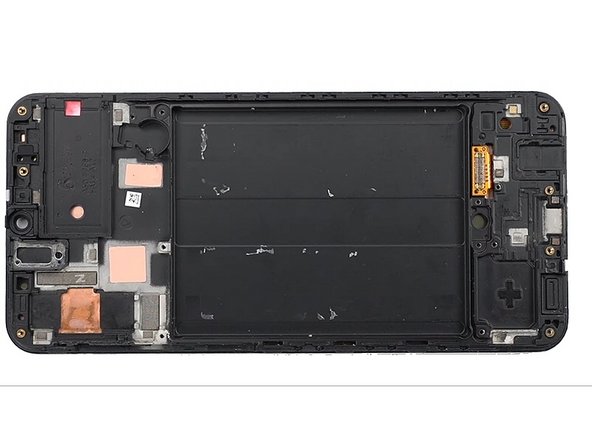
  11. Screen replacement for the Samsung Galaxy A50, All components are removed: Schritt 11, Bild 1 von 1
    • Now you should have removed all the components in the phone (see picture)

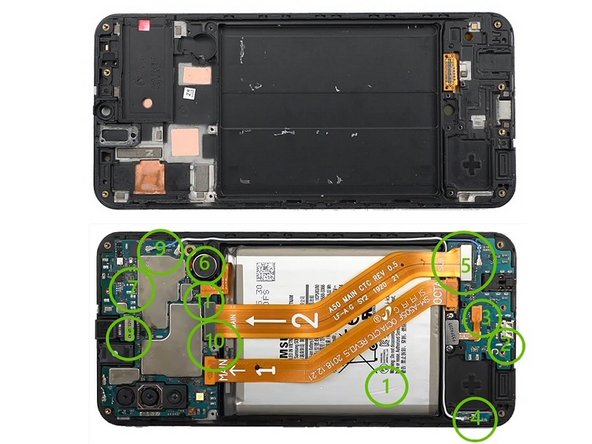
  12. Screen replacement for the Samsung Galaxy A50, Reassemble the phone: Schritt 12, Bild 1 von 1
    • Replace all the components in the new display frame according to the diagram to the right (bottom is fully assembled)

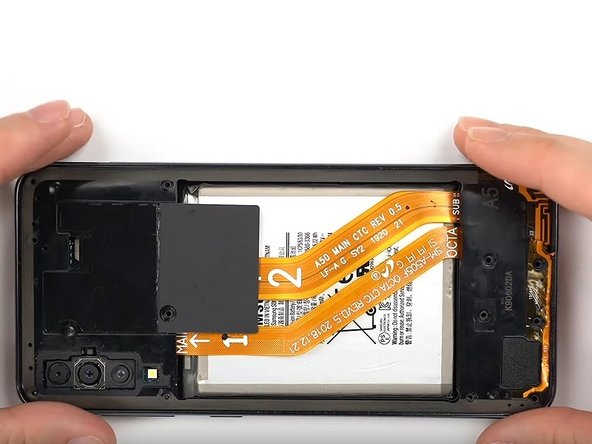
  13. Screen replacement for the Samsung Galaxy A50, Re-attach frame: Schritt 13, Bild 1 von 2 Screen replacement for the Samsung Galaxy A50, Re-attach frame: Schritt 13, Bild 2 von 2
    • Clip the frame back onto the screen

    • Tighten all the screws

  14. Screen replacement for the Samsung Galaxy A50, Re-attach the back glass: Schritt 14, Bild 1 von 1
    • Using a new piece of tape, stick the glass back on

Abschluss

After receiving your new screen, you will need to remove the protective film from it before installing it.

To reassemble your device, follow the steps above in reverse.

Turn on your phone and test your repair before applying the new adhesive and closing the phone.

16 weitere Nutzer:innen haben diese Anleitung absolviert.

Besonderer Dank geht an diese Übersetzer:innen:

fr en

100%

Diese Übersetzer:innen helfen uns, die Welt zu reparieren! Wie kann ich mithelfen?
Hier starten ›

cPix

Mitglied seit: 06/14/16

3.971 Reputation

8 Anleitungen geschrieben

6 Kommentare

Merci, c’est réparé !

Chris Fer - Antwort

il me semble que le backcover du a50 est en plastique, le chauffer trop fort risque de le deformer

Getha Cruz - Antwort

Effectivement une température de 65°C environ pendant 5 minutes suffira pour ramollir le sticker située sous la plaque arrière.

cPix - Antwort

Does anyone know if the A505 screen and frame are the same for all variants?

Kemar K - Antwort

Done, finger print sensor won’t work any more, everything else is.
Teemu Laulajainen - Antwort

Kommentar hinzufügen

Seitenaufrufe:

Letzte 24 Stunden: 0

Letzte 7 Tage: 1

Letzte 30 Tage: 1

Insgesamt: 10,150