Zum Hauptinhalt wechseln

Diese Anleitung enthält neuere Änderungen. Wechsel zur neuesten unüberprüften Version.

Sega CD CD Tray Replacement

Was du brauchst

  1. Sega CD CD Tray Replacement, Sega CD Plastic Housing Removal: Schritt 1, Bild 1 von 2 Sega CD CD Tray Replacement, Sega CD Plastic Housing Removal: Schritt 1, Bild 2 von 2
    • Using a Phillips head screwdriver remove six screws from the bottom of the console.

    • The six screws are marked.

  2. Sega CD CD Tray Replacement: Schritt 2, Bild 1 von 1
    • Remove the two screws that attach the Genesis' connector to the rest of the console.

    • The two screws are marked in the diagram.

  3. Sega CD CD Tray Replacement: Schritt 3, Bild 1 von 1
    • Slide the lock tab to the left to separate the halves of the console.

  4. Sega CD CD Tray Replacement: Schritt 4, Bild 1 von 1
    • Lift from the left side to remove the top of the case.

  5. Sega CD CD Tray Replacement: Schritt 5, Bild 1 von 1
    • Using the spudger, pry the cover off of the Genesis attachment.

  6. Sega CD CD Tray Replacement: Schritt 6, Bild 1 von 1
    • Lift the top of the case to remove the cover.

  7. Sega CD CD Tray Replacement: Schritt 7, Bild 1 von 1
    • Remove the faceplate by pulling it up, then out.

  8. Sega CD CD Tray Replacement, CD Tray: Schritt 8, Bild 1 von 2 Sega CD CD Tray Replacement, CD Tray: Schritt 8, Bild 2 von 2
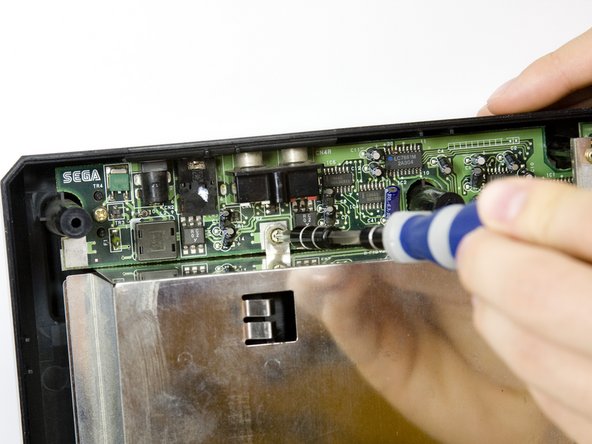
    • Remove metal plate by unscrewing the three screws with the Phillips head screwdriver and then lifting the plate.

    • The three screws are shown on the diagram.

  9. Sega CD CD Tray Replacement: Schritt 9, Bild 1 von 2 Sega CD CD Tray Replacement: Schritt 9, Bild 2 von 2
    • Remove the two screws from the plastic bar.

    • The two screws are shown pictured.

  10. Sega CD CD Tray Replacement: Schritt 10, Bild 1 von 2 Sega CD CD Tray Replacement: Schritt 10, Bild 2 von 2
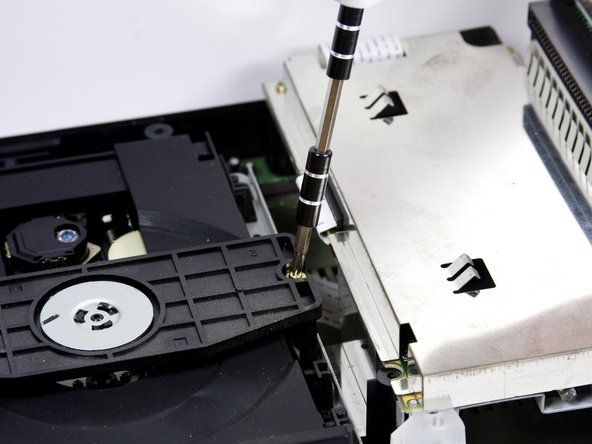
    • To remove the CD tray

    • Remove the four screws with the Phillips head screwdriver.

  11. Sega CD CD Tray Replacement: Schritt 11, Bild 1 von 1
    • Carefully unplug the wire connected to optical reader.

  12. Sega CD CD Tray Replacement: Schritt 12, Bild 1 von 2 Sega CD CD Tray Replacement: Schritt 12, Bild 2 von 2
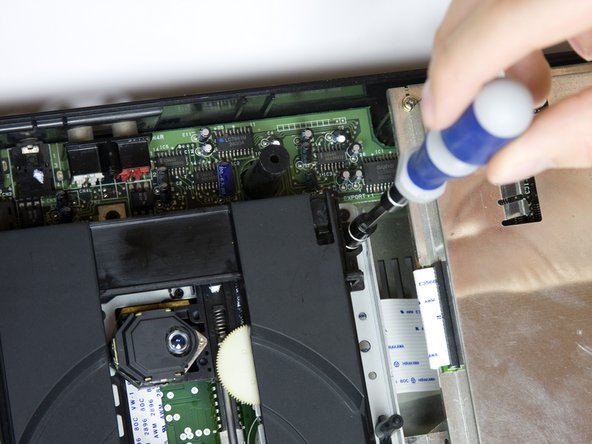
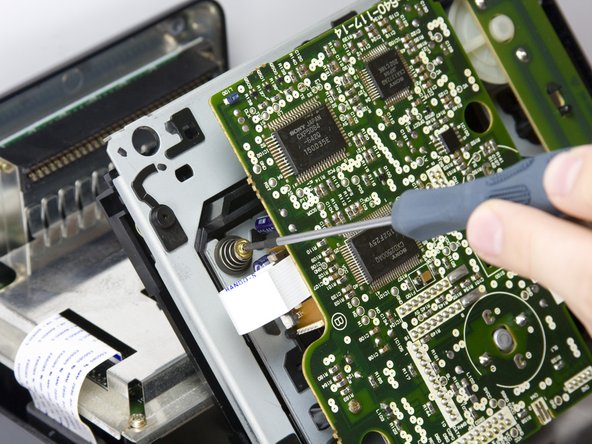
    • Remove the four screws on the underside of the CD tray with a small Phillips head screwdriver.

    • The four screws are highlighted on the diagram.

    • The four springs below the circuit board are attached to the screws, so be careful not to lose them when you remove the screws.

  13. Sega CD CD Tray Replacement: Schritt 13, Bild 1 von 1
    • Carefully remove the CD tray from circuit board.

Abschluss

To reassemble your device, follow these instructions in reverse order.

Ein:e weitere:r Nutzer:in hat diese Anleitung absolviert.

sskyllin

Mitglied seit: 10/18/10

21 Reputation

2 Anleitungen geschrieben

Team

Cal Poly, Team 5-14, Maness Fall 2010 Mitglied von Cal Poly, Team 5-14, Maness Fall 2010

CPSU-MANESS-F10S5G14

4 Mitglieder

12 Anleitungen geschrieben

0 Kommentare

Kommentar hinzufügen

Seitenaufrufe:

Letzte 24 Stunden: 3

Letzte 7 Tage: 9

Letzte 30 Tage: 47

Insgesamt: 9,619