Einleitung
This guide will show you how to replace the motherboard on the Shark IQ AV993. In this guide it is crucial that every step is met with the utmost care and gentleness. The motherboard is the key component to the robot and one little mistake can create more problems. This replacement will require the user to move wires and unplug them from the motherboard. This must be done carefully; make sure the robot is completely off. Again, you will be working with wiring and the electrical components of the robot. This repair may be needed if parts of the robot are not connected properly and functioning in an in proper manner. Your motherboard is the source of the entire functionality of the robot so it must be replaced if other components don't function correctly.
Was du brauchst
-
-
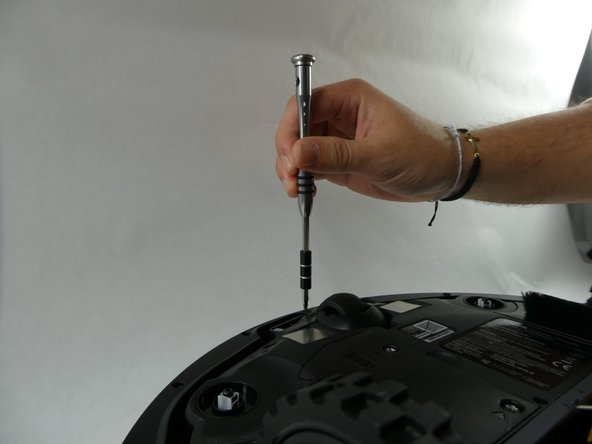
Unscrew the two 14 mm screws on the battery panel using a Phillips #1 screwdriver.
-
-
-
Gently pull the white tabs on the battery straight upward.
-
There is a clip inserted into a plastic housing via wiring. Disconnect the battery by pressing in the clip.
-
Remove the battery from the device.
-
-
-
Remove the five 10 mm screws from the bottom of the device using a T15 Torx screwdriver.
-
-
-
Use both hands to lift the device.
-
The front bumper that is seated on the device will fall off.
-
-
-
Flip over the vacuum so that the bottom is facing upwards.
-
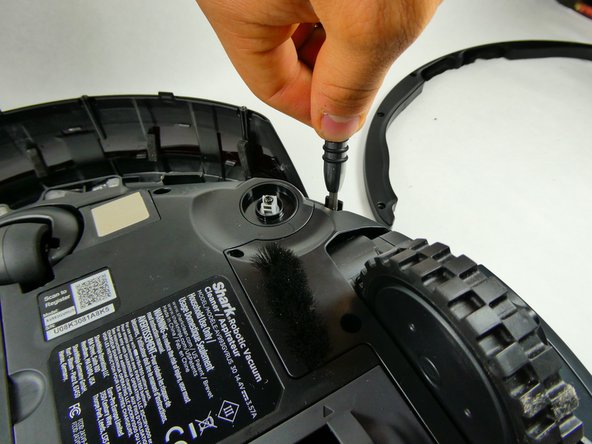
Remove the five 14 mm screws using a T20 Torx screwdriver.
-
-
-
Pull upward on the wheel to remove the wheel housing.
-
Press the tab on the clip and slide the wires out of the housing.
-
-
-
-
Remove the dust bin from the device by pressing down on the release button and pulling out the tray.
-
-
-
Turn the device over so the bottom is facing upwards.
-
Press on the release tabs located on the roller brush cover.
-
Remove the cover from the device.
-
-
-
Remove the five 14 mm screws from the bottom of the device using a T20 Torx screwdriver.
-
-
-
Use your hands to lift the bottom of the vacuum away from the top plastic cover.
-
-
-
Remove the three 10 mm screws using a Phillips #1 screwdriver.
-
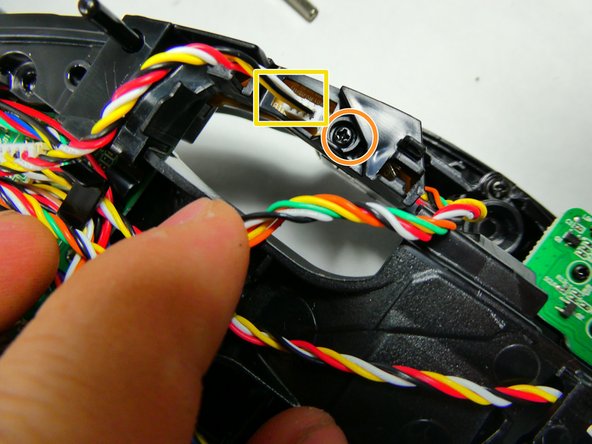
Off to the right and left sides of the robot you will find one clip leading to a smaller independent board. Remove the singular 9 mm screw using a T15 Torx screwdriver to free the edges of the plastic element holding the motherboard down. Repeat this for the other side.
-
Detach the white connector from the plastic housing. Repeat this for the other side.
-
-
-
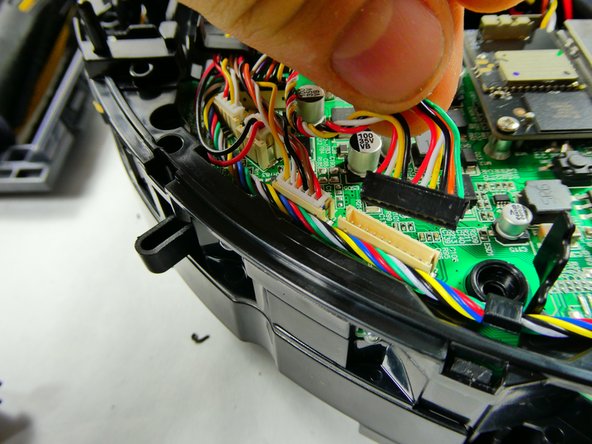
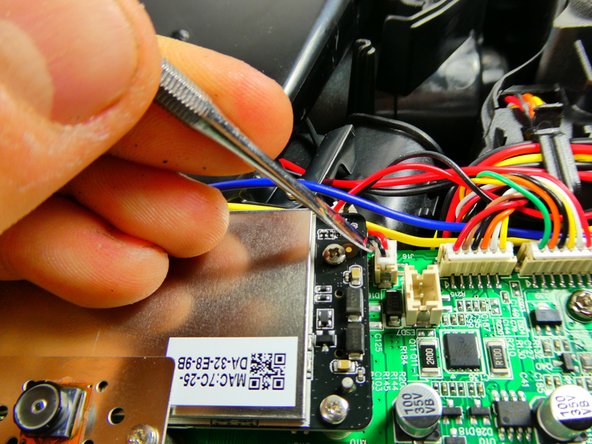
Unplug each of the thirteen connectors from their housings on the motherboard.
-
-
-
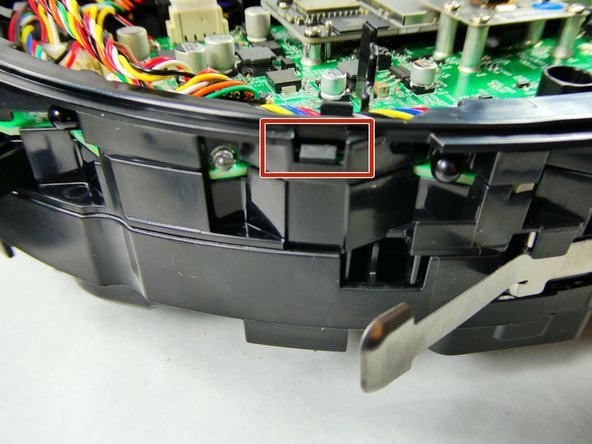
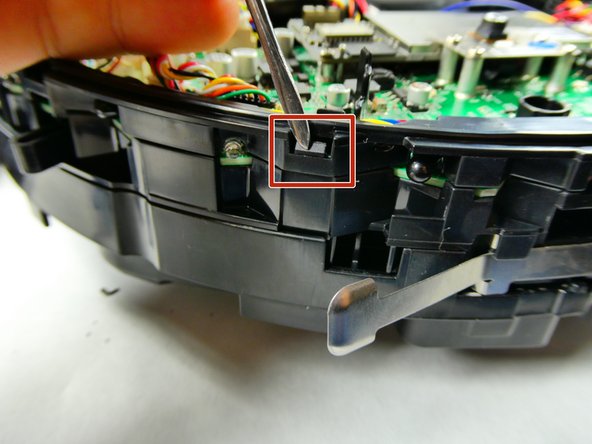
On either side of the bot, there are clips that insert into the upper plastic housing piece that hold the motherboard down. Popping these pieces off will free this covering, allowing the motherboard to be almost free.
-
-
-
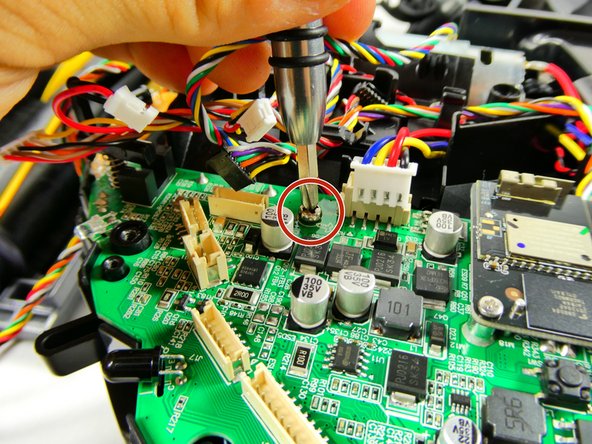
Remove the two 10 mm screws using a Phillips #1 screwdriver, freeing the motherboard from the plastic holdings below the board.
-
-
-
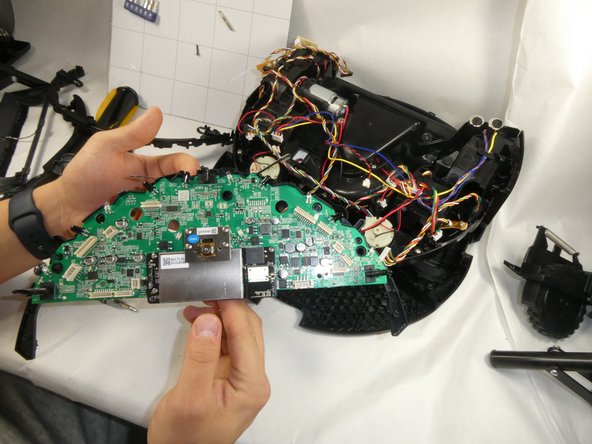
Upon lifting up the motherboard, which will lift straight up, there is a singular clip that connects the rest of the bot. Unclip this, where the clip is large enough to undo with a finger.
-
Once this is removed, the motherboard and the plastic it is clipped to can be removed from the rest of the bot.
-
-
-
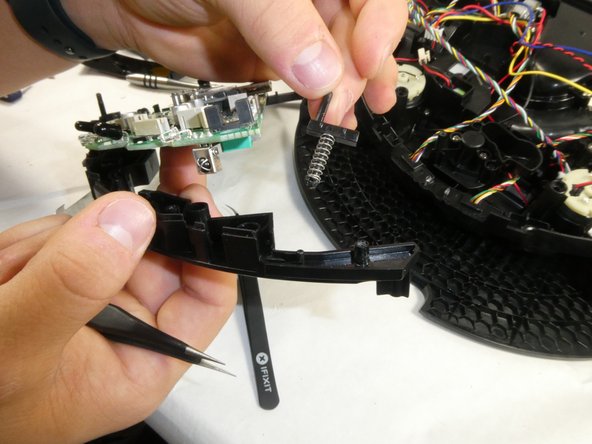
The board is attached to the plastic frame by these spring-loaded clips. Pinch the bottom of these with some tweezers and push the ends through the hole they bore to remove them.
-


To reassemble your device, follow these instructions in reverse order.
To reassemble your device, follow these instructions in reverse order.
Rückgängig: Ich habe diese Anleitung nicht absolviert.
2 weitere Nutzer:innen haben diese Anleitung absolviert.

Team

UMass Dartmouth, Team 3-3, Botvin Fall 2022 Mitglied von UMass Dartmouth, Team 3-3, Botvin Fall 2022
UMASSD-BOTVIN-F22S3G3
3 Mitglieder
6 Anleitungen geschrieben