Diese Version enthält möglicherweise inkorrekte Änderungen. Wechsle zur letzten geprüften Version.
Was du brauchst
-
Dieser Schritt ist noch nicht übersetzt. Hilf mit, ihn zu übersetzen!
-
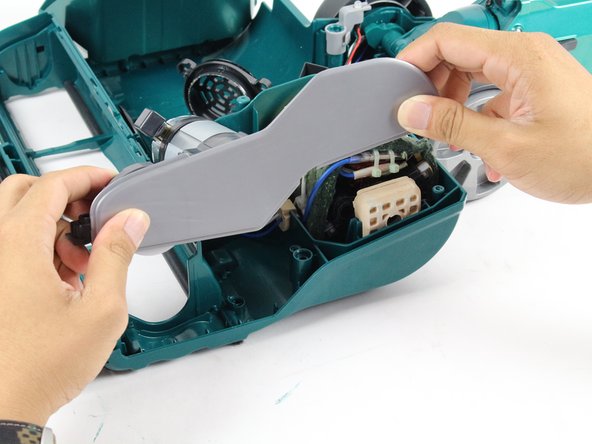
Locate the two tabs with white arrows on them. They are located on either side of the brushroll cover.
-
Slide the tabs away from the center of the vacuum to unlock the brushroll cover.
-
Lift the brushroll cover upward.
-
-
Dieser Schritt ist noch nicht übersetzt. Hilf mit, ihn zu übersetzen!
-
Lift the brushroll out by pulling the tab labeled "pull".
-
-
Dieser Schritt ist noch nicht übersetzt. Hilf mit, ihn zu übersetzen!
-
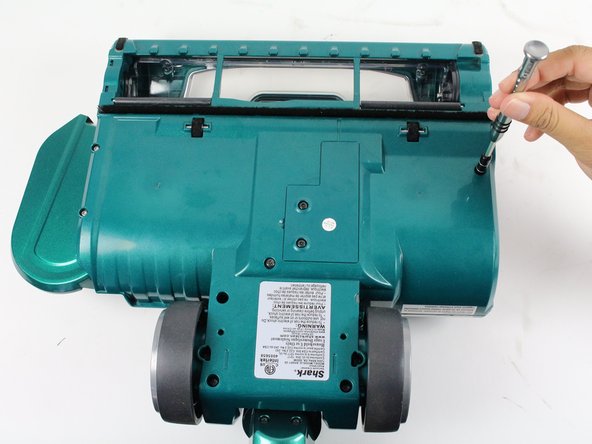
Flip the device over so that the bottom is face up.
-
Remove the eight screws shown by rotating counter-clockwise with a T15 Torx screwdriver.
-
Two 14 mm Torx screws
-
Two 16 mm Torx screws
-
Four 21 mm Torx screws
-
-
Dieser Schritt ist noch nicht übersetzt. Hilf mit, ihn zu übersetzen!
-
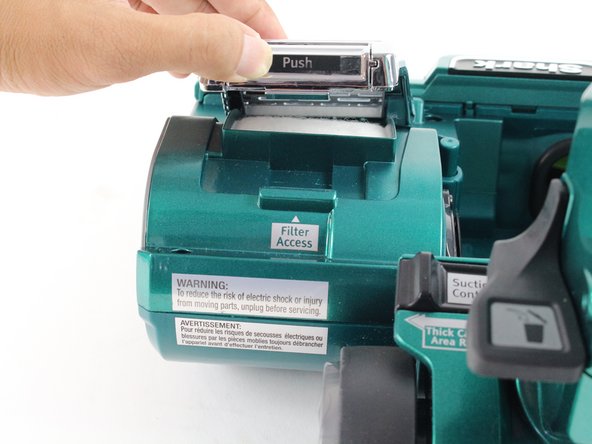
Push inward on the top of the filter grille where it says "Push."
-
Lift the filter grille upward.
-
-
Dieser Schritt ist noch nicht übersetzt. Hilf mit, ihn zu übersetzen!
-
Lift gently and pull the grille up towards you until it releases.
-
-
Dieser Schritt ist noch nicht übersetzt. Hilf mit, ihn zu übersetzen!
-
Remove the four screws by rotating counter-clockwise:
-
One 12 mm screw with a T10 Torx screwdriver
-
Three 14 mm screw with a T15 Torx screwdriver
-
-
Dieser Schritt ist noch nicht übersetzt. Hilf mit, ihn zu übersetzen!
-
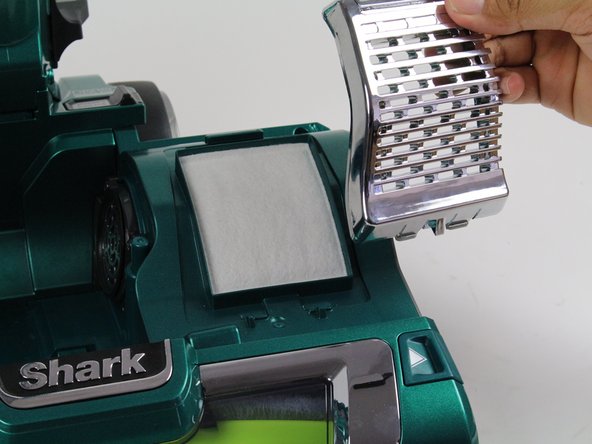
Remove the grey filter plate by simply lifting upward.
-
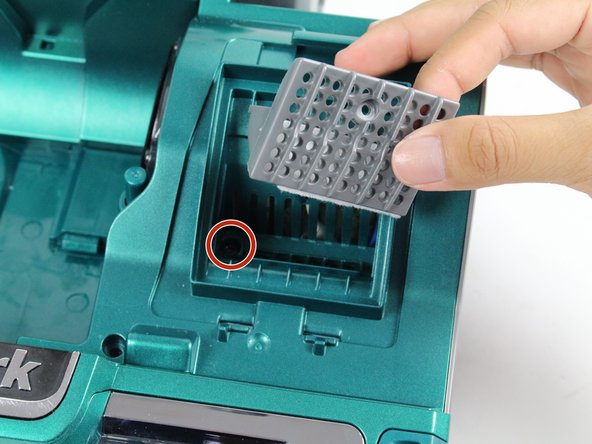
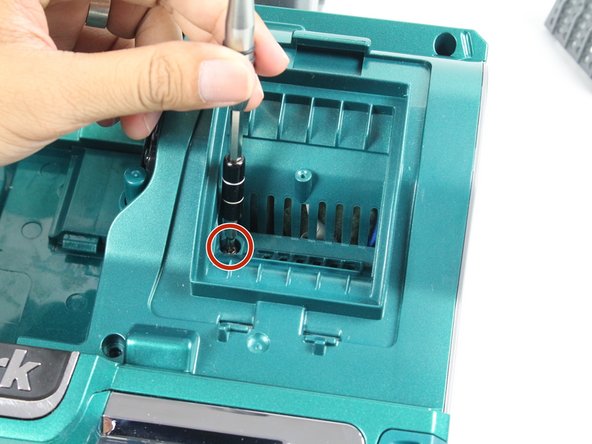
Remove the 14mm screw by rotating counter clockwise with a T10 Torx screwdriver.
-
-
-
Dieser Schritt ist noch nicht übersetzt. Hilf mit, ihn zu übersetzen!
-
Remove three 10mm screws by rotating counter-clockwise with a T15 Torx screwdriver.
-
-
Dieser Schritt ist noch nicht übersetzt. Hilf mit, ihn zu übersetzen!
-
Remove the airpath grille from the side of the motor compartment by pulling out and away from the attached area.
-
-
Dieser Schritt ist noch nicht übersetzt. Hilf mit, ihn zu übersetzen!
-
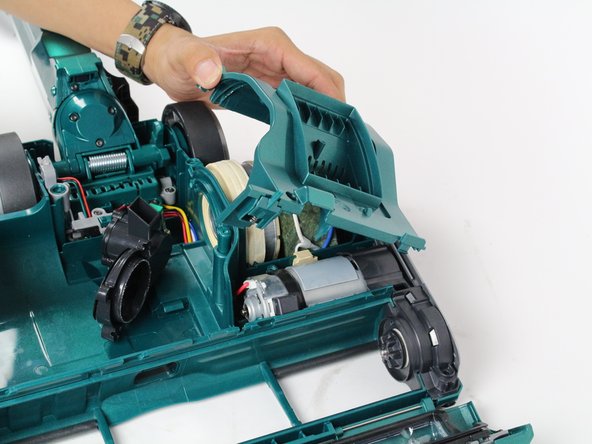
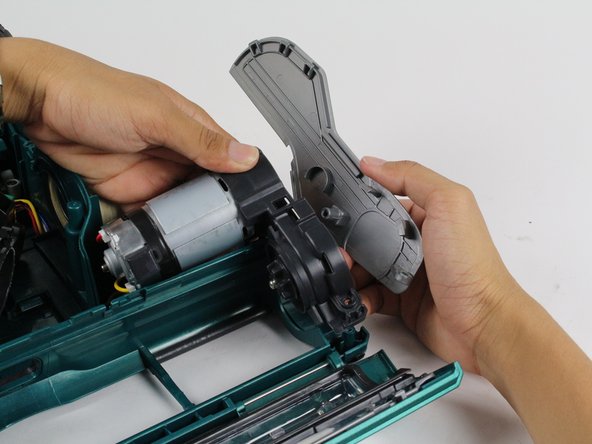
Remove the motor compartment panel by lifting up and away from the device.
-
-
Dieser Schritt ist noch nicht übersetzt. Hilf mit, ihn zu übersetzen!
-
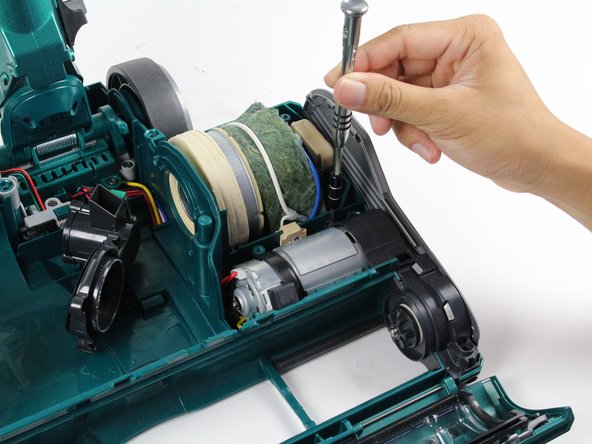
Remove one 14mm screw by rotating counter-clockwise with a T15 Torx screwdriver.
-
-
Dieser Schritt ist noch nicht übersetzt. Hilf mit, ihn zu übersetzen!
-
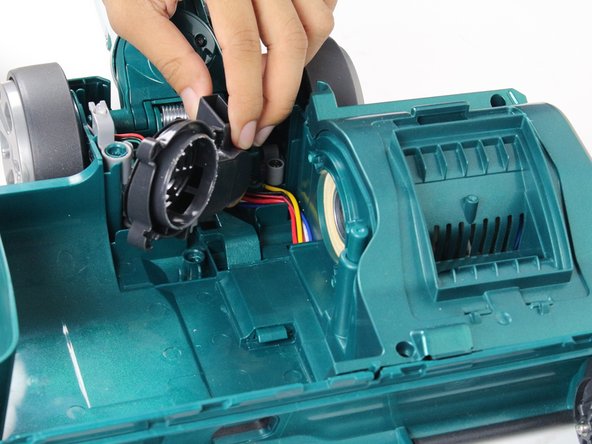
Disconnect the motor side panel by lifting the motor and panel up and out.
-
-
Dieser Schritt ist noch nicht übersetzt. Hilf mit, ihn zu übersetzen!
-
Remove one 9mm screw by rotating counter-clockwise with a Phillips #2 screwdriver.
-
-
Dieser Schritt ist noch nicht übersetzt. Hilf mit, ihn zu übersetzen!
-
Remove the side panel by pulling the panel out and away from the motor.
-
-
Dieser Schritt ist noch nicht übersetzt. Hilf mit, ihn zu übersetzen!
-
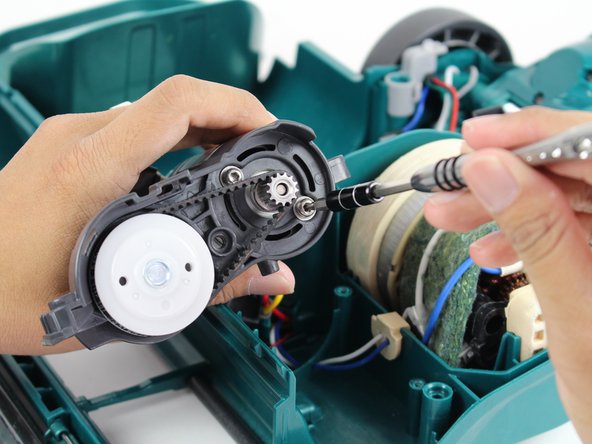
Loosen the two screws by rotating counter clockwise with a T15 Torx screwdriver.
-
-
Dieser Schritt ist noch nicht übersetzt. Hilf mit, ihn zu übersetzen!
-
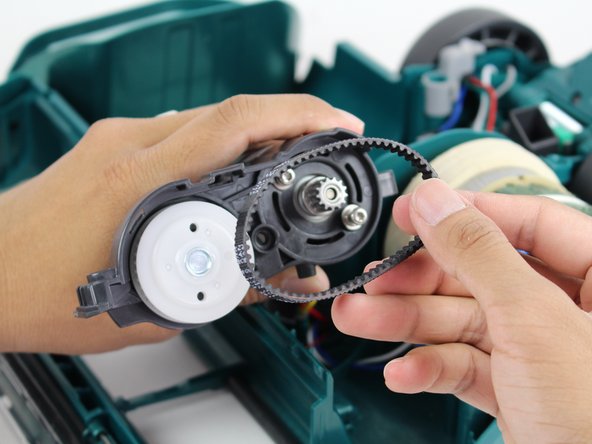
Remove the belt by pulling the belt away from the axle.
-
-
Dieser Schritt ist noch nicht übersetzt. Hilf mit, ihn zu übersetzen!
-
Remove two 16mm screws by rotating counter-clockwise with a T15 Torx screwdriver.
-
-
Dieser Schritt ist noch nicht übersetzt. Hilf mit, ihn zu übersetzen!
-
Remove the belt-assembly unit by pulling the belt-assembly unit away from the motor.
-
-
Dieser Schritt ist noch nicht übersetzt. Hilf mit, ihn zu übersetzen!
-
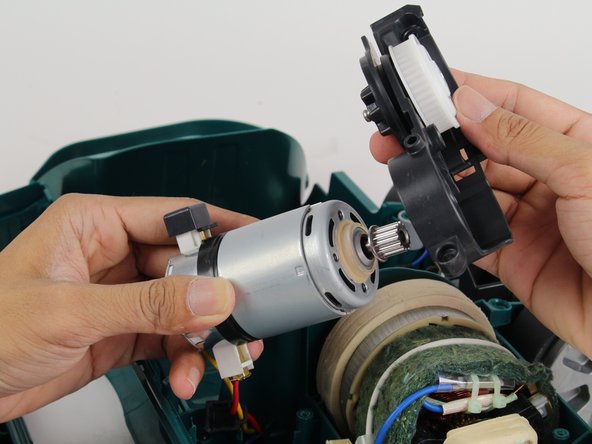
Rotate the motor unit over so that the wires are exposed.
-
Cut wires with cutting pliers to release the motor.
-


Rückgängig: Ich habe diese Anleitung nicht absolviert.
4 weitere Nutzer:innen haben diese Anleitung absolviert.
Team

Cal Poly, Team S19-G3, Livingston Winter 2018 Mitglied von Cal Poly, Team S19-G3, Livingston Winter 2018
CPSU-LIVINGSTON-W18S19G3
4 Mitglieder
18 Anleitungen geschrieben