Zum Hauptinhalt wechseln

Shark Rotator Lift-Away Speed Belt Replacement

Was du brauchst

  1. Shark Rotator Lift-Away Speed Belt Replacement, Brushroll: Schritt 1, Bild 1 von 1
    • Make sure the vacuum is turned off and unplugged before proceeding.

    • Locate the release button at the top of the vacuum pod next to the handle.

    • Use the handle to lift the pod up off of the vacuum nozzle while pressing the release button.

    • Removing the pod is optional, but it may be easier to locate blockages or access the motor and belt if you do so.

  2. Shark Rotator Lift-Away Speed Belt Replacement: Schritt 2, Bild 1 von 2 Shark Rotator Lift-Away Speed Belt Replacement: Schritt 2, Bild 2 von 2
    • Press the Brushroll Access buttons on the top of the nozzle to reveal the brushroll compartment.

  3. Shark Rotator Lift-Away Speed Belt Replacement: Schritt 3, Bild 1 von 2 Shark Rotator Lift-Away Speed Belt Replacement: Schritt 3, Bild 2 von 2
    • Lift the brushroll out by using the pull-tab on the left side.

    • You can test the brushroll once it has been inserted by plugging the vacuum in and running the vacuum in carpet mode. The brushroll indicator light should be a solid green color.

  4. Shark Rotator Lift-Away Speed Belt Replacement, Brushroll Motor: Schritt 4, Bild 1 von 1
    • Remove the five 5mm Torx #9 screws on the front side.

  5. Shark Rotator Lift-Away Speed Belt Replacement: Schritt 5, Bild 1 von 1
    • Remove the six 7.5mm Torx #20 screws on the bottom face of the nozzle.

    • A screwdriver extension may be necessary to reach the screw closest to the center of the nozzle.

  6. Shark Rotator Lift-Away Speed Belt Replacement: Schritt 6, Bild 1 von 1
    • Remove the top panel by lifting the top piece off of the bottom.

    • There will be loud clicking noises.

  7. Shark Rotator Lift-Away Speed Belt Replacement: Schritt 7, Bild 1 von 1
    • If you are trying to remove the belt, you may skip to the next step.

    • Remove the 7.5mm Torx #20 screw in front of the motor.

    • The motor is the gray block on the right side of the floor nozzle (when the nozzle faces towards you).

  8. Shark Rotator Lift-Away Speed Belt Replacement: Schritt 8, Bild 1 von 2 Shark Rotator Lift-Away Speed Belt Replacement: Schritt 8, Bild 2 von 2
    • If you are trying to remove the belt, you may skip to the next step.

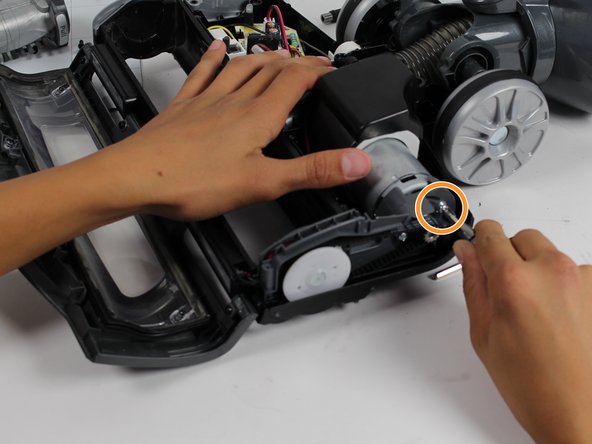
    • Remove the panel to reveal the motor screw.

    • Remove the 7.5mm Torx #20 motor screw.

    • Remove the motor.

  9. Shark Rotator Lift-Away Speed Belt Replacement, Brushroll Belt: Schritt 9, Bild 1 von 1
    • Remove the black belt located on the right face of the vacuum nozzle.

Abschluss

To reassemble your device, follow these instructions in reverse order.

4 weitere Nutzer:innen haben diese Anleitung absolviert.

Samantha Woo

Mitglied seit: 10/02/17

330 Reputation

2 Anleitungen geschrieben

Team

Cal Poly, Team S15-G7, Livingston Fall 2017 Mitglied von Cal Poly, Team S15-G7, Livingston Fall 2017

CPSU-LIVINGSTON-F17S15G7

4 Mitglieder

10 Anleitungen geschrieben

Ein Kommentar

where can I purchase the wheel shown in the photo above??

Kay Sherbeck - Antwort

Kommentar hinzufügen

Seitenaufrufe:

Letzte 24 Stunden: 6

Letzte 7 Tage: 30

Letzte 30 Tage: 240

Insgesamt: 8,952