Einleitung
You'll be replacing the keyboard component of the Sharp PC - MM20!
Was du brauchst
-
-
First, remove the battery from your laptop and make sure it is powered down.
-
-
-
Close your laptop
-
Turn your laptop so that the back of it is facing you.
-
You should notice three screw. Remove those screws using the proper screw driver.
-
Be sure to put them somewhere safe, like a magnetic pad for instance.
-
-
-
Now, we're going to flip the laptop so it is upside down.
-
Remove the screws shown in the picture as well.
-
-
-
-
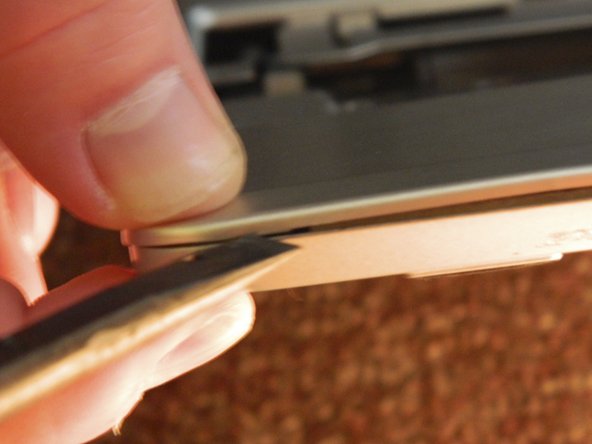
Next, open the laptop and focus on the front of the base of the laptop.
-
Notice that there are small notches in between the two plates of the laptop
-
Take a flat edge and wedge it into the slot, and pop it open. There should be several of these slots on the front side of the laptop.
-
-
-
Once the cover is loose, you should be able to wiggle it somewhat freely. However, there are a few connections holding it together.
-
Next, we're going to use tweezers to delicately remove the flat cable connecting the key board to the laptop.
-
Also, remove the flat cable from the track pad to the laptop.
-
-
-
Now that all connections are undone, you should be able to easily remove the top of the base from the rest of the computer.
-
-
-
Next, you can take the key board out of its housing, and replace it with your new key board!
-


To reassemble your device, follow these instructions in reverse order.
To reassemble your device, follow these instructions in reverse order.
Rückgängig: Ich habe diese Anleitung nicht absolviert.
Eine weitere Person hat diese Anleitung absolviert.
Team

Oakland University, Team 1-1, Ruszkiewicz Fall 2012 Mitglied von Oakland University, Team 1-1, Ruszkiewicz Fall 2012
OAK-RUSZKIEWICZ-F12S1G1
1 Mitglied
2 Anleitungen geschrieben