Zum Hauptinhalt wechseln

Slingbox 500 Capacitor Replacement

Was du brauchst

  1. Slingbox 500 Capacitor Replacement, Top Cover: Schritt 1, Bild 1 von 1
    • Remove the sticker on the back of the Slingbox that covers the rear screws using a spudger.

  2. Slingbox 500 Capacitor Replacement: Schritt 2, Bild 1 von 2 Slingbox 500 Capacitor Replacement: Schritt 2, Bild 2 von 2
    • Remove the seven 7.9 mm rear screws from the device using a Phillips #1 screwdriver.

    • Flip your Slingbox so the bottom is facing upwards.

    • Remove the four 7.9 mm screws using a Phillips #1 screwdriver.

    • You may have rubber feet on the bottom of your Slingbox. If you do, just gently remove them with your hands and set them aside to put back on later.

  3. Slingbox 500 Capacitor Replacement: Schritt 3, Bild 1 von 3 Slingbox 500 Capacitor Replacement: Schritt 3, Bild 2 von 3 Slingbox 500 Capacitor Replacement: Schritt 3, Bild 3 von 3
    • Remove the upper section of the case by rotating your Slingbox to view the back and lifting up on the higher corner.

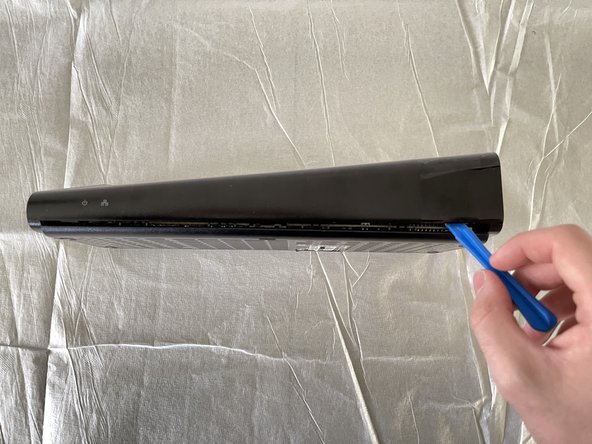
    • Use the opening tool to disconnect the small clips in the front.

    • These may require some minor force to disconnect.

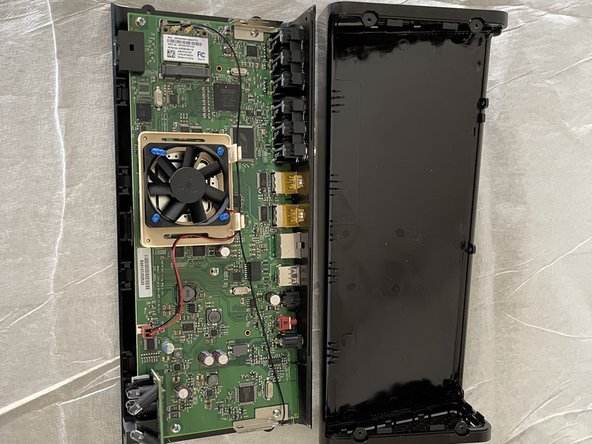
    • Remove the entire top of the Slingbox and set it aside.

  4. Slingbox 500 Capacitor Replacement, Motherboard: Schritt 4, Bild 1 von 2 Slingbox 500 Capacitor Replacement, Motherboard: Schritt 4, Bild 2 von 2
    • Remove five 9.5 mm screws from the motherboard using a Phillips #1 screwdriver.

    • Push down firmly on the screws as to not strip them when removing them as they may not spin easily at first.

    • After removing the screws the two metal tabs on either side will be free. Make sure to not bend them or accidentally damage the wires while doing further dissasembly.

  5. Slingbox 500 Capacitor Replacement: Schritt 5, Bild 1 von 1
    • Remove the motherboard from the lower case.

  6. Slingbox 500 Capacitor Replacement, Capacitor: Schritt 6, Bild 1 von 3 Slingbox 500 Capacitor Replacement, Capacitor: Schritt 6, Bild 2 von 3 Slingbox 500 Capacitor Replacement, Capacitor: Schritt 6, Bild 3 von 3
    • Check for any damage to or around the capacitor. This can either be burn marks or darkening of the board. The caps of the capacitor may be bulged or even popped. Make sure to check both sides of the board for any damage.

    • If you do find damage, make sure to wash your hands before continuing as some chemicals and components can cause irritation to eyes and skin.

    • Inspect the soldered ends of the capacitors for shorts or accidental soldering bridges. There may also be burns here if a short has occurred.

  7. Slingbox 500 Capacitor Replacement: Schritt 7, Bild 1 von 2 Slingbox 500 Capacitor Replacement: Schritt 7, Bild 2 von 2
    • Make sure to preheat your soldering iron fully before continuing as a not properly heated iron my cause more damage to the board and connections.

    • Once your iron is fully heated you can press it to the connections on the bottom of the motherboard to melt the existing solder. A solid press for around 2-3 seconds should fully melt the solder.

    • It is not recommended to touch the board or capacitor with your hands as it will likely be very hot after being heated.

    • Once the solder on the bottom is fully melted, you may try and remove the capacitor from the top of the board. You may have to heat it more than once to fully remove the damaged capacitor, but this will not harm the board in any way.

Abschluss

To reassemble your device, follow these instructions in reverse order.

David Sullivan

Mitglied seit: 10/18/21

365 Reputation

3 Anleitungen geschrieben

Team

UMass Dartmouth, Team 1-3, Simcock Fall 2021 Mitglied von UMass Dartmouth, Team 1-3, Simcock Fall 2021

UMASSD-SIMCOCK-F21S1G3

4 Mitglieder

3 Anleitungen geschrieben

0 Kommentare

Kommentar hinzufügen

Seitenaufrufe:

Letzte 24 Stunden: 0

Letzte 7 Tage: 1

Letzte 30 Tage: 1

Insgesamt: 141