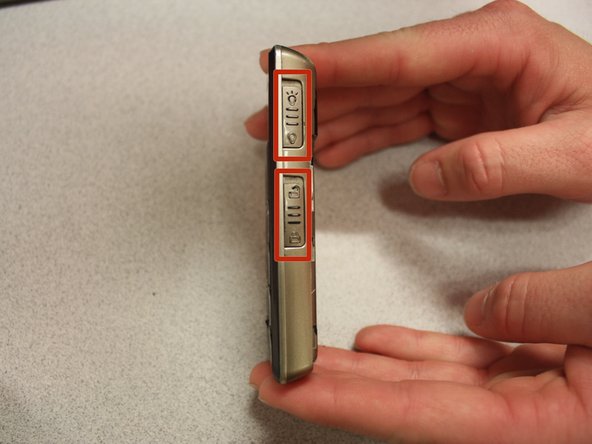
Zum Hauptinhalt wechseln

Snapfon ez One Volume and Unlock switch replacement

Was du brauchst

  1. Snapfon ez One Volume and Unlock switch replacement, Remove the battery cover: Schritt 1, Bild 1 von 1
    • Turn off the phone to prevent data loss.

    • Press and slide the battery out to remove it.

    • Picture rights belong to Snapfon®. Picture is used for educational purposes only. No copyright infringement intended.

  2. Snapfon ez One Volume and Unlock switch replacement, Remove the battery: Schritt 2, Bild 1 von 1
    • Pry the battery out with your thumb or the iFixit opening tool.

    • Make sure to properly dispose of the old battery at a recycling center.

    • Picture rights belong to Snapfon®. Picture is used for educational purposes only. No copyright infringement intended.

  3. Snapfon ez One Volume and Unlock switch replacement, Removing the plastic inserts: Schritt 3, Bild 1 von 2 Snapfon ez One Volume and Unlock switch replacement, Removing the plastic inserts: Schritt 3, Bild 2 von 2
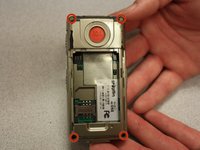
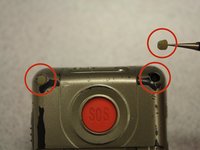
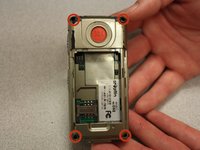
    • Remove the four rubber inserts from the screw holes using a pair of tweezers.

  4. Snapfon ez One Volume and Unlock switch replacement, Remove the shield screws: Schritt 4, Bild 1 von 3 Snapfon ez One Volume and Unlock switch replacement, Remove the shield screws: Schritt 4, Bild 2 von 3 Snapfon ez One Volume and Unlock switch replacement, Remove the shield screws: Schritt 4, Bild 3 von 3
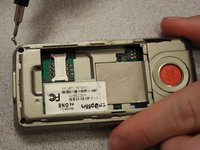
    • Remove the four 3.1mm screws in the corners with a Phillips #00 screwdriver.

  5. Snapfon ez One Volume and Unlock switch replacement, Separate the case: Schritt 5, Bild 1 von 3 Snapfon ez One Volume and Unlock switch replacement, Separate the case: Schritt 5, Bild 2 von 3 Snapfon ez One Volume and Unlock switch replacement, Separate the case: Schritt 5, Bild 3 von 3
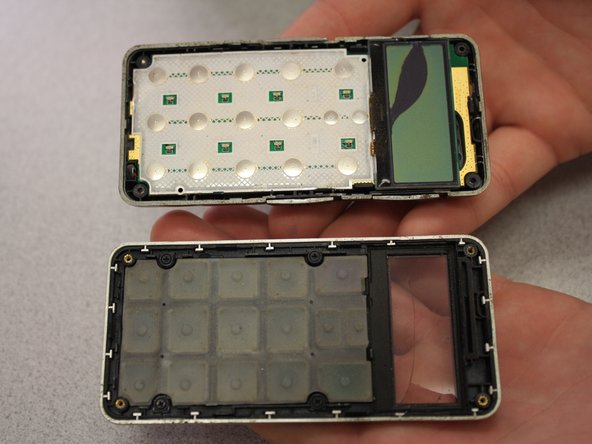
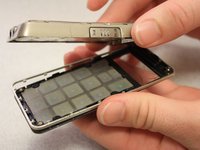
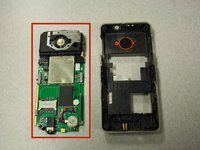
    • Separate the front case from the back case.

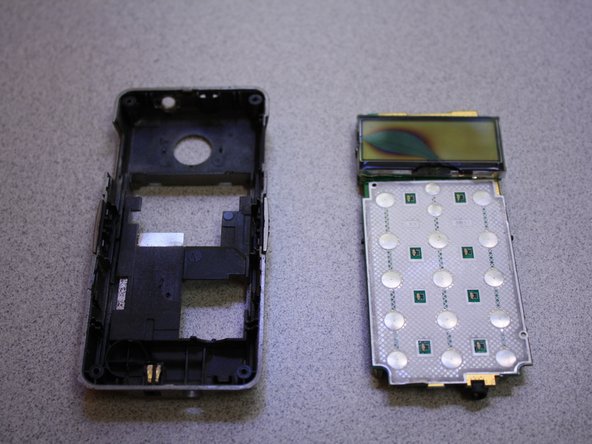
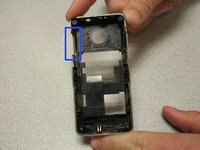
    • Remove the metal bumper from the front case’s perimeter.

  6. Snapfon ez One Volume and Unlock switch replacement, Remove the volume slider: Schritt 6, Bild 1 von 1
    • Pry the volume slider button out with tweezers.

    • The volume slider button may fall out during the separation of the front and back cases. This is OK.

  7. Snapfon ez One Volume and Unlock switch replacement, Remove the motherboard: Schritt 7, Bild 1 von 3 Snapfon ez One Volume and Unlock switch replacement, Remove the motherboard: Schritt 7, Bild 2 von 3 Snapfon ez One Volume and Unlock switch replacement, Remove the motherboard: Schritt 7, Bild 3 von 3
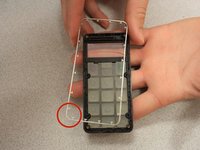
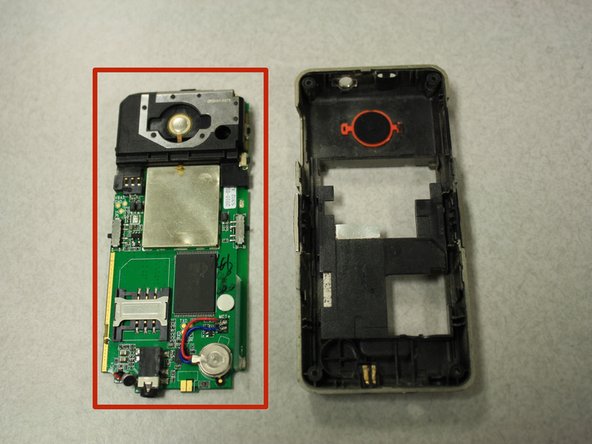
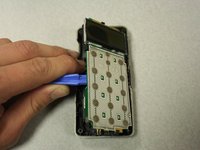
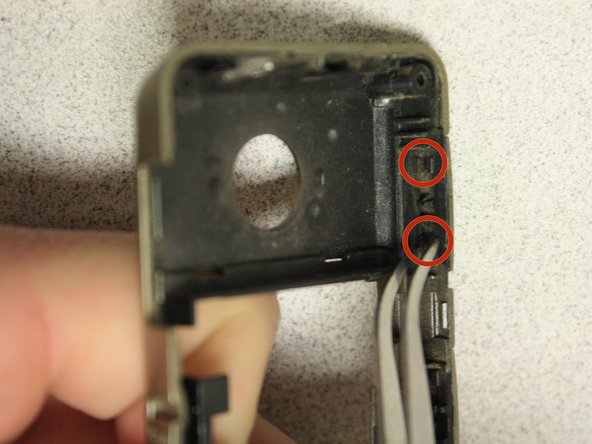
    • Separate the circuit board from the inside of the back case by prying between them with the opening tool.

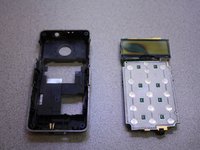
    • The last picture is a view of the back of the circuit board.

  8. Snapfon ez One Volume and Unlock switch replacement, Volume and Unlock switch: Schritt 8, Bild 1 von 2 Snapfon ez One Volume and Unlock switch replacement, Volume and Unlock switch: Schritt 8, Bild 2 von 2
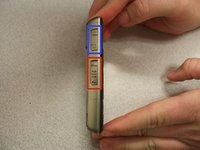
    • All three of these switches (shown in the red boxes in these two pictures) are removed the same way. So this guide will show the removal and repair of only one switch.

    • The button (shown in blue) should already be removed from the disassembly of the circuit board portion of this guide.

  9. Snapfon ez One Volume and Unlock switch replacement: Schritt 9, Bild 1 von 3 Snapfon ez One Volume and Unlock switch replacement: Schritt 9, Bild 2 von 3 Snapfon ez One Volume and Unlock switch replacement: Schritt 9, Bild 3 von 3
    • Use tweezers to pull the volume button out of the track.

    • Pinch the two sets of clamps together and push outwards (away from the phone) in order to remove the flashlight switch (or either of the other two switches).

  10. Snapfon ez One Volume and Unlock switch replacement: Schritt 10, Bild 1 von 3 Snapfon ez One Volume and Unlock switch replacement: Schritt 10, Bild 2 von 3 Snapfon ez One Volume and Unlock switch replacement: Schritt 10, Bild 3 von 3
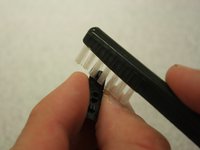
    • To remove stickiness or dirt, clean the switch with rubbing alcohol and a brush.

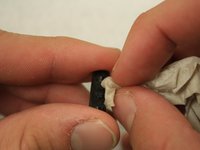
    • Let dry before putting the switch back on the phone.

    • Clean the port with a towel soaked in rubbing alcohol.

    • Finally, let both the port and switch dry before reassembling.

Abschluss

To reassemble your device, follow these instructions in reverse order.

John Bender

Mitglied seit: 03/26/14

818 Reputation

8 Anleitungen geschrieben

Team

Clemson, Team 6-5, Benson Spring 2014 Mitglied von Clemson, Team 6-5, Benson Spring 2014

CLEM-BENSON-S14S6G5

3 Mitglieder

16 Anleitungen geschrieben

0 Kommentare

Kommentar hinzufügen

Seitenaufrufe:

Letzte 24 Stunden: 0

Letzte 7 Tage: 0

Letzte 30 Tage: 4

Insgesamt: 736