Zum Hauptinhalt wechseln

SodaStream Source Microchip Replacement

Was du brauchst

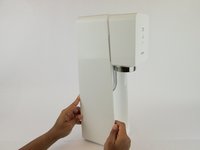
  1. SodaStream Source Microchip Replacement, SodaStream Source External Disassembly: Schritt 1, Bild 1 von 3 SodaStream Source Microchip Replacement, SodaStream Source External Disassembly: Schritt 1, Bild 2 von 3 SodaStream Source Microchip Replacement, SodaStream Source External Disassembly: Schritt 1, Bild 3 von 3
    • Remove the soda bottle and the CO₂ canister from the machine.

  2. SodaStream Source Microchip Replacement: Schritt 2, Bild 1 von 2 SodaStream Source Microchip Replacement: Schritt 2, Bild 2 von 2
    In diesem Schritt verwendetes Werkzeug:
    Phillips #1 Screwdriver
    $8.99
    Kaufen
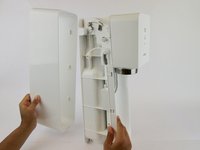
  3. SodaStream Source Microchip Replacement: Schritt 3, Bild 1 von 2 SodaStream Source Microchip Replacement: Schritt 3, Bild 2 von 2
    • Pull the outer cover away from the front of the device.

  4. SodaStream Source Microchip Replacement: Schritt 4, Bild 1 von 1
    In diesem Schritt verwendetes Werkzeug:
    Phillips #1 Screwdriver
    $8.99
    Kaufen
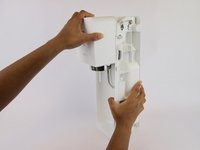
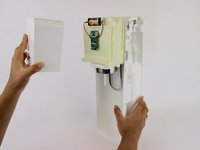
  5. SodaStream Source Microchip Replacement: Schritt 5, Bild 1 von 2 SodaStream Source Microchip Replacement: Schritt 5, Bild 2 von 2
    In diesem Schritt verwendetes Werkzeug:
    Jimmy
    $7.95
    Kaufen
    • Firmly pull the front cover off.

    • This piece is difficult to remove and requires force. It may help to use a wide, thin object to pry it off (like a Jimmy).

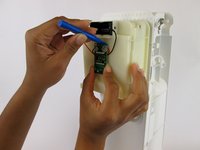
  6. SodaStream Source Microchip Replacement, Microchip: Schritt 6, Bild 1 von 1
    • Remove the 9.1 mm screw from the microchip.

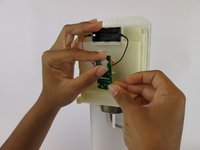
  7. SodaStream Source Microchip Replacement: Schritt 7, Bild 1 von 3 SodaStream Source Microchip Replacement: Schritt 7, Bild 2 von 3 SodaStream Source Microchip Replacement: Schritt 7, Bild 3 von 3
    • Wedge the plastic spudger between the microchip and the glue dot until the glue pops off.

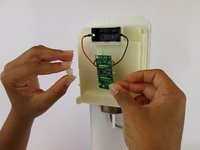
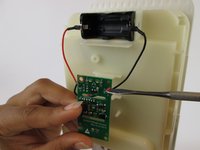
  8. SodaStream Source Microchip Replacement: Schritt 8, Bild 1 von 3 SodaStream Source Microchip Replacement: Schritt 8, Bild 2 von 3 SodaStream Source Microchip Replacement: Schritt 8, Bild 3 von 3
    In diesem Schritt verwendetes Werkzeug:
    Spudger
    $2.99
    Kaufen
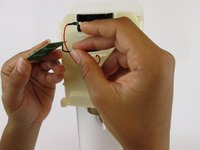
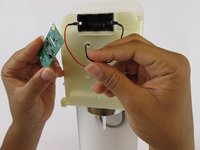
    • Use the spudger to lift the edge of the wire and pull the wire out of the microchip.

    • Use an ESD tool such as a nylon spudger when working with potentially dangerous electronics.

    • While reconnecting the wires, you will need a hot glue gun to reattach the wire ends to the new chip.

Abschluss

To reassemble your device, follow these instructions in reverse order.

Ein:e weitere:r Nutzer:in hat diese Anleitung absolviert.

Team

USF Tampa, Team S1-G4, Leahy Spring 2017 Mitglied von USF Tampa, Team S1-G4, Leahy Spring 2017

USFT-LEAHY-S17S1G4

3 Mitglieder

40 Anleitungen geschrieben

3 Kommentare

Great information, but is there someone out there offering this repair as a service, I’m not motivated enough to do this myself and happy to pay someone to do it for me

matteo barnett - Antwort

Where can you buy the microchip please?

Jill - Antwort

Where can you purchase a replacement microchip from?

David Grosz - Antwort

Kommentar hinzufügen

Seitenaufrufe:

Letzte 24 Stunden: 3

Letzte 7 Tage: 9

Letzte 30 Tage: 40

Insgesamt: 4,030