Einleitung
This guide will teach you how to replace the Bluetooth button on the Sol Republic Deck.
Was du brauchst
-
-
With plastic spudger wedge in between the top and bottom casings to force sepearation . Exposing the inside components of the Republic Deck.
-
-
-
Use the screwdriver to unscrew two 3.6mm Phillips #0 screws securing the plastic plate.
-
-
-
-
Plug in de-soldering kit and wait 3 minutes for the solder to heat up.
-
Use the tip of your soldering iron to heat the old solder unit and apply until it melts.
-
Remove speaker wires connecting the speaker to the circuit board.
-
-
-
Unscrew fifteen 6.2mm Phillips #0 screws and lift the black plastic plate from the case.
-
-
-
Remove the three 3.6mm Phillips #0 screws.
-
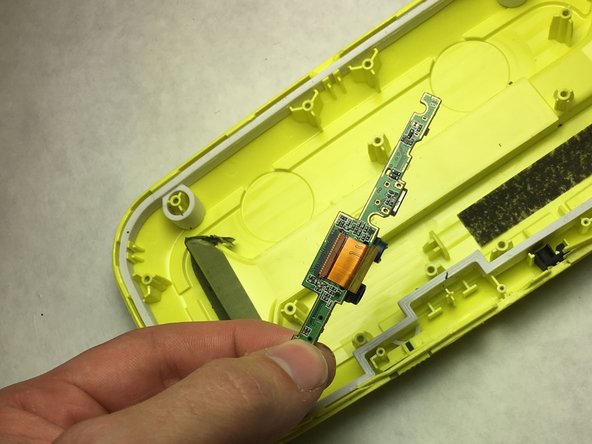
Remove the circuit board containing the BlueTooth button.
-


To reassemble your device, follow these instructions in reverse order.
To reassemble your device, follow these instructions in reverse order.
Rückgängig: Ich habe diese Anleitung nicht absolviert.
Eine weitere Person hat diese Anleitung absolviert.
Team

IUPUI, Team S3-G1, Baechle Spring 2017 Mitglied von IUPUI, Team S3-G1, Baechle Spring 2017
IUPUI-BAECHLE-S17S3G1
3 Mitglieder
3 Anleitungen geschrieben