Zum Hauptinhalt wechseln

Sonos One Power Adapter Replacement

Was du brauchst

  1. Sonos One Power Adapter Replacement, Protective Cover: Schritt 1, Bild 1 von 3 Sonos One Power Adapter Replacement, Protective Cover: Schritt 1, Bild 2 von 3 Sonos One Power Adapter Replacement, Protective Cover: Schritt 1, Bild 3 von 3
    • Disconnect all power cords.

    • Remove the rubber foot and plastic screw guard on the bottom of the device using a plastic opening tool.

    • Note: the rubber foot and plastic screw guard can be removed as one piece to make reassembly easier

  2. Sonos One Power Adapter Replacement: Schritt 2, Bild 1 von 3 Sonos One Power Adapter Replacement: Schritt 2, Bild 2 von 3 Sonos One Power Adapter Replacement: Schritt 2, Bild 3 von 3
    • Remove the four 10mm Torx T10 screws from the bottom of the speaker.

  3. Sonos One Power Adapter Replacement: Schritt 3, Bild 1 von 2 Sonos One Power Adapter Replacement: Schritt 3, Bild 2 von 2
    • Remove the bottom cover by squeezing the protective cover slightly while pushing up with your fingers.

  4. Sonos One Power Adapter Replacement: Schritt 4, Bild 1 von 3 Sonos One Power Adapter Replacement: Schritt 4, Bild 2 von 3 Sonos One Power Adapter Replacement: Schritt 4, Bild 3 von 3
    • The protective cover clip is very thin and deforms easily.

    • Remove the single 8mm Torx T10 screw and protective cover clip.

  5. Sonos One Power Adapter Replacement: Schritt 5, Bild 1 von 2 Sonos One Power Adapter Replacement: Schritt 5, Bild 2 von 2
    • Slide the protective cover upwards to remove.

  6. Sonos One Power Adapter Replacement, Control Panel & Microphone: Schritt 6, Bild 1 von 3 Sonos One Power Adapter Replacement, Control Panel & Microphone: Schritt 6, Bild 2 von 3 Sonos One Power Adapter Replacement, Control Panel & Microphone: Schritt 6, Bild 3 von 3
    • Use the pointed end of a spudger to remove the covers that hide the screws.

    • Remove the four 9mm Torx T8 screws from around the perimeter of the control panel.

  7. Sonos One Power Adapter Replacement: Schritt 7, Bild 1 von 2 Sonos One Power Adapter Replacement: Schritt 7, Bild 2 von 2
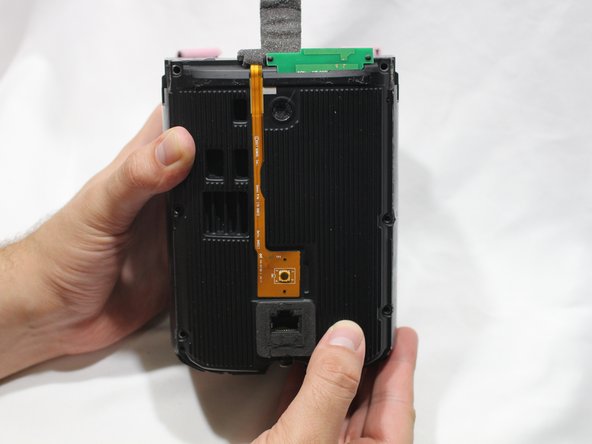
    • With the front of the unit facing you, lift the control panel up using your thumbs.

    • There's a ribbon cable attaching the control panel to the speaker so work slowly.

  8. Sonos One Power Adapter Replacement: Schritt 8, Bild 1 von 3 Sonos One Power Adapter Replacement: Schritt 8, Bild 2 von 3 Sonos One Power Adapter Replacement: Schritt 8, Bild 3 von 3
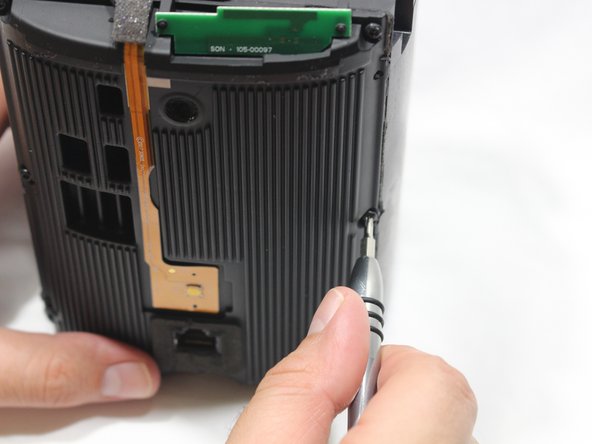
    • Use a spudger to flip up the retaining flap on the control panel ribbon cable ZIF socket.

    • Pull the control panel ribbon cable out of its socket.

  9. Sonos One Power Adapter Replacement: Schritt 9, Bild 1 von 2 Sonos One Power Adapter Replacement: Schritt 9, Bild 2 von 2
    • Pull the control panel away from the speaker to separate.

  10. Sonos One Power Adapter Replacement, Power Adapter Receptacle: Schritt 10, Bild 1 von 3 Sonos One Power Adapter Replacement, Power Adapter Receptacle: Schritt 10, Bild 2 von 3 Sonos One Power Adapter Replacement, Power Adapter Receptacle: Schritt 10, Bild 3 von 3
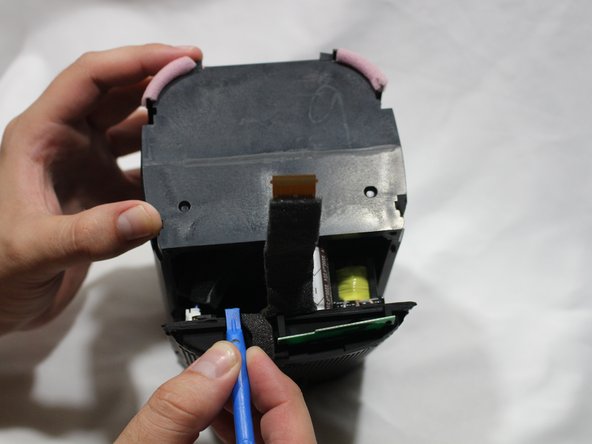
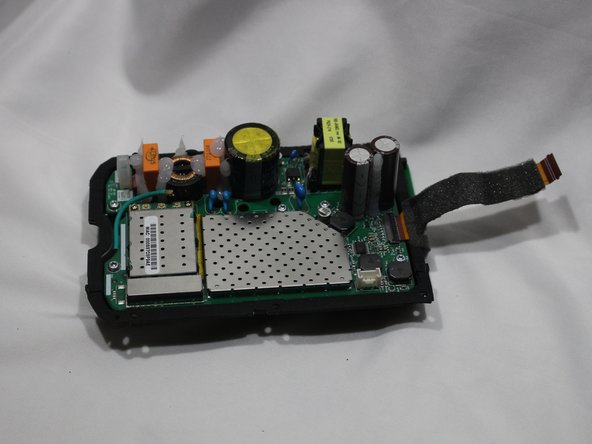
    • Remove the six 9mm Torx T8 screws from the motherboard panel.

  11. Sonos One Power Adapter Replacement: Schritt 11, Bild 1 von 2 Sonos One Power Adapter Replacement: Schritt 11, Bild 2 von 2
    • Using a plastic opening tool, separate the motherboard from the speaker.

  12. Sonos One Power Adapter Replacement: Schritt 12, Bild 1 von 3 Sonos One Power Adapter Replacement: Schritt 12, Bild 2 von 3 Sonos One Power Adapter Replacement: Schritt 12, Bild 3 von 3
    • Using your thumb, disconnect the speaker cable from the motherboard.

  13. Sonos One Power Adapter Replacement: Schritt 13, Bild 1 von 3 Sonos One Power Adapter Replacement: Schritt 13, Bild 2 von 3 Sonos One Power Adapter Replacement: Schritt 13, Bild 3 von 3
    • Disconnect the power adapter plug from the motherboard using your thumb.

  14. Sonos One Power Adapter Replacement: Schritt 14, Bild 1 von 3 Sonos One Power Adapter Replacement: Schritt 14, Bild 2 von 3 Sonos One Power Adapter Replacement: Schritt 14, Bild 3 von 3
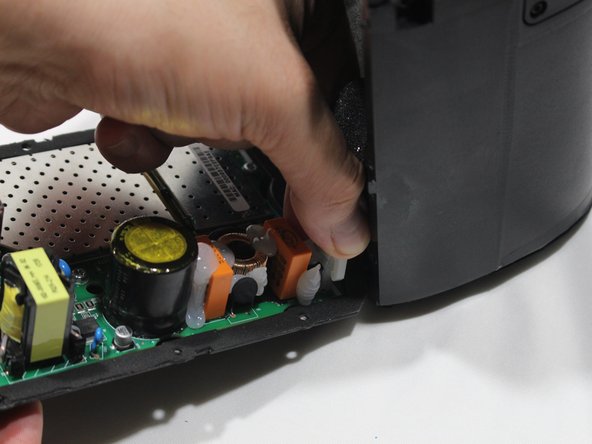
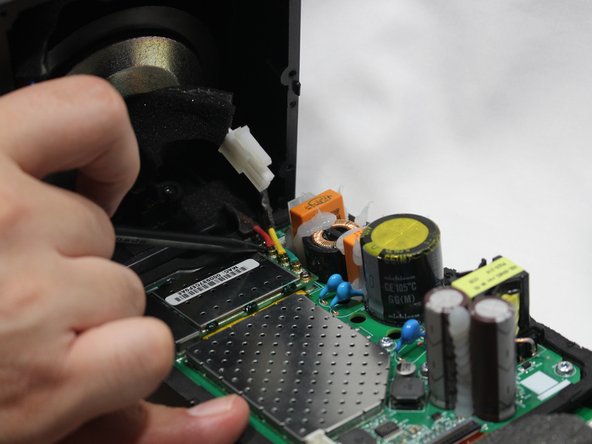
    • Using the pointed end of the spudger, disconnect the red, green, and yellow cables connecting the WiFi transmitter/receiver.

  15. Sonos One Power Adapter Replacement: Schritt 15, Bild 1 von 2 Sonos One Power Adapter Replacement: Schritt 15, Bild 2 von 2
    • Remove the motherboard panel from the speaker housing.

  16. Sonos One Power Adapter Replacement: Schritt 16, Bild 1 von 3 Sonos One Power Adapter Replacement: Schritt 16, Bild 2 von 3 Sonos One Power Adapter Replacement: Schritt 16, Bild 3 von 3
    • The woofer is highly magnetic, making removal of the metal screws sometimes difficult.

    • Remove the two 9mm Torx T8 screws from the power adapter plug.

    • Remove the power adapter receptacle from its housing slot.

Abschluss

To reassemble your device, follow these instructions in reverse order.

6 weitere Nutzer:innen haben diese Anleitung absolviert.

Marcus Glowa

Mitglied seit: 02/14/18

848 Reputation

5 Anleitungen geschrieben

Team

USF Tampa, Team S2-G1, Nance Spring 2018 Mitglied von USF Tampa, Team S2-G1, Nance Spring 2018

USFT-NANCE-S18S2G1

3 Mitglieder

6 Anleitungen geschrieben

0 Kommentare

Kommentar hinzufügen

Seitenaufrufe:

Letzte 24 Stunden: 1

Letzte 7 Tage: 28

Letzte 30 Tage: 109

Insgesamt: 7,165