Zum Hauptinhalt wechseln

Sony BDP BX350 Wifi Card Replacement

Was du brauchst

  1. Sony BDP BX350 Wifi Card Replacement, Control Board: Schritt 1, Bild 1 von 1
    • Remove the three 10mm Philips head screws on the back of the player.

  2. Sony BDP BX350 Wifi Card Replacement: Schritt 2, Bild 1 von 1
    • Using an opening tool lift up the tabs located on the bottom of the plastic front cover.

  3. Sony BDP BX350 Wifi Card Replacement: Schritt 3, Bild 1 von 1
    • Lift the tabs located on each side of the device to free the front cover. Begin separating the two covers from metal casing.

  4. Sony BDP BX350 Wifi Card Replacement: Schritt 4, Bild 1 von 1
    • Remove both covers.

  5. Sony BDP BX350 Wifi Card Replacement: Schritt 5, Bild 1 von 2 Sony BDP BX350 Wifi Card Replacement: Schritt 5, Bild 2 von 2
    • Do not bend or tear the ribbon cable.

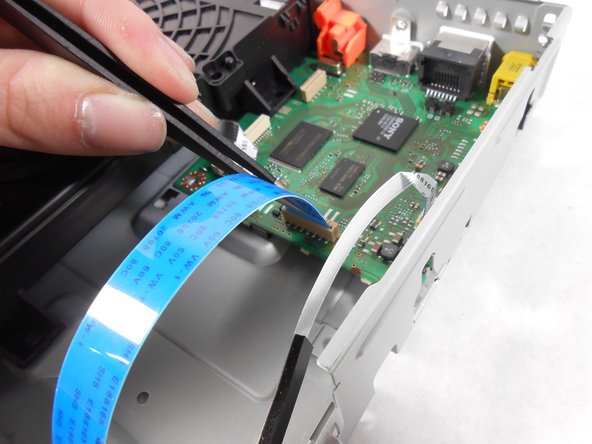
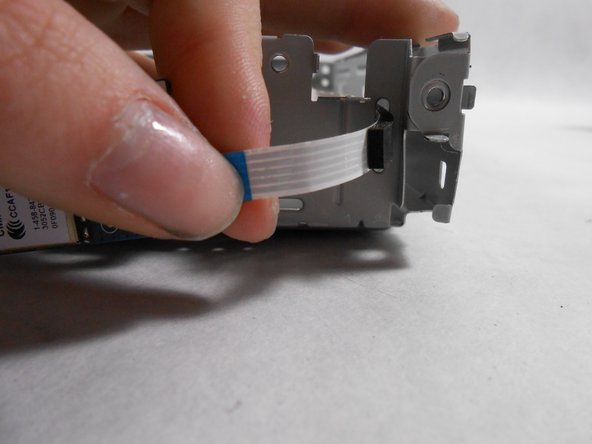
    • Using the plastic tweezers, carefully remove the ribbon cable from the motherboard.

  6. Sony BDP BX350 Wifi Card Replacement: Schritt 6, Bild 1 von 1
    • Unscrew the one 5mm Phillips head screw from the front of the device board.

  7. Sony BDP BX350 Wifi Card Replacement: Schritt 7, Bild 1 von 2 Sony BDP BX350 Wifi Card Replacement: Schritt 7, Bild 2 von 2
    • Do not bend or tear ribbon cable.

    • Carefully separate the device control board from the metal casing.

  8. Sony BDP BX350 Wifi Card Replacement, Wifi Card: Schritt 8, Bild 1 von 2 Sony BDP BX350 Wifi Card Replacement, Wifi Card: Schritt 8, Bild 2 von 2
    • Remove 6mm Philips head screw from wifi board.

  9. Sony BDP BX350 Wifi Card Replacement: Schritt 9, Bild 1 von 1
    • Remove the ribbon cable from motherboard using a pair of tweezers.

  10. Sony BDP BX350 Wifi Card Replacement: Schritt 10, Bild 1 von 3 Sony BDP BX350 Wifi Card Replacement: Schritt 10, Bild 2 von 3 Sony BDP BX350 Wifi Card Replacement: Schritt 10, Bild 3 von 3
    • Do not bend or tear ribbon cable.

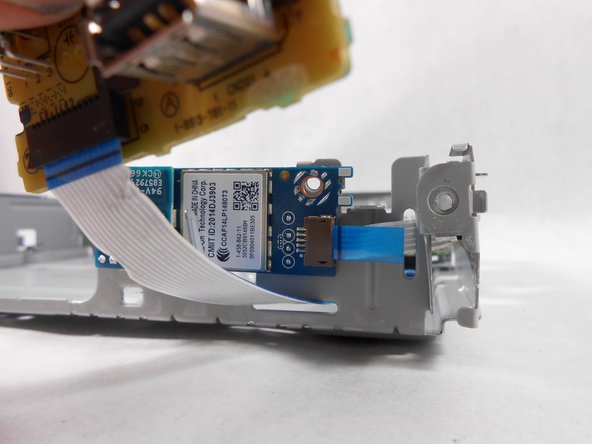
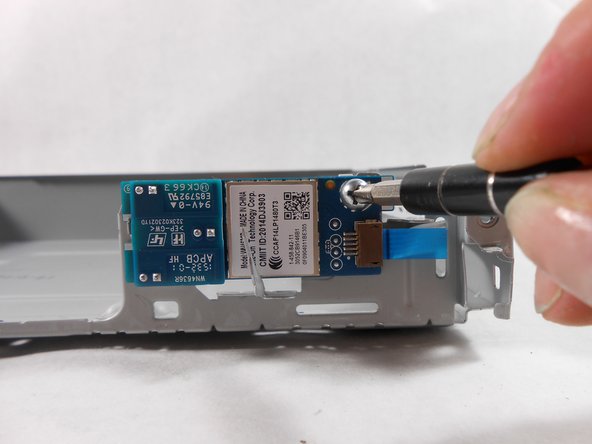
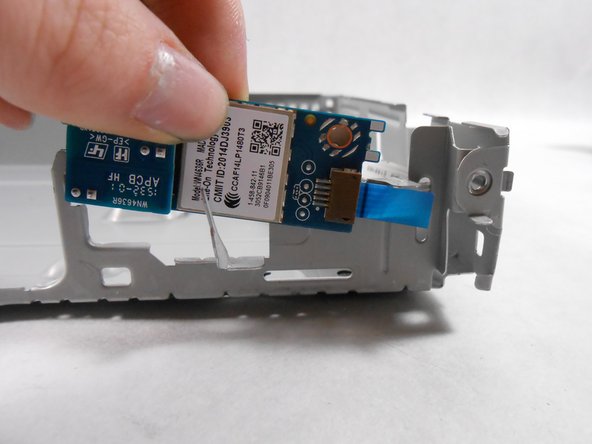
    • Carefully remove board and ribbon cables by pulling upwards then out to free it from the metal clips.

Abschluss

To reassemble your device, follow these instructions in reverse order.

Kristen Vezina

Mitglied seit: 03/06/17

413 Reputation

4 Anleitungen geschrieben

Team

UMass Dartmouth, Team S8-G5, Catania Spring 2017 Mitglied von UMass Dartmouth, Team S8-G5, Catania Spring 2017

UMASSD-CATANIA-S17S8G5

3 Mitglieder

5 Anleitungen geschrieben

0 Kommentare

Kommentar hinzufügen

Seitenaufrufe:

Letzte 24 Stunden: 0

Letzte 7 Tage: 0

Letzte 30 Tage: 1

Insgesamt: 260