Diese Anleitung enthält neuere Änderungen. Wechsel zur neuesten unüberprüften Version.
Einleitung
The USB is a very important part of the Sony Bloggie as it is the only way to get your movies from the camera to a computer. This guide will show you how to install a new USB drive in the Sony Bloggie 3D.
Was du brauchst
-
-
Remove the two 2.5mm Phillips #00 screws using the Philips #00 screwdriver.
-
-
-
Use a plastic opening tool to pry the cover open.
-
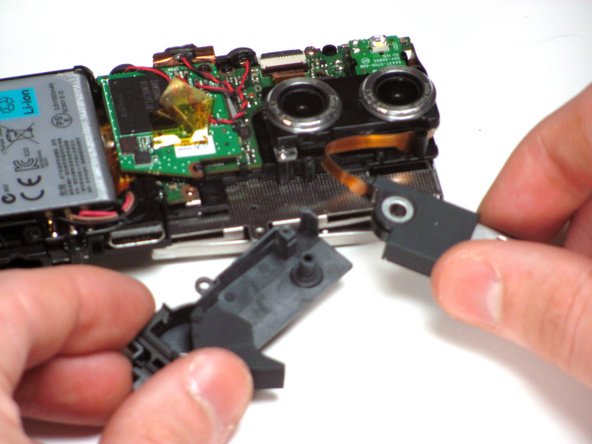
After the the cover is partly open as shown, remove the cover with your hands.
-
-
-
Using your hand, or a pair of tweezers, remove the ZIF connector by gently pulling it out of the dock on the circuit board.
-
-
-
-
Use a plastic opening tool to loosen the back cover off the device.
-
Once the back cover is loose, remove it gently by hand.
-
-
-
Once the back cover is removed, by using the opening tool, remove the following screws using a Phillips #00 screwdriver.
-
Two 4.0mm Phillips #00 screws
-
One 8.0mm Phillips #00 screw
-
One 9.5mm Phillips #00 screw
-
-
-
Using a spudger, remove the clips of the metal casing from each end of the USB drive.
-
-
-
Now that the USB component is on its own, untangle the ribbon from inside the device.
-


To reassemble your device, follow these instructions in reverse order.
To reassemble your device, follow these instructions in reverse order.
Team

Cal Poly, Team 7-12, Maness Winter 2013 Mitglied von Cal Poly, Team 7-12, Maness Winter 2013
CPSU-MANESS-W13S7G12
5 Mitglieder
12 Anleitungen geschrieben