Zum Hauptinhalt wechseln

Sony Cyber-shot DSC-P100 Camera Lens Replacement

Was du brauchst

  1. Sony Cyber-shot DSC-P100 Camera Lens Replacement, Front Casing: Schritt 1, Bild 1 von 3 Sony Cyber-shot DSC-P100 Camera Lens Replacement, Front Casing: Schritt 1, Bild 2 von 3 Sony Cyber-shot DSC-P100 Camera Lens Replacement, Front Casing: Schritt 1, Bild 3 von 3
    • First locate the appropriate screws for detachment.

  2. Sony Cyber-shot DSC-P100 Camera Lens Replacement: Schritt 2, Bild 1 von 1
    • Remove the five screws shown using a Phillips #00 Screwdriver.

    • It is important to put the small screws in a safe location in order to reassemble the casing.

  3. Sony Cyber-shot DSC-P100 Camera Lens Replacement: Schritt 3, Bild 1 von 1
    • Using a spudger, carefully pry open the front casing.

  4. Sony Cyber-shot DSC-P100 Camera Lens Replacement: Schritt 4, Bild 1 von 2 Sony Cyber-shot DSC-P100 Camera Lens Replacement: Schritt 4, Bild 2 von 2
    • Carefully separate the front casing from the camera body.

    • CAUTION: Be careful not to break the wire connecting the front casing and the camera.

  5. Sony Cyber-shot DSC-P100 Camera Lens Replacement, Back Casing: Schritt 5, Bild 1 von 3 Sony Cyber-shot DSC-P100 Camera Lens Replacement, Back Casing: Schritt 5, Bild 2 von 3 Sony Cyber-shot DSC-P100 Camera Lens Replacement, Back Casing: Schritt 5, Bild 3 von 3
    • Remove the four screws from the casing.

  6. Sony Cyber-shot DSC-P100 Camera Lens Replacement: Schritt 6, Bild 1 von 2 Sony Cyber-shot DSC-P100 Camera Lens Replacement: Schritt 6, Bild 2 von 2
    • Carefully pull the back casing away from the camera.

  7. Sony Cyber-shot DSC-P100 Camera Lens Replacement, Camera Lens: Schritt 7, Bild 1 von 2 Sony Cyber-shot DSC-P100 Camera Lens Replacement, Camera Lens: Schritt 7, Bild 2 von 2
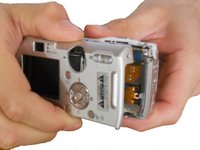
    • Remove the two screws on the back side of the camera surrounding the LCD screen.

  8. Sony Cyber-shot DSC-P100 Camera Lens Replacement: Schritt 8, Bild 1 von 3 Sony Cyber-shot DSC-P100 Camera Lens Replacement: Schritt 8, Bild 2 von 3 Sony Cyber-shot DSC-P100 Camera Lens Replacement: Schritt 8, Bild 3 von 3
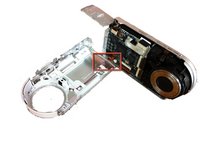
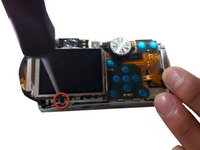
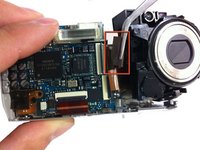
    • Remove the two ribbon traces found on the left side of the lens on the front of camera holding the lens in place.

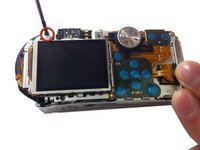
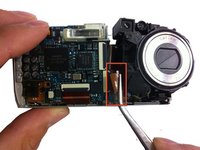
    • Carefully pull the lens away front the camera until it is released.

  9. Sony Cyber-shot DSC-P100 Camera Lens Replacement: Schritt 9, Bild 1 von 1
    • The lens is now successfully removed from the camera.

Abschluss

To reassemble your device, follow these instructions in reverse order.

Ein:e weitere:r Nutzer:in hat diese Anleitung absolviert.

Katie McCraw

Mitglied seit: 03/09/12

191 Reputation

7 Anleitungen geschrieben

Team

Clemson, Team 1-5, Benson Spring 2012 Mitglied von Clemson, Team 1-5, Benson Spring 2012

CLEM-BENSON-S12S1G5

4 Mitglieder

14 Anleitungen geschrieben

Ein Kommentar

Is there a way to disassemble the lens to correct the alignment. My daughter dropped it and I think the mechanism has been misaligned.

Macjune Tolentino - Antwort

Kommentar hinzufügen

Seitenaufrufe:

Letzte 24 Stunden: 1

Letzte 7 Tage: 2

Letzte 30 Tage: 25

Insgesamt: 2,626