Einleitung
The purpose of this guide is to replace the LCD screen. This guide will provide the necessary information to disassemble the camera, replace the screen, and to properly reassemble the components involved.
Was du brauchst
-
-
If there is a battery currently in the slot, remove by first pulling downwards on the blue component. This will allow you to remove the battery from the slot.
Be careful, i got an electrical shock even after removing the battery when i touched the inner case. i guess, you have to wait some time for static electricity to disapear
-
-
-
Remove all of the 1mm screws using a Philips #000 Screwdriver.
-
Remover the rest of the screws (2mm) from the camera covers using a Phillips #000 Screwdriver.
-
-
-
-
Use the plastic opening tool to gently remove the front and back plates of the camera.
-
-
-
Pull up on the lower end of the plate. Lift it so the plate is high enough so that the marked bump is not holding it in place.
-
Pull away from the camera at the end of the metal plate with the blue circuits to then remove the plate from the rest of the camera.
-
-
-
Remove this screw (1mm) with a Phillips #000 Screwdriver.
-
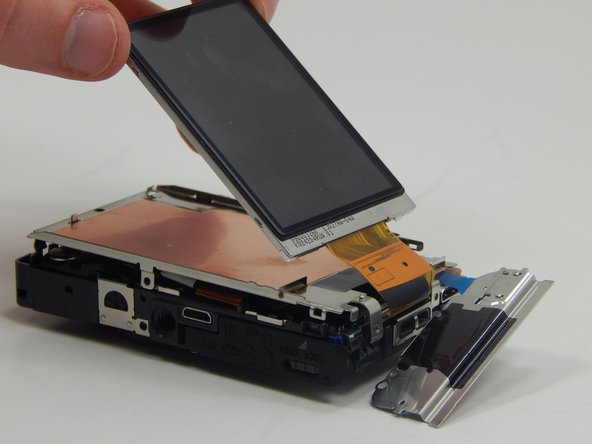
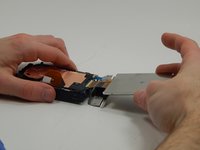
Gently lift the LCD from the metal plate.
-
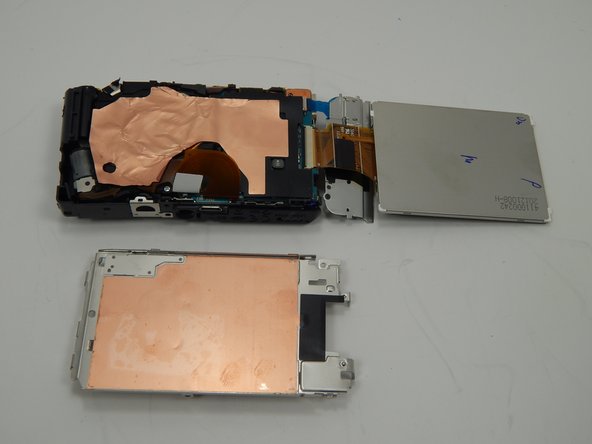
Remove the metal plate that was underneath the LCD screen from the camera.
-
-
-
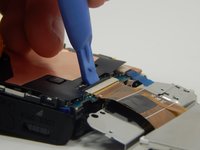
Use the plastic opening tool to pry the black bar upwards.
-
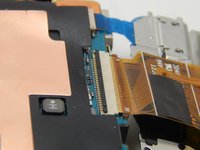
Pull the LCD screen from out of the slot.
-


To reassemble your device, follow these instructions in reverse order.
To reassemble your device, follow these instructions in reverse order.
Rückgängig: Ich habe diese Anleitung nicht absolviert.
Eine weitere Person hat diese Anleitung absolviert.
Team

Michigan Tech, Team 1-9, Lauer Spring 2015 Mitglied von Michigan Tech, Team 1-9, Lauer Spring 2015
MTU-LAUER-S15S1G9
2 Mitglieder
6 Anleitungen geschrieben