Einleitung
If your camera's screen isn't working properly, you may need to replace it. Follow this guide to do so!
Was du brauchst
-
-
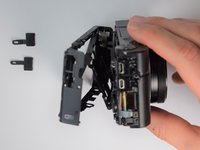
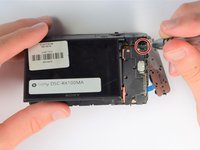
Using the screwdriver, remove all screws (black 2.5mm) from outermost layer of the assembly.
-
-
-
Also using the screwdriver, remove screws (black 1mm) underneath articulated LCD screen.
-
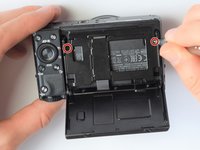
Remove the marked 2.5 mm screws with the screwdriver
-
-
-
-
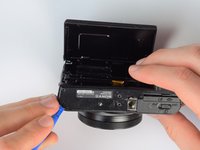
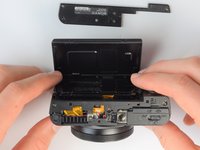
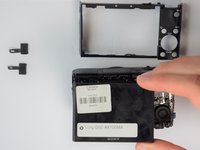
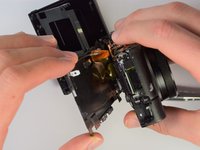
Using the same plastic opening tools, separate the screen and back assembly from the front portion of the camera
-
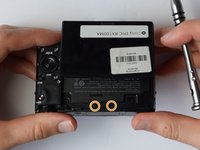
Once the back assembly is slightly detached, pull the media covers for the HDMI and Multimedia ports
-
-
-
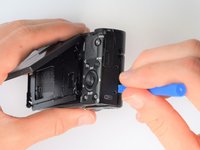
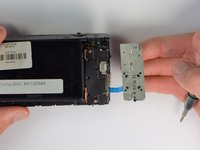
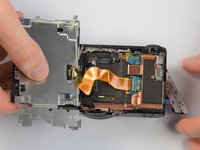
Move side panel to get access to screws
-
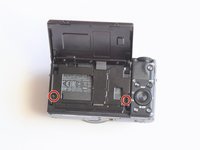
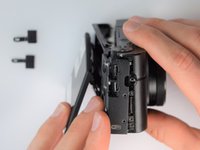
Remove two screws (black 2.5mm) with PH #0 screwdriver
-
-
-
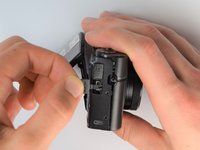
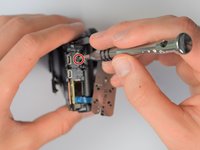
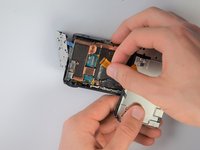
Carefully unplug ribbon connector to fully detach LCD screen assembly from camera
-


To reassemble your device, follow these instructions in reverse order.
To reassemble your device, follow these instructions in reverse order.
Rückgängig: Ich habe diese Anleitung nicht absolviert.
2 weitere Personen haben diese Anleitung absolviert.
Team

Cal Poly, Team 21-1, Maness Winter 2017 Mitglied von Cal Poly, Team 21-1, Maness Winter 2017
CPSU-MANESS-W17S21G1
5 Mitglieder
10 Anleitungen geschrieben
4 Kommentare
Any idea where I can get a set or replacement screws? one came out of my LCD joint and I can’t find replacements anywhere online. I’ve even tried Ebay.
Definately be careful with the gold ribbon cable, looked at mine funny and it just snapped in two.. waiting on a replacement now :(
I’ve ripped 2 of these before - not fun! Still… cheap enough to buy but delivery took a couple of weeks.
I had a cracked screen so had to take this out to replace as well - problem i’ve had is that although i stuck it down really well (with 3M 1mm double-sided tape, it doesn’t hold great and so the screen has risen a bit and doesn’t sit flush.
Just in the process now of sticking it down again but with a touch of superglue as i need it to hold down a bit better - that should hopefully be me done then :)
Great guide by the way KC Egger - thanks for taking the time to put this together - it’s been a life saver for me!
Where did you purchase your screen, I’ve been trying to find one from Sony parts dealers and can’t find it. Any links would be helpful, thanks.