Einleitung
If you need to replace an old or damaged motherboard, access the motherboard with this guide. The motherboard is a vital piece for the Sony DVD player, It runs all systems making sure everything is running properly and smoothly.
Was du brauchst
-
-
Use the Philips screwdriver to remove the screws located on the sides and the back.
-
-
-
-
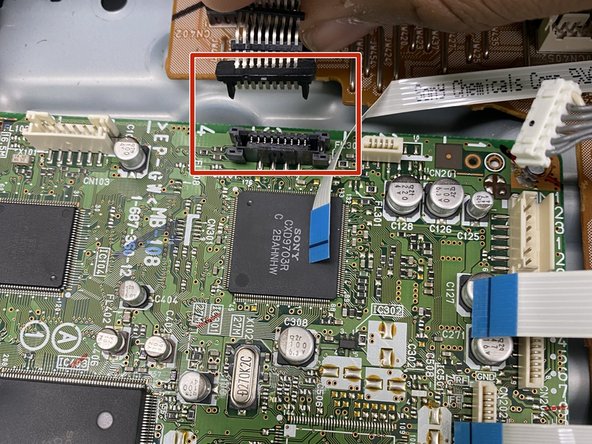
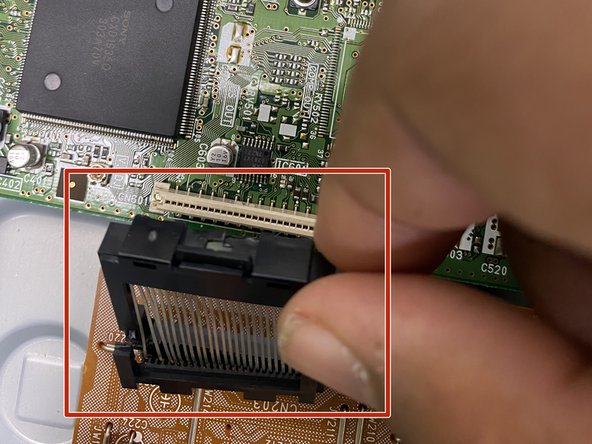
Remove all cables that are connected to the motherboard by pulling upwards from the motherboard.
-
-
-
Use a Phillips screwdriver to remove all screws located in the 4 corners of the motherboard.
-


To reassemble your device, follow these instructions in reverse order.
To reassemble your device, follow these instructions in reverse order.
Rückgängig: Ich habe diese Anleitung nicht absolviert.
Ein:e weitere:r Nutzer:in hat diese Anleitung absolviert.

Team

University of North Texas, Team 6-3, Kilpatrick Fall 2023 Mitglied von University of North Texas, Team 6-3, Kilpatrick Fall 2023
UNT-KILPATRICK-F23S6G3
5 Mitglieder
6 Anleitungen geschrieben