Zum Hauptinhalt wechseln

Sony Ericsson W810I Charger Adapter Replacement

Archivierte Anleitung
Diese Anleitung wurde ausschließlich für historische Zwecke erhalten. Verwende die aktualisierte Version dieser Anleitung, um deine Reparatur durchzuführen.

Was du brauchst

  1. Sony Ericsson W810I Charger Adapter Replacement, Charger Adapter: Schritt 1, Bild 1 von 1
    • Power the phone off.

    • Press down firmly against the icon on the lower rear panel with your thumb.

    • Slide the panel down to remove it.

  2. Sony Ericsson W810I Charger Adapter Replacement: Schritt 2, Bild 1 von 2 Sony Ericsson W810I Charger Adapter Replacement: Schritt 2, Bild 2 von 2
    • Lift the battery and pull it out.

    • Remove the SIM card too if you have one.

  3. Sony Ericsson W810I Charger Adapter Replacement: Schritt 3, Bild 1 von 2 Sony Ericsson W810I Charger Adapter Replacement: Schritt 3, Bild 2 von 2
    • Remove the following screws:

    • Two T7 Torx screws

    • Two Phillips #00 screws

  4. Sony Ericsson W810I Charger Adapter Replacement: Schritt 4, Bild 1 von 2 Sony Ericsson W810I Charger Adapter Replacement: Schritt 4, Bild 2 von 2
    • Use an opening tool to remove the camera faceplate.

    • Be careful to not bend the camera faceplate when removing it.

  5. Sony Ericsson W810I Charger Adapter Replacement: Schritt 5, Bild 1 von 3 Sony Ericsson W810I Charger Adapter Replacement: Schritt 5, Bild 2 von 3 Sony Ericsson W810I Charger Adapter Replacement: Schritt 5, Bild 3 von 3
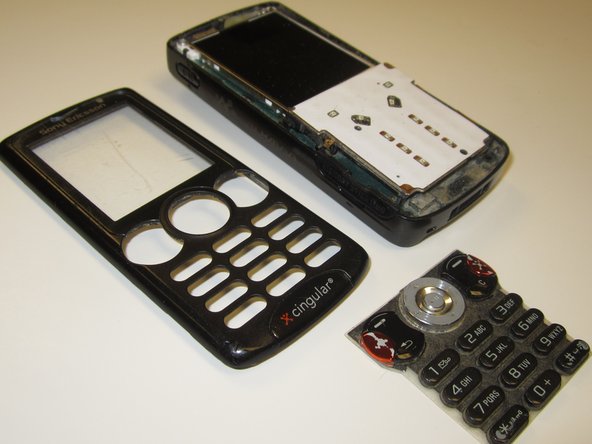
    • Flip the phone over and use an opening tool to pry off the number pad.

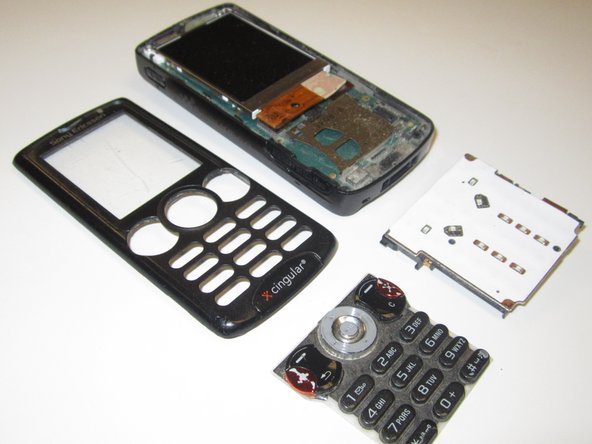
    • Separate the keypad from the motherboard.

  6. Sony Ericsson W810I Charger Adapter Replacement: Schritt 6, Bild 1 von 1
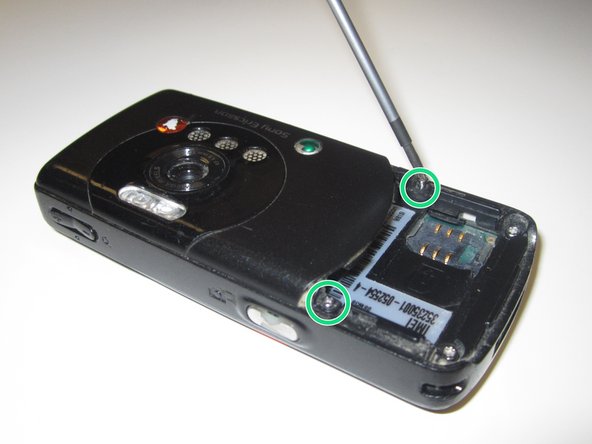
    • Remove two T6 Torx screws that secure the motherboard.

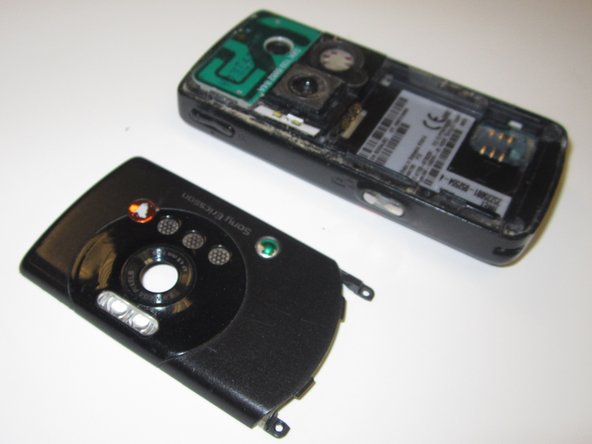
    • Use an opening tool to remove the motherboard. Pay attention to cables on the motherboard.

    • Do not pry too hard on the motherboard, as it can break under too much force.

  7. Sony Ericsson W810I Charger Adapter Replacement: Schritt 7, Bild 1 von 1
    • Pull off charger adapter and remove it.

    • Pull evenly on the full width of the cable so that no individual wires are overly strained.

Abschluss

To reassemble your device, follow these instructions in reverse order.

Ein:e weitere:r Nutzer:in hat diese Anleitung absolviert.

Ben Micucci

Mitglied seit: 10/14/11

186 Reputation

5 Anleitungen geschrieben

Team

James Madison, Team 2-2, Allen Fall 2011 Mitglied von James Madison, Team 2-2, Allen Fall 2011

JMU-ALLEN-F11S2G2

2 Mitglieder

10 Anleitungen geschrieben

0 Kommentare

Kommentar hinzufügen

Seitenaufrufe:

Letzte 24 Stunden: 1

Letzte 7 Tage: 2

Letzte 30 Tage: 3

Insgesamt: 1,609