Einleitung
This guide will show you how to clean and/or replace the buttons and switches on the Sony FDL-220R Watchman. Steps include basic disassembly of the Sony FDL-220R Watchman, and tools include a Phillips #00 Screwdriver and a solution of warm water and baking soda.
Was du brauchst
-
-
Press down on the textured area and push towards the bottom of the device.
-
Gently remove the battery cover.
-
Remove the three AA batteries.
-
-
-
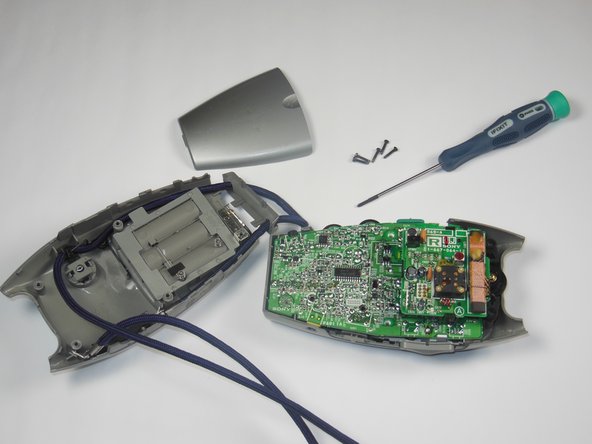
Locate the five 5x11mm screws surrounding the battery compartment.
-
Remove screws with a Philips #00 screwdriver.
-
-
-
-
Grasp the entire back half of the Watchman's casing.
-
Snap off the casing from the bottom of the device.
-
Gently pull off entire back casing.
-
-
-
Carefully grasp the entire circuit board.
-
Pull the circuit board off of the device's plastic casing.
-
-
-
Locate the thee plastic buttons/switches on the sides of the plastic grey casing.
-
Remove all three buttons/switches.
-
If the buttons/switches are dirty, clean them in warm water and dry thoroughly.
-
If one of the buttons/switches is broken, simply replace it with a new one.
-


To reassemble your device, follow these instructions in reverse order.
To reassemble your device, follow these instructions in reverse order.
Team

Baylor, Team 4-5, Williams Fall 2014 Mitglied von Baylor, Team 4-5, Williams Fall 2014
BU-WILLIAMS-F14S4G5
4 Mitglieder
4 Anleitungen geschrieben