Einleitung
This guide will help you replace the speaker if it isn't working right. This will require you to dismantle quite a bit, so make sure to place your screws in proper order so you can put it together again.
Was du brauchst
-
-
Remove the six black 4 mm Phillips #00 screws from the bottom panel of the camera.
-
Pull off the bottom panel. It may be difficult, but tugging on it shouldn't cause harm to yourself or the device.
-
-
-
Remove the 3 mm Phillips #00 screw from the bottom of the camera.
-
Remove the 4 mm Phillips #00 screw from the right panel.
-
Pull the right panel off. Again, it might be difficult, but pulling hard shouldn't harm you or the camera.
-
-
-
Remove the two 4 mm Phillips #00 screws from the top right corner of the camera.
-
Remove the 4 mm Phillips #00 screw from in front of the flash mount.
-
-
-
Remove the 3 mm Phillips #00 screw from below the right side of the battery slot.
-
Remove the black 5 mm Phillips #00 screw from the top of the battery slot.
-
-
-
-
Remove the three 4 mm Phillips #00 screws from the left panel underneath the display screen.
-
Pull the top panel off of the device with the iFixit opening tool.
-
-
-
Remove the top and bottom 4 mm Phillips #00 screws from the display screen hinge.
-
Use the iFixit opening tool to remove the screen hinge.
-
-
-
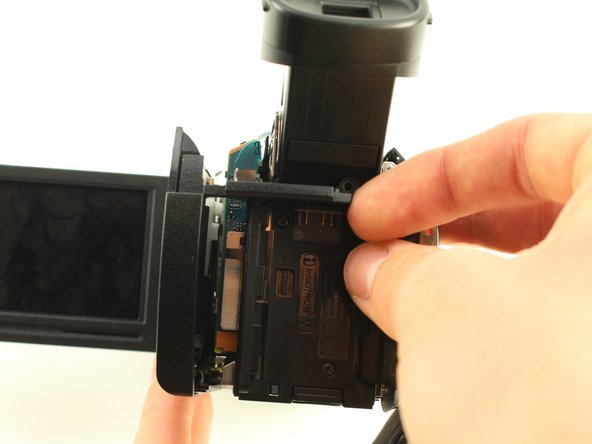
Remove the 3 mm Phillips #00 screw from between the eyepiece and the panel directly to the right of the battery slot.
-
Take the panel directly to the right of the battery slot off of the camera.
-
-
-
Remove the 4 mm Phillips #00 screw above and to the right of the battery slot.
-
Pry the left panel out at an angle by pushing the plastic slat between the battery slot and the eyepiece.
-
Wiggle the left panel and pull it out gently.
-
-
-
Remove the two 4 mm Phillips #00 screws from the inside of the screen hinge.
-
Remove the black plastic from the back of the screen.
-
-
-
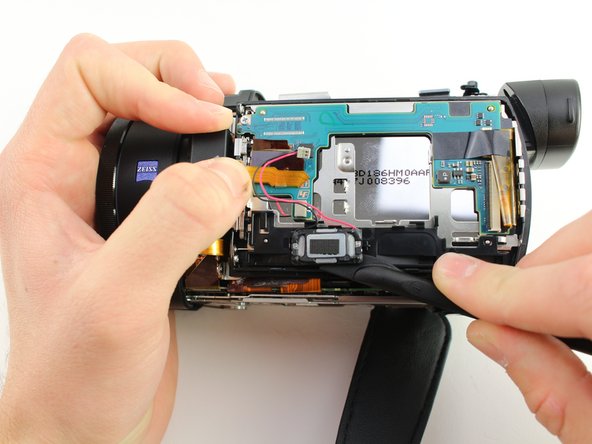
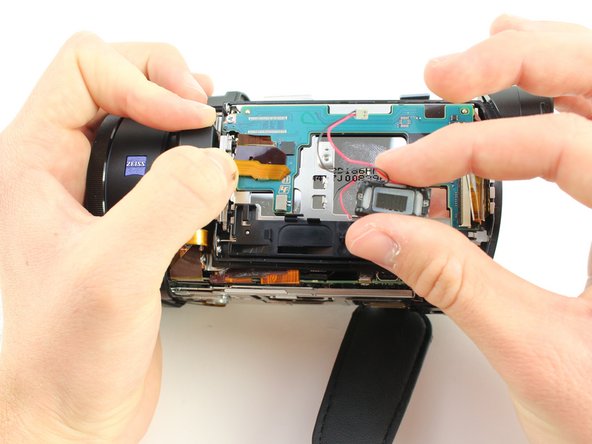
Using the tweezers, unplug the speaker. The connector should be a white piece of plastic attached to a red wire and a black wire.
-
Remove the speaker with the black nylon spudger. The speaker is attached by adhesive.
-


To reassemble your device, follow these instructions in reverse order.
To reassemble your device, follow these instructions in reverse order.
Rückgängig: Ich habe diese Anleitung nicht absolviert.
Ein:e weitere:r Nutzer:in hat diese Anleitung absolviert.
Team

Cal Poly, Team S18-G2, White Winter 2019 Mitglied von Cal Poly, Team S18-G2, White Winter 2019
CPSU-WHITE-W19S18G2
4 Mitglieder
12 Anleitungen geschrieben