Einleitung
The motherboard is the brain of your microcassette-corder. Following the steps in this guide will allow you to remove the motherboard and install a new one, saving your microcassette-corder.
Was du brauchst
-
-
Find the arrow on the battery cover on the back of the device.
-
While pressing down on the arrow, slide the cover towards the bottom of the recorder until it clicks.
-
-
-
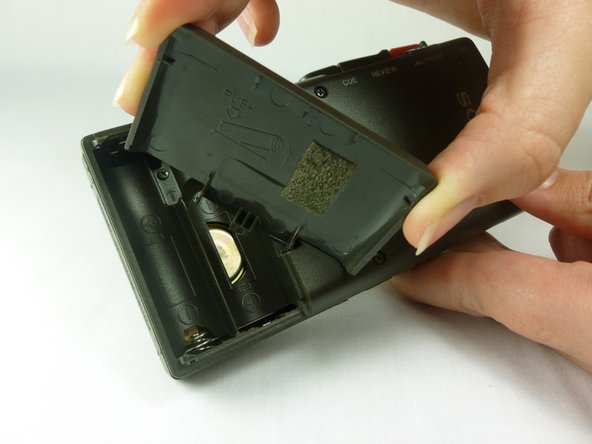
Remove the battery cover by first tilting it so it is at a right angle with the rest of the device.
-
Next, twist it to the side as shown in the second picture. The lid should simply snap off.
-
-
-
Use a #00 Phillips head screwdriver to remove the four (1.7x16 mm) screws from the back case.
-
Next, use the same screwdriver to unscrew the (1.7X5 mm) screw, which is located inside the battery compartment.
-
-
-
Use a spudger to push in the two tabs located on the bottom of the device.
-
It works best to push the tabs at an upward angle (towards the top of the battery compartment)
-
It may take a decent amount of force in order to push in the tabs.
-
-
-
-
With a firm grip on the larger half, remove the back cover by lifting first on the battery area.
-
The back cover should lift cleanly off.
-
-
-
Using tweezers, pull upward on the black tape which secures the wires.
-
Removing this tape allows you to move the wires out of the way for the next step.
-
-
-
Desolder all wires connecting components to the motherboard.
-
A red wire and a blue wire connect the motor to the motherboard.
-
Two black wires connect the speaker to the motherboard.
-
A red wire and a black wire connect the microphone to the motherboard.
-
-
-
After desoldering the microphone connections, pull the microphone straight out from the device and set aside.
-
Removing the microphone gives you access to the green ribbon cable that connects to the mechanism deck.
-
-
-
Desolder the 4 connections of the green ribbon cable.
-
Pull upward on the green ribbon cable to separate it from the motherboard.
-
-
-
Using a #00 Phillips screwdriver, remove the two 1.4x3 mm screws securing the motherboard.
-
-
-
If the replacement motherboard does not have the wire battery terminals attached, desolder the two battery connections on the motherboard.
-
Leave the wire battery terminals in place.
-
If the replacement motherboard has battery terminals attached, the connections do not need to be desoldered.
-
-
-
To remove the battery terminals, use a prying tool to push the lip of the metal wire towards the motherboard.
-
Lift up on the wire while the small lip is depressed and slide the wire terminals out of the plastic guides.
-
-
-
Verify all of the connections have been desoldered and the screws removed.
-
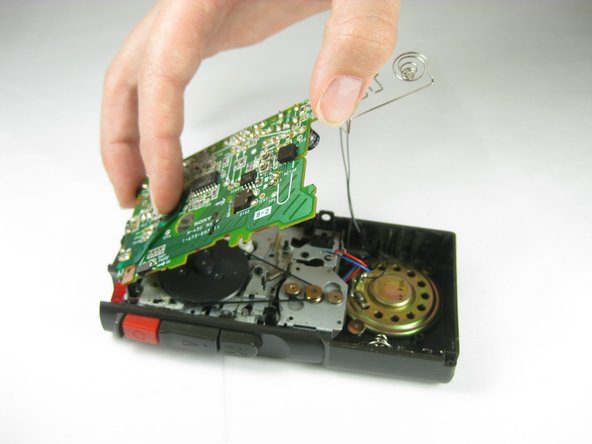
Lift the motherboard upward to remove it from the microcassette-corder.
-




To reassemble your device, follow these instructions in reverse order.
To reassemble your device, follow these instructions in reverse order.
Rückgängig: Ich habe diese Anleitung nicht absolviert.
Eine weitere Person hat diese Anleitung absolviert.



Team

Cal Poly, Team 10-34, Amido Winter 2012 Mitglied von Cal Poly, Team 10-34, Amido Winter 2012
CPSU-AMIDO-W12S10G34
4 Mitglieder
7 Anleitungen geschrieben
Ein Kommentar
Buenas tardes,podrían colaborar me con las referencias de las resistencias de control de 2.4 y 1.2 del motor o guiarme donde puedo adquirir esta información. bendiciones mil gracias. Antonio
