Diese Version enthält möglicherweise inkorrekte Änderungen. Wechsle zur letzten geprüften Version.
Was du brauchst
-
Dieser Schritt ist noch nicht übersetzt. Hilf mit, ihn zu übersetzen!
-
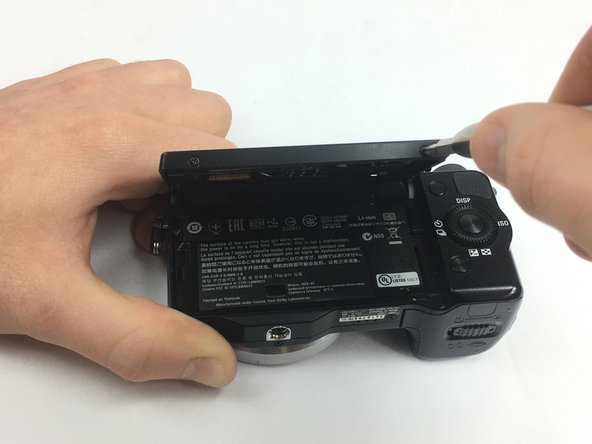
Open the battery compartment by sliding the lock to the right.
-
-
Dieser Schritt ist noch nicht übersetzt. Hilf mit, ihn zu übersetzen!
-
Pick up the device with the LCD screen facing you.
-
While gripping with one hand, lift up on the LCD screen to reveal screws underneath
-
-
Dieser Schritt ist noch nicht übersetzt. Hilf mit, ihn zu übersetzen!
-
Unscrew and remove the eight1.2mm Phillips 00 screws.
-
-
-
Dieser Schritt ist noch nicht übersetzt. Hilf mit, ihn zu übersetzen!
-
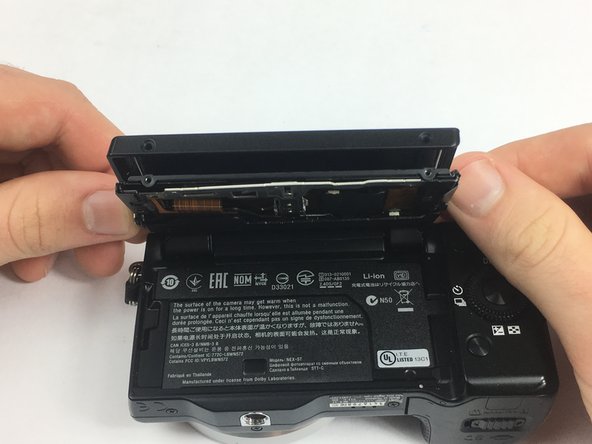
Remove the black plate by using your fingers or tweezers.
-
-
Dieser Schritt ist noch nicht übersetzt. Hilf mit, ihn zu übersetzen!
-
Remove the second plate by pulling it away from the camera. You can use tweezers or your fingers for this step.
-
-
Dieser Schritt ist noch nicht übersetzt. Hilf mit, ihn zu übersetzen!
-
Rotate the camera so the lens is facedown and the power button is pointing away from you.
-
Remove the two 1.2mm Phillips 00 screws shown in the image.
-
-
Dieser Schritt ist noch nicht übersetzt. Hilf mit, ihn zu übersetzen!
-
Remove the 2 metal side coverings from the side of the LCD.
-
-
Dieser Schritt ist noch nicht übersetzt. Hilf mit, ihn zu übersetzen!
-
Use tweezers to peel back the small black film.
-
-
Dieser Schritt ist noch nicht übersetzt. Hilf mit, ihn zu übersetzen!
-
Rotate the camera, and lift up on the LCD screen.
-
This will reveal a large black rectangular film which you can peel back with tweezers.
-
-
Dieser Schritt ist noch nicht übersetzt. Hilf mit, ihn zu übersetzen!
-
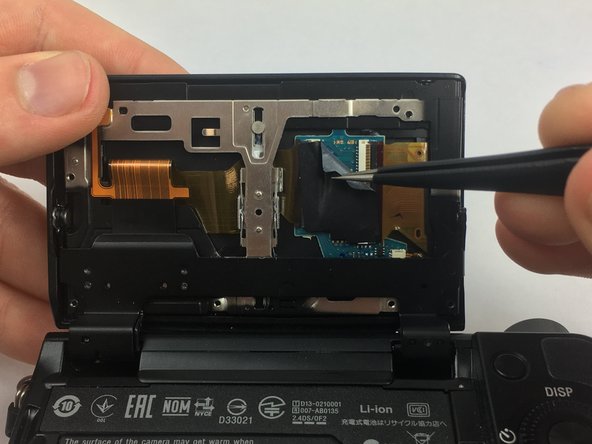
Rotate the camera and use your fingers or tweezers to disconnect the first wire.
-
-
Dieser Schritt ist noch nicht übersetzt. Hilf mit, ihn zu übersetzen!
-
Lift the tab of the ZIF connector and pull the wire away from the motherboard.
-
-
Dieser Schritt ist noch nicht übersetzt. Hilf mit, ihn zu übersetzen!
-
You may remove the loose black film from the back of the LCD screen.
-
When purchasing a new LCD screen be mindful that some do not come with the original plastic frame. You may have to separate these pieces by pushing the LCD out of the frame from behind.
-


Rückgängig: Ich habe diese Anleitung nicht absolviert.
5 weitere Nutzer:innen haben diese Anleitung absolviert.
Team

USF Tampa, Team S13-G2, Cagle Spring 2017 Mitglied von USF Tampa, Team S13-G2, Cagle Spring 2017
USFT-CAGLE-S17S13G2
3 Mitglieder
12 Anleitungen geschrieben
3 Kommentare
Where does one find the replacement screen? I’m in sore need of this myself.
I was able to get the screen working with a new replacement, but without the double-sided tape it feels like a cludge.
where did you find the screen, if i may?