Einleitung
This guide will demonstrate how to replace the speaker system of the Sony SRS-X55 portable speaker. Upon the completion of this guide the entire speaker system will be removed and replaced.
Was du brauchst
-
-
Remove the six 9 mm screws on the bottom panel using the Phillips head #2.
-
-
-
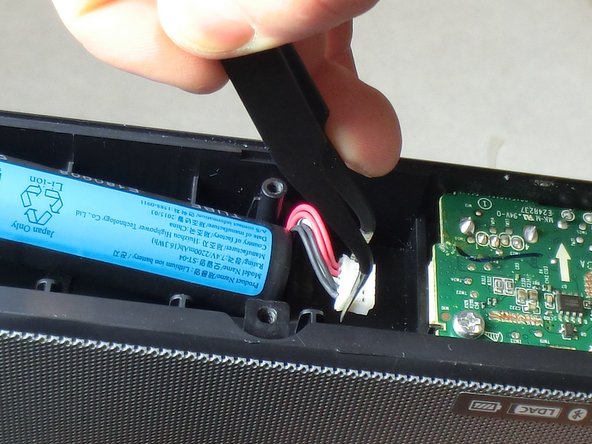
Unplug the wiring connecting the battery to the IO board using the tweezers, then remove the battery.
-
-
-
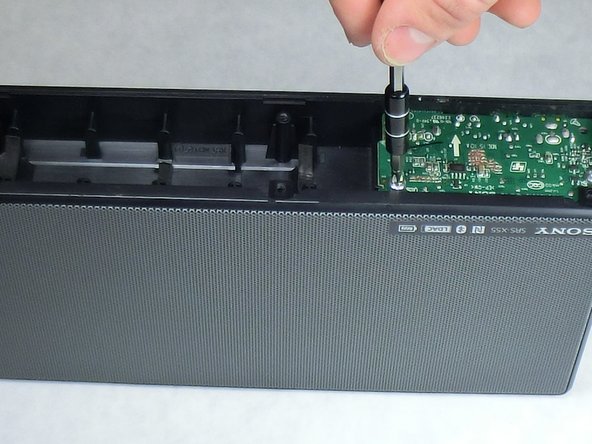
Remove the 3.5 mm silver screws on top of the I/O board using Phillips head #2 screw driver.
-
-
-
-
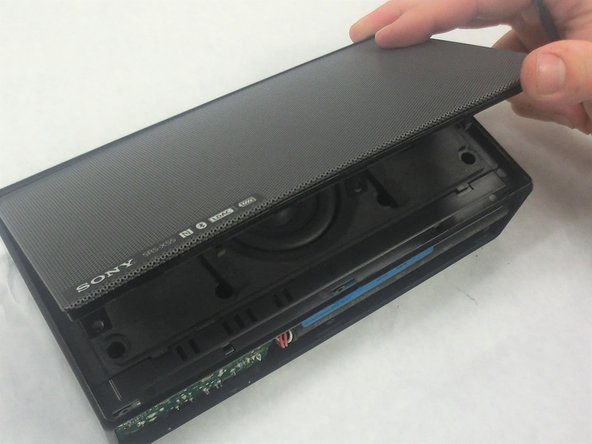
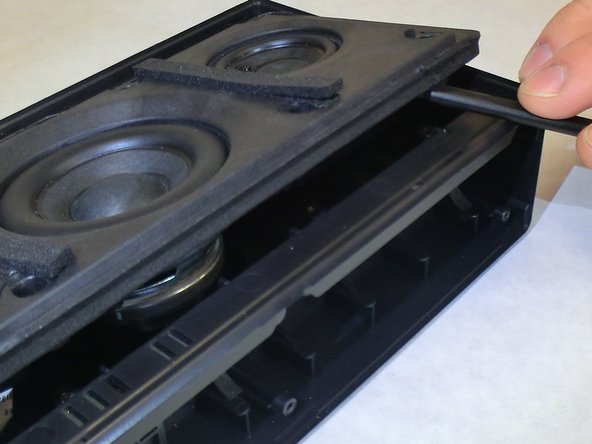
Insert the plastic sudger into the seam where the metal speaker cover meets the speaker body. Slide the sudger along the edge to detach the two components and set aside the cover.
-
-
-
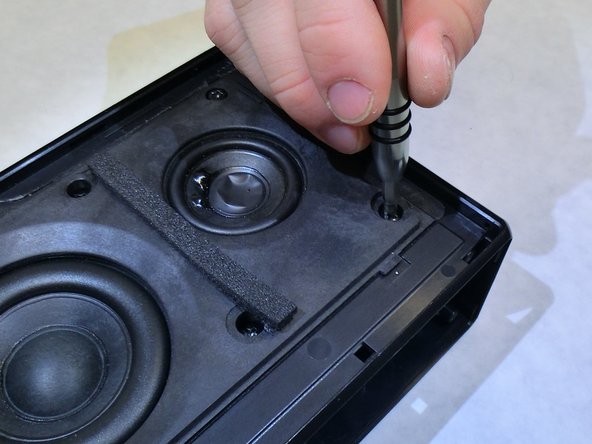
Remove the 8.9 mm screws holding the speaker assembly to the speaker body using Phillips head #2 screw driver.
-
-
-
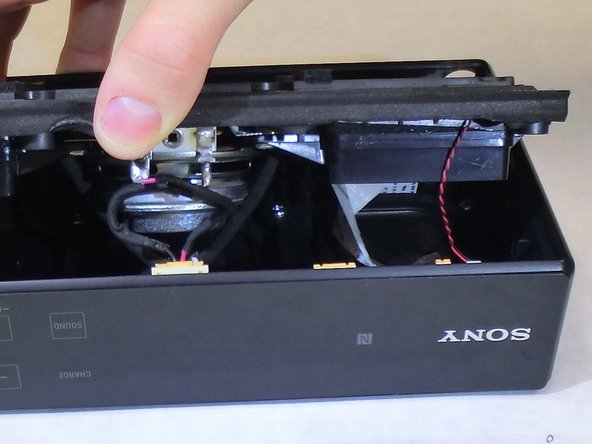
Place the plastic spudger under one of the tabs on the face of the speaker assembly and gently lift it from the speaker body.
-
-
-
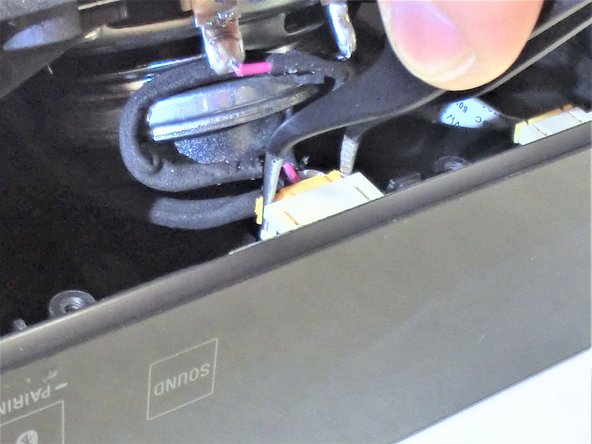
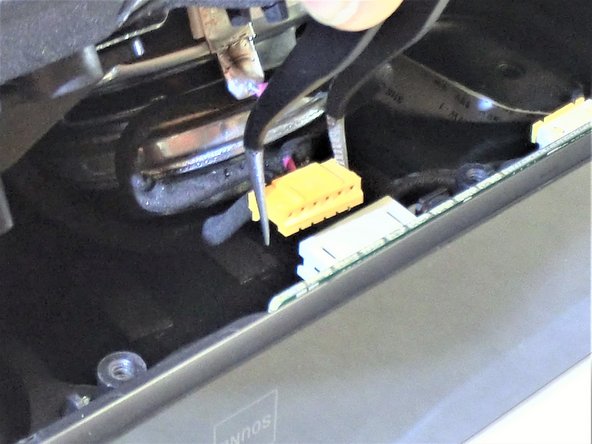
Use the tweezers to disconnect the two cables from the input board and motherboard and finish lifting the speaker assembly from the speaker body.
-
-
-
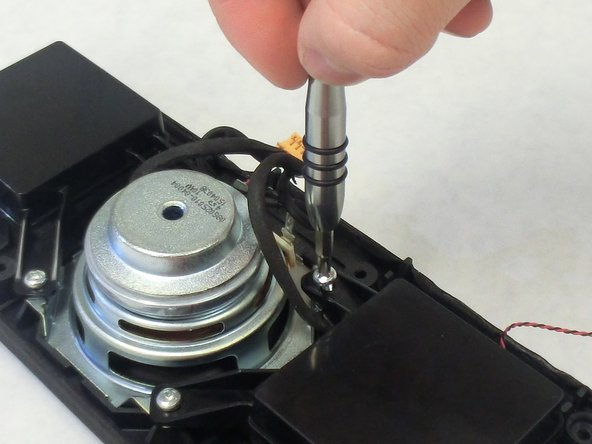
Remove the 9 mm screws on the back of the speaker assembly using Phillips head #2 screw driver.
-
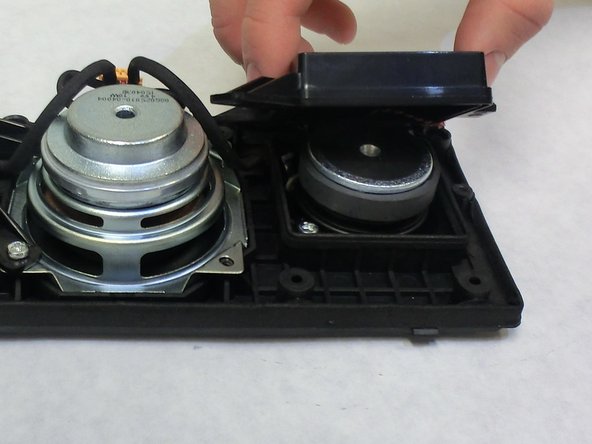
Lift both speaker covers from the speaker assembly.
-
-
-
Remove the 6.3 mm screws holding each of the auxiliary speakers into the speaker assembly with Phillips head #2 screw driver.
-
The speakers are magnetic so they will attract the screws.
-
-
-
Gently lift the auxiliary speakers from the speaker assembly.
-
Lift the sub-woofer from the speaker assembly.
-
-
-
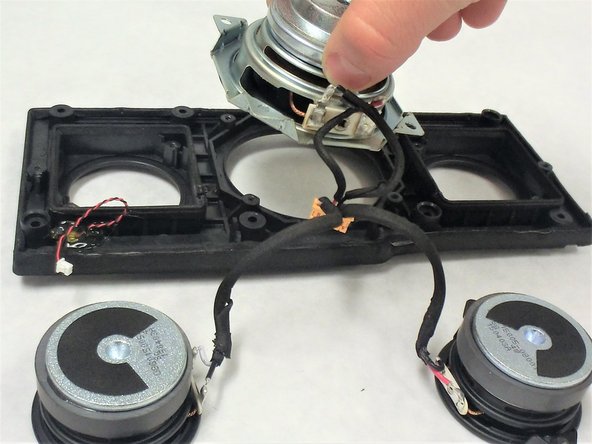
Place the tip of the soldering iron against the wire terminals until the connection separates on its own. The three terminal locations are shown.
-
Reconnect the leads to the proper terminals. Use either of the other speakers as a reference if needed; they will have the same wire configuration.
-
For step-by-step instructions on soldering check out this link Wie man Lötverbindungen herstellt und entlötet.
-


To reassemble your device, follow these instructions in reverse order.
To reassemble your device, follow these instructions in reverse order.
Rückgängig: Ich habe diese Anleitung nicht absolviert.
4 weitere Nutzer:innen haben diese Anleitung absolviert.
Team

IUPUI, Team 2-3, Baechle Spring 2017 Mitglied von IUPUI, Team 2-3, Baechle Spring 2017
IUPUI-BAECHLE-S17S2G3
3 Mitglieder
3 Anleitungen geschrieben
6 Kommentare
Hello, Thanks for your tuto … Please can you help me to buy a new central loudspeaker … I only found "already used parts" on eBay an would like to buy a new "not used" part ? Thanks in advance for your answer
hi im in the same situation as Pascal I cant find where to buy the 10W bass speaker online.
Steve Chaney
Hi Steve,
I have the same problem. Did you find some 10w bass speaker?
Sven from germany
Tuchplet is damaging and new tuchplet ripleys