Einleitung
This Audio System is the model SRS-XB30. One of the common malfunctions is the charging port. This guide will show you step by step instructions on how to replace the charging port.
Was du brauchst
-
-
To remove the speaker grill, insert the big spudger underneath it in each corner.
-
-
-
With the Sony logo facing towards you, use the medium spudger to lift the side plates from the internal frame.
-
-
-
Locate the four screws on the now exposed front panel.
-
-
-
Next, remove the four outer edge screws, located on each corner of the speaker. The outer edge of the speaker is a clear plastic.
-
Remove each of the four corner screws (15.0 mm long).
-
-
-
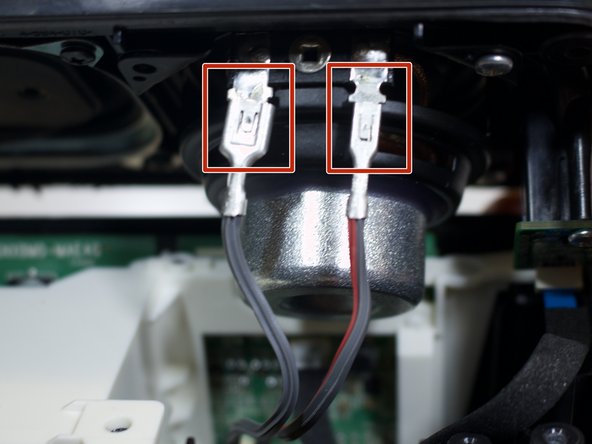
Unclip the four wire connectors (that are attached to the speaker lid).
-
Disconnect the thin yellow wire (attached to the speaker lid) from its port.
-
-
-
-
Locate the two silver screws (9 mm) attached to the two LED-light-chips on the speaker lid.
-
-
-
Separate the speaker lid entirely from the bottom frame.
-
-
-
Locate and remove the three black screws (10.0 mm) within the internal frame. Use bit T7.
-
-
-
Locate the blue film attached to the circuit box containing the charging port.
-
-
-
Insert the spudger along the battery edge and firmly hold the wires. Lift both sides up. The battery will pop out from its encasement.
-
-
-
Locate the circuit box containing the yellow charging port.
-
Remove the circuit box from any attachments connecting it to the speaker.
I have just received a new battery and fitted it but still does not turn on , am not able to find a replacement charging port even from Sony any help please
-
-
-
Insert a new circuit box.
Wherre can i order a new circuit bord
Donde lo puedo compar?
-


To reassemble your device, follow these instructions in reverse order.
To reassemble your device, follow these instructions in reverse order.
Rückgängig: Ich habe diese Anleitung nicht absolviert.
4 weitere Nutzer:innen haben diese Anleitung absolviert.

Team

Eastern Washington University, Team S3-G1, Rowley Spring 2018 Mitglied von Eastern Washington University, Team S3-G1, Rowley Spring 2018
EWU-ROWLEY-S18S3G1
5 Mitglieder
6 Anleitungen geschrieben
8 Kommentare
Hi where I can find new circuit box?
That’s right , at the very beginning it says that no parts are needed , what about the new charging port where can we get it?
I am incredibly curious, and a little bit excited, to hear what it is that was going through your mind at the start of this in comparison to when you reached the end? The exact moment that the very title of this article says very clearly the word “replacement” and then to see the amazing luck of the mistaken omission which read “No Parts Required” only to then be let down again when you realized that a part was in fact required. After-all it is called “Charging Port Replacement” so I’m sure you probably healed up pretty quick from the heartbreak you suffered.
Very clear instructions, thanks.
Any idea where I can find a new charging port for my speaker? Can’t find anything on the internet..
Thanks by advance
Dries
I actually used this guide to install a type C charging port to the speaker. I bought a microusb to type C female cable, soldered the ground and 5v in parallel to the charging port and put it in place of the USB port.
Seanwee -
Removal of NFC board is missing. It should be detouched from the glue and pulled out carefully. it has a small socket with 4 pins underneath. I broke mine.
Nesecito una parte