Diese Version enthält möglicherweise inkorrekte Änderungen. Wechsle zur letzten geprüften Version.
Was du brauchst
-
Dieser Schritt ist noch nicht übersetzt. Hilf mit, ihn zu übersetzen!
-
Turn the laptop upside down so that the top is sitting on a flat surface.
-
If you are looking at the bottom of the laptop the battery is located on the front right side of the laptop; the opposite side from the floppy disk drive.
-
-
Dieser Schritt ist noch nicht übersetzt. Hilf mit, ihn zu übersetzen!
-
As shown by the arrow, slide the plastic cover up and then pull out and downwards.
-
You should now be able to pull the battery out.
-
-
Dieser Schritt ist noch nicht übersetzt. Hilf mit, ihn zu übersetzen!
-
Remove the four 16 mm screws bordering the edge of the laptop using a Phillips #0 screwdriver.
-
-
Dieser Schritt ist noch nicht übersetzt. Hilf mit, ihn zu übersetzen!
-
Remove the 4mm screw on the right rear side of the laptop next to the audio ports using a Phillips #0 screwdriver.
-
-
Dieser Schritt ist noch nicht übersetzt. Hilf mit, ihn zu übersetzen!
-
Flip the computer so the key board is facing up.
-
-
-
Dieser Schritt ist noch nicht übersetzt. Hilf mit, ihn zu übersetzen!
-
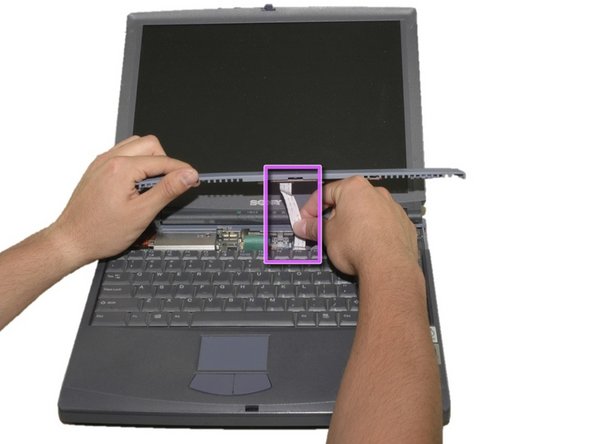
Slide the blue speaker grille (located above the keyboard) to the right and gently pull upward. The grille will still be connected by a white electrical strip.
-
Carefully pull out the white electrical strip. By doing this you will remove the speaker grille.
-
-
Dieser Schritt ist noch nicht übersetzt. Hilf mit, ihn zu übersetzen!
-
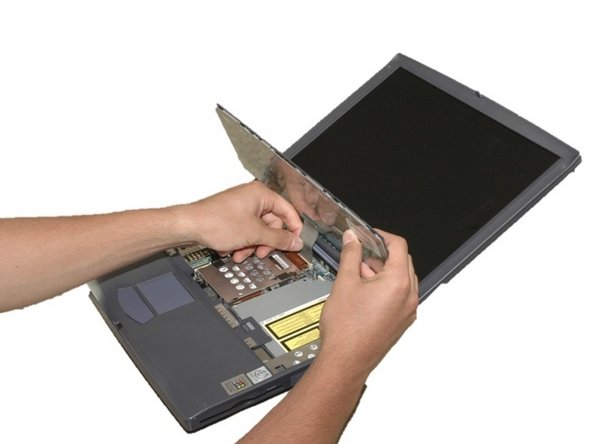
Remove the 4mm screw in the center using a Phillips screwdriver.
-
Carefully and slowly pull the green strip straight up (away from the laptop) to disconnect it. Make sure not to pull too hard to avoid breaking.
-
The keyboard can now be removed.
-
-
Dieser Schritt ist noch nicht übersetzt. Hilf mit, ihn zu übersetzen!
-
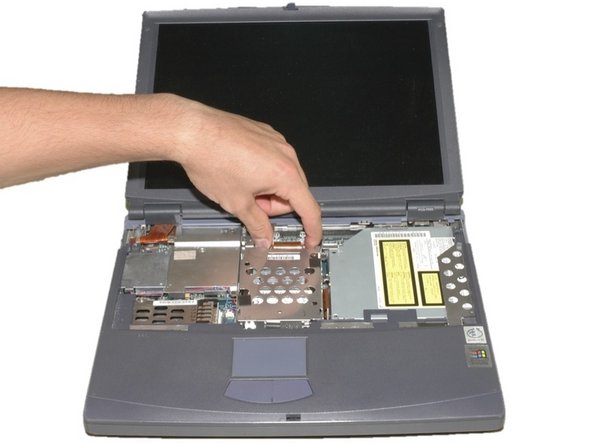
Remove the two 4mm Phillips screws in the center of the computer located on each side of the copper electrical strip.
-
-
Dieser Schritt ist noch nicht übersetzt. Hilf mit, ihn zu übersetzen!
-
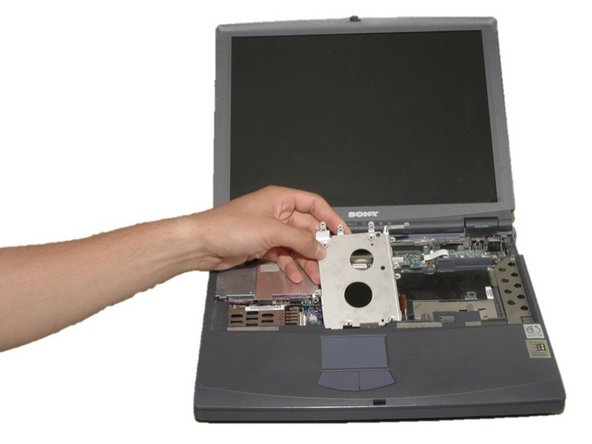
Remove the four 4mm Phillips screws around the hard drive cage.
-
Lift hard drive cage straight up.
-
Carefully disconnect the copper strip to pull out the hard drive.
-
-
Dieser Schritt ist noch nicht übersetzt. Hilf mit, ihn zu übersetzen!
-
With the hard drive removed, unscrew the four 6mm brass colored, Phillips screws under the hard drive cage
-
This will allow you to remove the hard drive mounting bracket
-
-
Dieser Schritt ist noch nicht übersetzt. Hilf mit, ihn zu übersetzen!
-
Remove the three 6mm brass colored, Phillips screws that hold the fan cage in place.
-
-
Dieser Schritt ist noch nicht übersetzt. Hilf mit, ihn zu übersetzen!
-
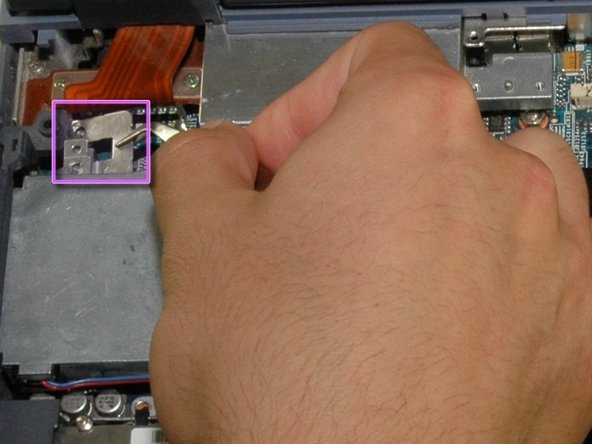
Remove the two 4mm black Phillips screws shown here.
-
Remove the 18mm silver Phillips screw shown here.
-
Now remove the silver tab.
-
-
Dieser Schritt ist noch nicht übersetzt. Hilf mit, ihn zu übersetzen!
-
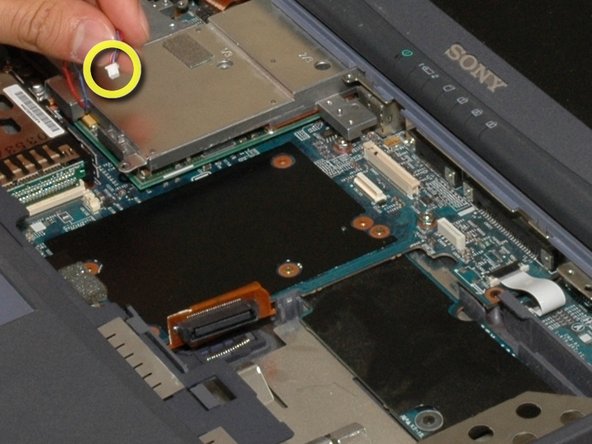
Remove the blue and red fan power cords.
-
-
Dieser Schritt ist noch nicht übersetzt. Hilf mit, ihn zu übersetzen!
-
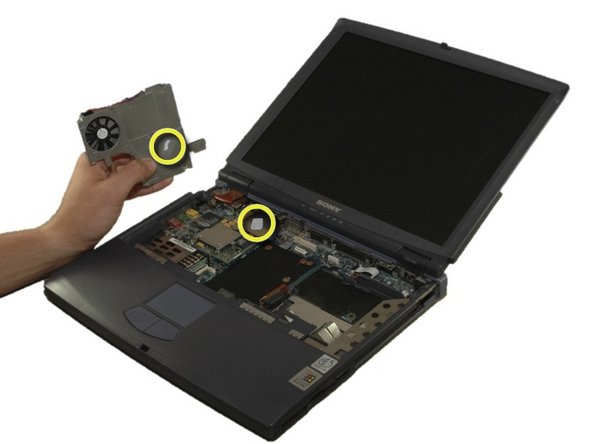
Carefully pull up and out on the metal heat sink and fan bracket.
-
You should be able to see the thermal paste.
-
-
Dieser Schritt ist noch nicht übersetzt. Hilf mit, ihn zu übersetzen!
-
To remove thermal paste thoroughly, put isopropyl alcohol (70% or greater) on a paper towel and wipe thermal paste off. Some force may be required.
-
Apply new thermal paste to CPU.
-


Team

Cal Poly, Team 12-36, Maness Spring 2011 Mitglied von Cal Poly, Team 12-36, Maness Spring 2011
CPSU-MANESS-S11S12G36
4 Mitglieder
16 Anleitungen geschrieben