Einleitung
This replacement guide provides step by step instructions with pictures to help replace the Sony Vaio PCG-3C2L motherboard. The motherboard retains the majority of computer hardware and might need to be replaced if there are multiple components on your laptop that need replacing (graphics card, CPU, RAM, damaged pins, etc.). Replacing your motherboard will increase the processing speed and speed of data transfer. You can find a replacement motherboard here.
Was du brauchst
-
-
Turn your computer over so the bottom is facing up.
-
The battery should be in the top on the back of the computer.
-
-
-
Initially, the "lock" button should be pushed all the way to the left. To unlock the battery, move the lock button from the left to the right.
-
-
-
Keep the "release" button pressed.
-
Use the iFixit opening tool (or your hands) to lift the battery up.
-
-
-
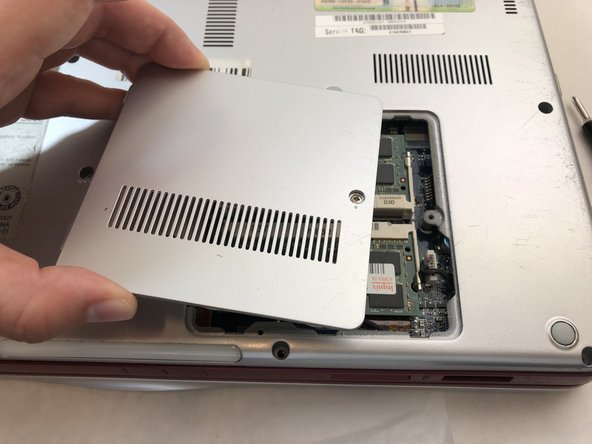
Unscrew the panel screw with a Phillips #0 screwdriver.
-
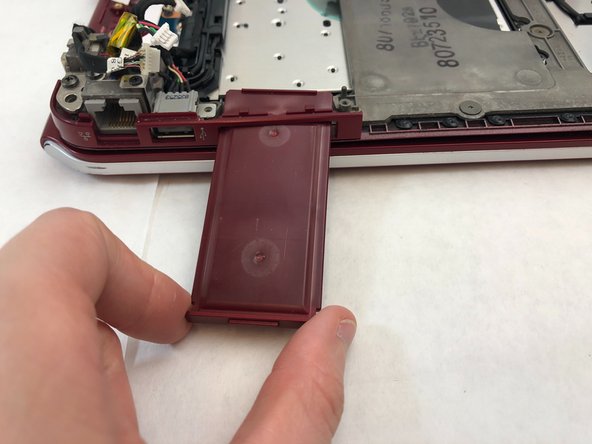
Remove the panel from the laptop.
-
-
-
Inside the panel there will be two green panels with black rectangles on top. This is the RAM.
-
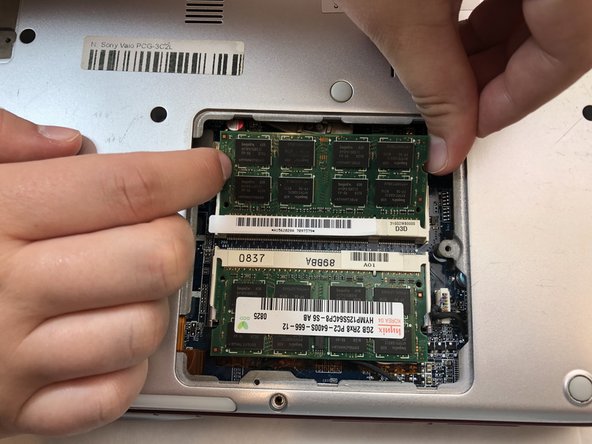
To remove the RAM, use your fingers to press the metal tabs on the white holders outwards.
-
At this point, the green panel will flip up slightly.
-
-
-
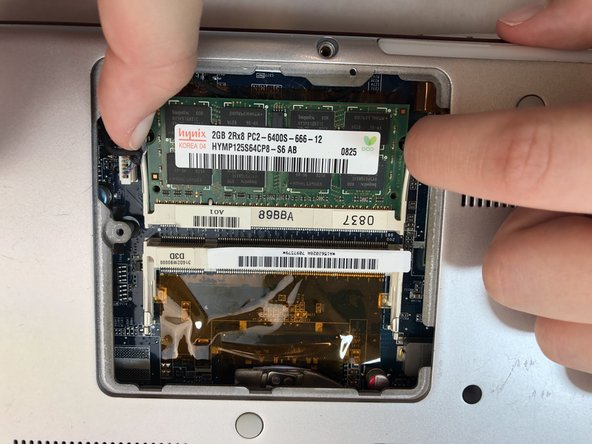
With the green panel flipped up, use your hands to remove the RAM.
-
Do the same thing for the second green panel.
-
-
-
-
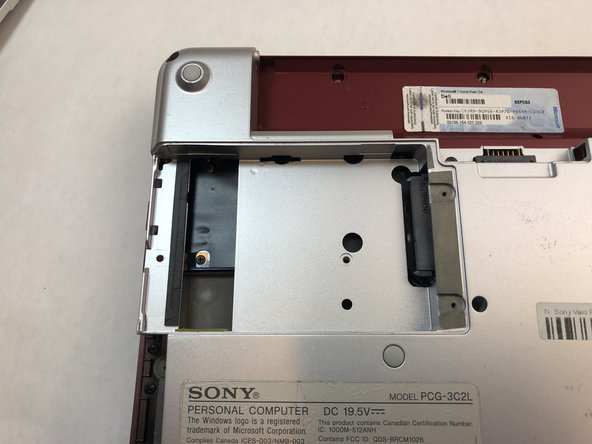
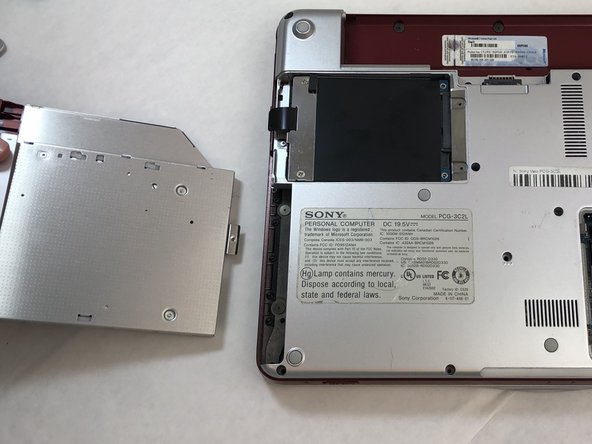
Using a Phillips #0 screwdriver, remove the two 3.5mm screws on the hard drive cover.
-
-
-
Using a Phillips #0 screwdriver, remove the three 8mm screws on the hard drive casing.
-
Remove the black hard drive casing by pulling it off.
-
-
-
Remove the six 8 mm edge screws from the back panel using a Phillips #0 screwdriver.
-
Remove the two 8 mm corner screws from the back panel using a Phillips #0 screwdriver.
-
Remove the four 8 mm middle screws from the back panel using a Phillips #0 screwdriver.
-
Remove the three 2 mm screws from the back panel using a Phillips #0 screwdriver.
-
-
-
Remove the 6 mm screw from the battery holder using a Phillips #0 screwdriver.
-
Remove the two 4 mm screws from the battery holder using a Phillips #0 screwdriver.
-
-
-
Using your hands, pull up the back panel about two inches up from the rest of the laptop.
-
Disconnect the black wire connector.
-
Remove back panel.
-
-
-
Unscrew the four 4 mm captive screws from the fan casing using a Phillips #0 screwdriver.
-
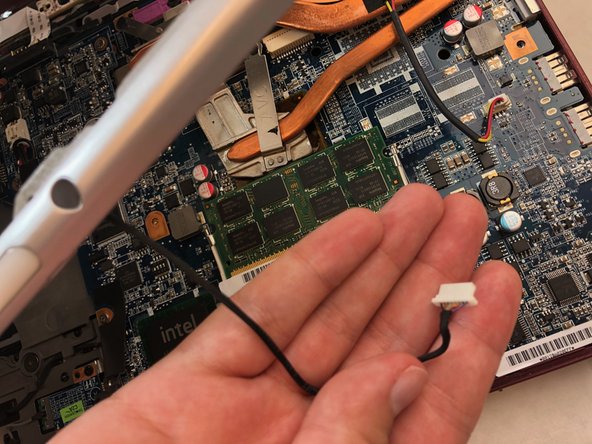
Disconnect the black/red/yellow wire connector by gently pulling on the wire.
-
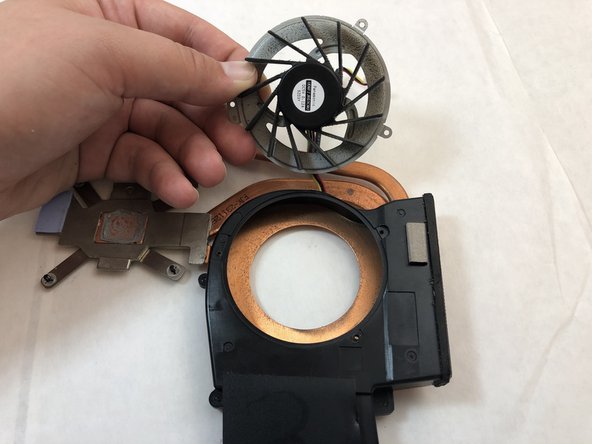
Remove the copper colored fan casing that contains the fan by pulling it off of the bottom of the laptop.
-
-
-
Remove the three 3 mm fan casing screws from the fan casing using a Phillips #0 screwdriver.
-
-
-
Use the Phillips #0 screwdriver to remove the five 3.8 mm screws.
-
Use the Phillips #0 screwdriver to remove the two 3.3 mm screws.
-
-
-
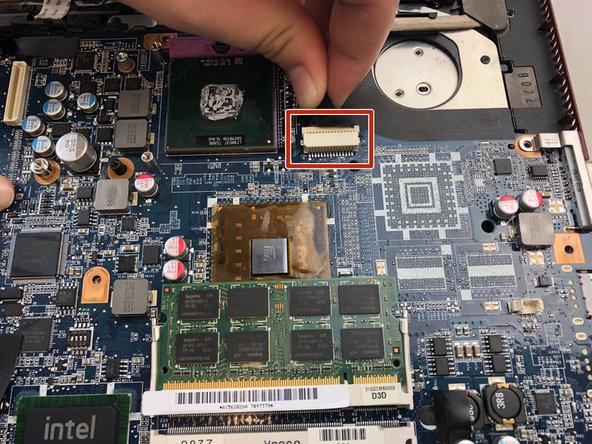
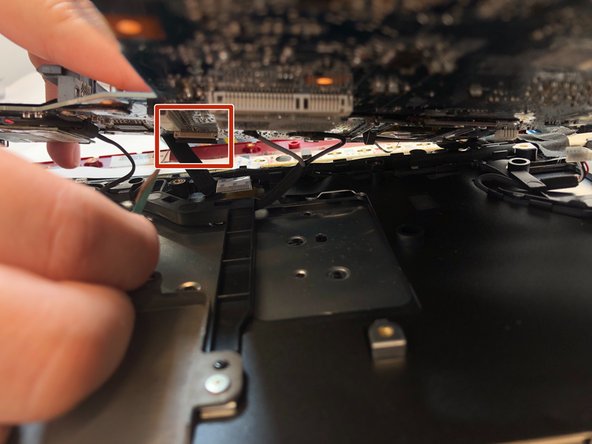
Disconnect five wire connectors by gently pulling on the cords to release. They are located around the motherboard.
-
-
-
Use the Phillips #0 screwdriver to remove the four 3.8 mm screws.
-
Use the Phillips #0 screwdriver to remove the single 2 mm screw.
-
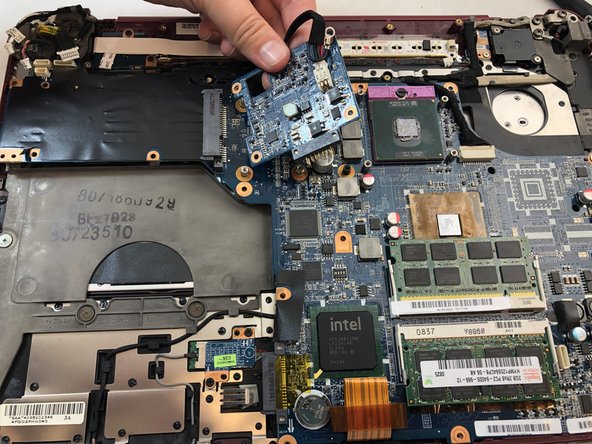
Remove the MD16 from the motherboard by gently pulling up. The MD16 is the small raised panel which is the same blue as the motherboard. It is attached to a black cord and should remain attached to the black cord.
-
Place the MD16 to the side.
-
-
-
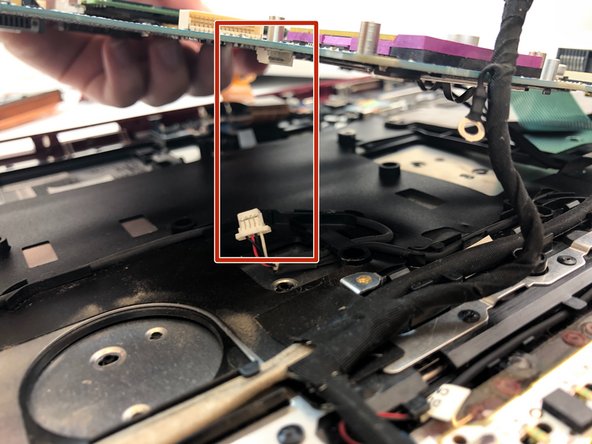
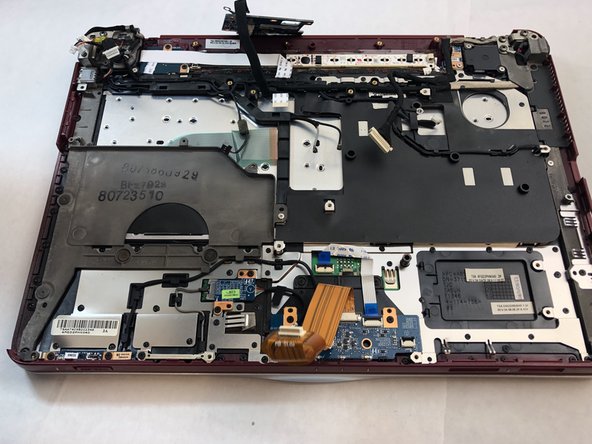
Lift the motherboard up about two inches so you can see underneath it.
-
Underneath the motherboards are more connectors. Disconnect the five wire connectors from the bottom of the motherboard by gently pulling on the wire to release.
-
-
-
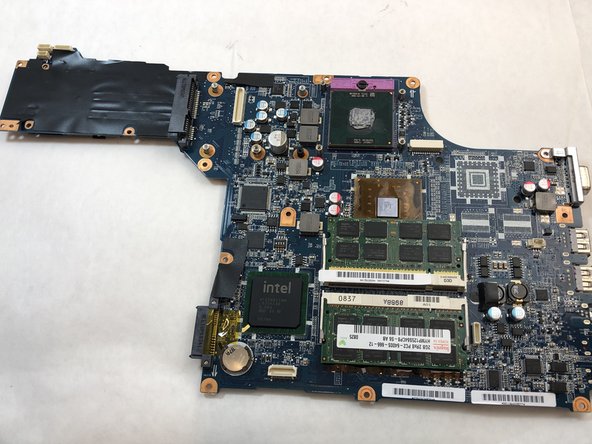
Once all the wire connectors are disconnected, remove the motherboard from the bottom of the laptop.
-


To reassemble your device, follow these instructions in reverse order.
To reassemble your device, follow these instructions in reverse order.
Rückgängig: Ich habe diese Anleitung nicht absolviert.
Eine weitere Person hat diese Anleitung absolviert.

Team

Embry-Riddle Aeronautical University, Team S8-G3, Salas Fall 2019 Mitglied von Embry-Riddle Aeronautical University, Team S8-G3, Salas Fall 2019
ERAU-SALAS-F19S8G3
4 Mitglieder
12 Anleitungen geschrieben