Zum Hauptinhalt wechseln

Sony Vaio PCG-4G1L Optical Drive Replacement

Was du brauchst

  1. Sony Vaio PCG-4G1L Optical Drive Replacement, Battery: Schritt 1, Bild 1 von 1
    • Turn off the computer and disconnect the charging cable.

    • Failing to unplug the cable can result in electric shock.

  2. Sony Vaio PCG-4G1L Optical Drive Replacement: Schritt 2, Bild 1 von 2 Sony Vaio PCG-4G1L Optical Drive Replacement: Schritt 2, Bild 2 von 2
    • Slide battery release toggle switch towards the "RELEASE" print.

  3. Sony Vaio PCG-4G1L Optical Drive Replacement: Schritt 3, Bild 1 von 3 Sony Vaio PCG-4G1L Optical Drive Replacement: Schritt 3, Bild 2 von 3 Sony Vaio PCG-4G1L Optical Drive Replacement: Schritt 3, Bild 3 von 3
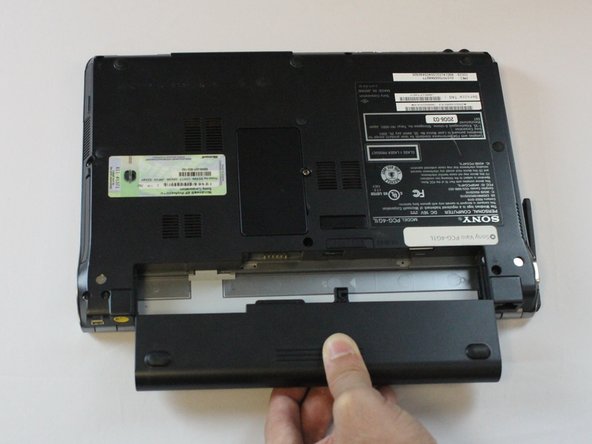
    • Apply pressure with your thumb on the grip.

    • Pull the battery out while simultaneously holding the battery release toggle switch in the release position.

  4. Sony Vaio PCG-4G1L Optical Drive Replacement, Keyboard: Schritt 4, Bild 1 von 2 Sony Vaio PCG-4G1L Optical Drive Replacement, Keyboard: Schritt 4, Bild 2 von 2
    • Remove one 5 mm Phillips #1 pan head screw, in the middle of the laptop, using a Bit Driver with Phillips PH1 bit.

  5. Sony Vaio PCG-4G1L Optical Drive Replacement: Schritt 5, Bild 1 von 2 Sony Vaio PCG-4G1L Optical Drive Replacement: Schritt 5, Bild 2 von 2
    • Be sure to pry the plastic opening tool under the keyboard, rather than under the keys. Otherwise, some keys could get harmed.

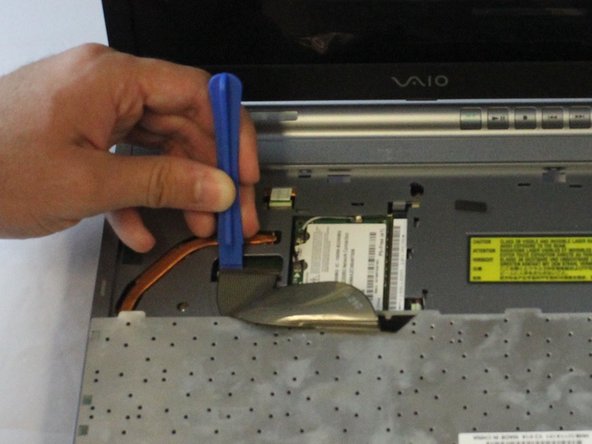
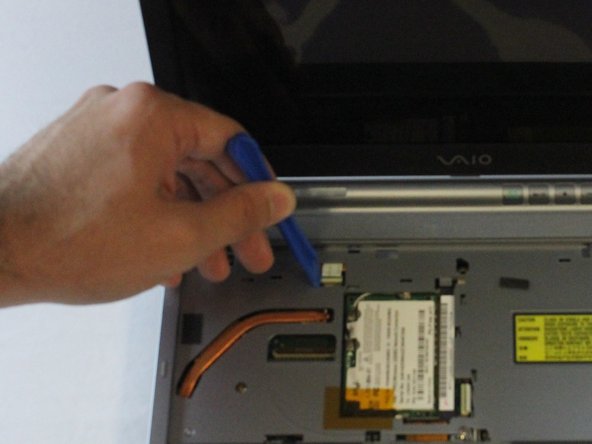
    • While using a plastic opening tool, carefully lift the keyboard by inserting the tool under the edge.

  6. Sony Vaio PCG-4G1L Optical Drive Replacement: Schritt 6, Bild 1 von 3 Sony Vaio PCG-4G1L Optical Drive Replacement: Schritt 6, Bild 2 von 3 Sony Vaio PCG-4G1L Optical Drive Replacement: Schritt 6, Bild 3 von 3
    • Do not pull the keyboard too far away, as a ribbon cable is still attached. Failing to do so can cause damage to the ribbon cable or the connector.

    • Use the plastic opening tool to release the clamp.

    • Using slight pressure, remove the ribbon cable with your fingers.

  7. Sony Vaio PCG-4G1L Optical Drive Replacement, Network Antenna: Schritt 7, Bild 1 von 1
    • Swivel the Network Antenna up so that it points upward.

  8. Sony Vaio PCG-4G1L Optical Drive Replacement: Schritt 8, Bild 1 von 2 Sony Vaio PCG-4G1L Optical Drive Replacement: Schritt 8, Bild 2 von 2
    • Pinch thumb and index finger at the Network Antenna's base.

    • Make sure not to bend the Network Antenna. Failing to do so can cause damage to the antenna.

    • Pull the Network Antenna off.

  9. Sony Vaio PCG-4G1L Optical Drive Replacement, Plastic Casing: Schritt 9, Bild 1 von 2 Sony Vaio PCG-4G1L Optical Drive Replacement, Plastic Casing: Schritt 9, Bild 2 von 2
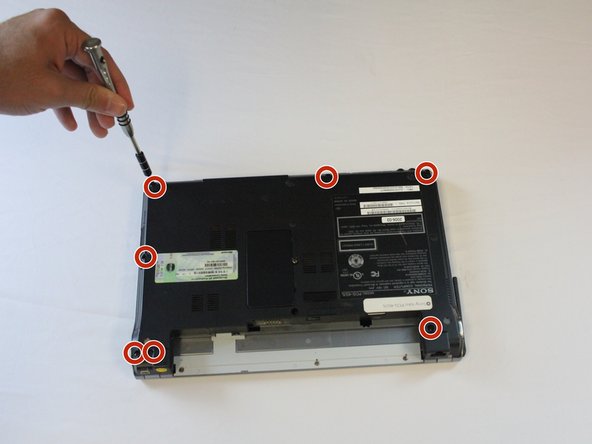
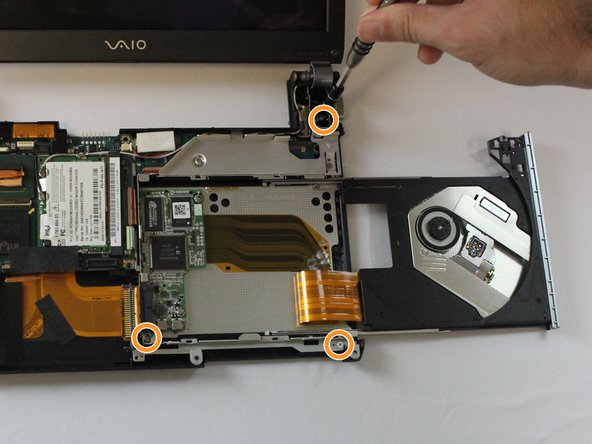
    • Remove seven 5 mm Phillips #1 pan head screws with a Bit Driver, using a Phillips PH1 bit.

  10. Sony Vaio PCG-4G1L Optical Drive Replacement: Schritt 10, Bild 1 von 2 Sony Vaio PCG-4G1L Optical Drive Replacement: Schritt 10, Bild 2 von 2
    • Remove one 7 mm Phillips #1 Pan Head Screw by using a Bit Driver with Phillips PH1 bit.

  11. Sony Vaio PCG-4G1L Optical Drive Replacement: Schritt 11, Bild 1 von 2 Sony Vaio PCG-4G1L Optical Drive Replacement: Schritt 11, Bild 2 von 2
    • Disconnect the cable by using the precision tweezers.

    • Slowly pry out the ribbon cable by using the plastic opening tool.

  12. Sony Vaio PCG-4G1L Optical Drive Replacement: Schritt 12, Bild 1 von 1
    • Do not pull the plastic cover too far away, as a ribbon cable is still attached. Failing to do so can cause damage to ribbon cable or the connector.

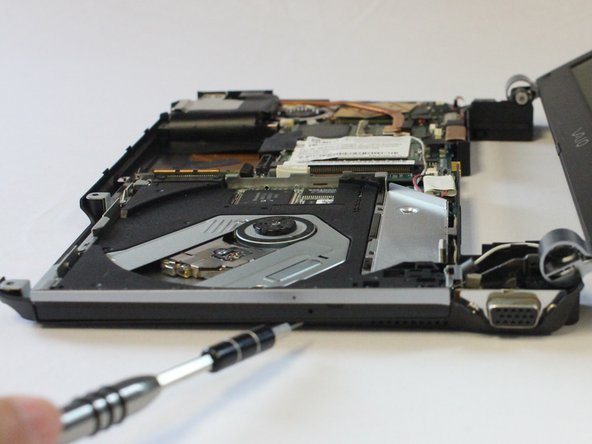
    • Remove the plastic cover by inserting the plastic opening tool around the edge.

  13. Sony Vaio PCG-4G1L Optical Drive Replacement: Schritt 13, Bild 1 von 2 Sony Vaio PCG-4G1L Optical Drive Replacement: Schritt 13, Bild 2 von 2
    • Disconnect the ribbon cable by pulling straight up with your fingers.

  14. Sony Vaio PCG-4G1L Optical Drive Replacement, Optical Drive: Schritt 14, Bild 1 von 2 Sony Vaio PCG-4G1L Optical Drive Replacement, Optical Drive: Schritt 14, Bild 2 von 2
    • Insert the PH0.8 bit into the pin hole to eject the optical drive.

  15. Sony Vaio PCG-4G1L Optical Drive Replacement: Schritt 15, Bild 1 von 2 Sony Vaio PCG-4G1L Optical Drive Replacement: Schritt 15, Bild 2 von 2
    • Remove one 4mm Phillips #0 pan head screw, using a Bit Driver with a Phillips PH000 bit.

    • Remove three 5mm Phillips #0 flat head screws, using a Bit Driver with a Phillips PH000 bit.

  16. Sony Vaio PCG-4G1L Optical Drive Replacement: Schritt 16, Bild 1 von 2 Sony Vaio PCG-4G1L Optical Drive Replacement: Schritt 16, Bild 2 von 2
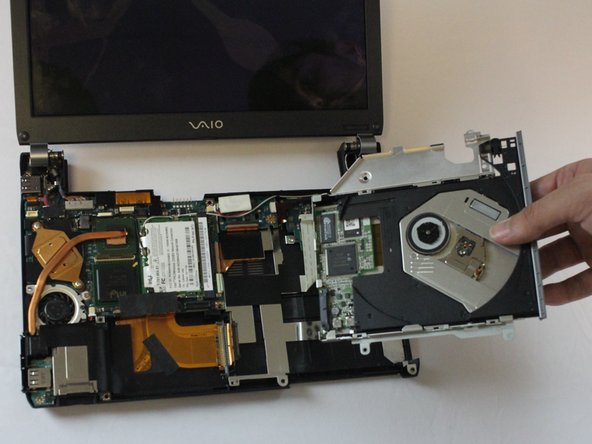
    • Apply pressure to the ribbon cable, then pick up and pull the optical drive away from the cable.

Abschluss

To reassemble your device, follow these instructions in reverse order.

Cole Collins

Mitglied seit: 10/04/16

175 Reputation

4 Anleitungen geschrieben

Team

USF Tampa, Team 2-3, Cagle Fall 2016 Mitglied von USF Tampa, Team 2-3, Cagle Fall 2016

USFT-CAGLE-F16S2G3

5 Mitglieder

12 Anleitungen geschrieben

0 Kommentare

Kommentar hinzufügen

Seitenaufrufe:

Letzte 24 Stunden: 0

Letzte 7 Tage: 0

Letzte 30 Tage: 3

Insgesamt: 572