Einleitung
The battery will need to be removed before servicing or replacing anything else on the device. The hard drive can be taken out after removing two screws. Be careful when removing the hard drive as it is attached to the motherboard by a thin ribbon cable.
Was du brauchst
-
-
Slide the lock latch to the right to release the battery lock.
-
Slide and hold the release latch to the left.
-
-
-
Use a fingernail or plastic opening tool lift the battery while holding the release latch.Rotate the battery up and away from you to remove it from the laptop.
-
-
-
-
Using a Phillips #1 screw driver, loosen both screws holding the cover in place. These screws are secured to the cover with retaining clips.
-
-
-
Lift the cover with a fingernail or plastic opening tool from the side where the screws are present and lift it off to the left.
-
-
-
The hard drive is covered by a thin, black, plastic flap. Gently lift the hard drive up and to the right.
-
-
-
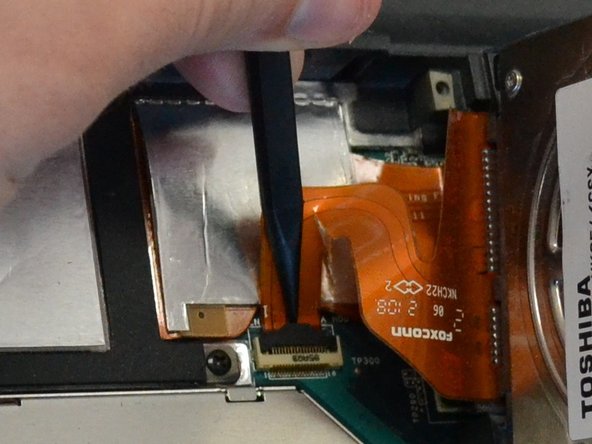
Use the spudger or a fingernail to carefully release the lock securing the ribbon cable to the motherboard.
-
-
-
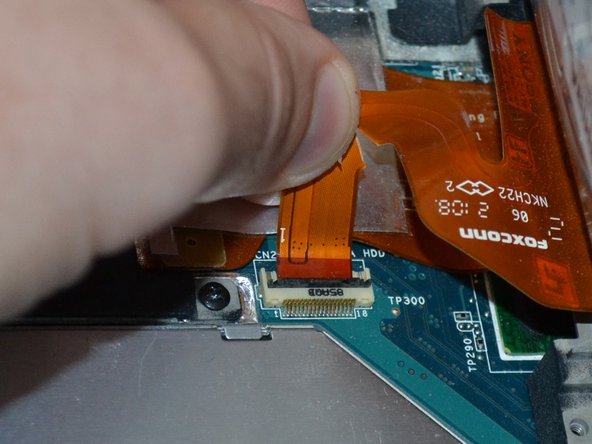
Grasp the ribbon cable carefully near the connector end. Remove it by pulling the cable away from the connector on the motherboard at a slightly upward angle.
-


To reassemble your device, follow these instructions in reverse order.
To reassemble your device, follow these instructions in reverse order.
Rückgängig: Ich habe diese Anleitung nicht absolviert.
Ein:e weitere:r Nutzer:in hat diese Anleitung absolviert.

Team

Michigan Tech, Team 1-6, Lauer Spring 2015 Mitglied von Michigan Tech, Team 1-6, Lauer Spring 2015
MTU-LAUER-S15S1G6
2 Mitglieder
10 Anleitungen geschrieben