Zum Hauptinhalt wechseln

Sony Vaio PCG-61411L Keyboard Replacement

Archivierte Anleitung
Diese Anleitung wurde ausschließlich für historische Zwecke erhalten. Verwende die aktualisierte Version dieser Anleitung, um deine Reparatur durchzuführen.

Was du brauchst

  1. Sony Vaio PCG-61411L Keyboard Replacement, Battery: Schritt 1, Bild 1 von 3 Sony Vaio PCG-61411L Keyboard Replacement, Battery: Schritt 1, Bild 2 von 3 Sony Vaio PCG-61411L Keyboard Replacement, Battery: Schritt 1, Bild 3 von 3
    • Be sure to disconnect the device charger and power down the device before beginning.

    • Turn the device over onto its back, where the battery is at the top of the device. Slide the "lock" switch to the right.

  2. Sony Vaio PCG-61411L Keyboard Replacement: Schritt 2, Bild 1 von 3 Sony Vaio PCG-61411L Keyboard Replacement: Schritt 2, Bild 2 von 3 Sony Vaio PCG-61411L Keyboard Replacement: Schritt 2, Bild 3 von 3
    • Slide the "release" switch to the left and gently lift the battery up to remove it.

    • Completely remove the battery from the device.

  3. Sony Vaio PCG-61411L Keyboard Replacement, Hard Drive: Schritt 3, Bild 1 von 1
    • The hard drive panel is located in the bottom right corner of the device.

  4. Sony Vaio PCG-61411L Keyboard Replacement: Schritt 4, Bild 1 von 2 Sony Vaio PCG-61411L Keyboard Replacement: Schritt 4, Bild 2 von 2
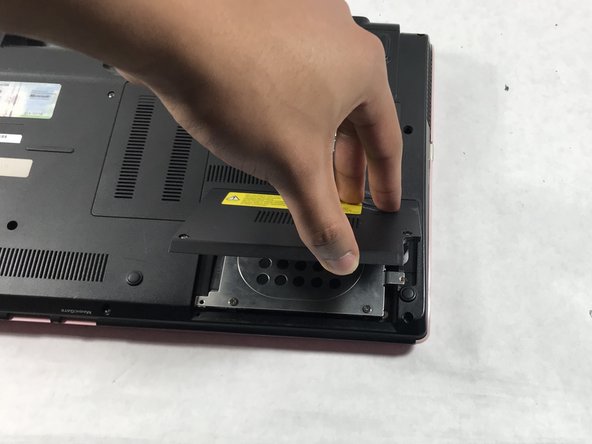
    • Using the PH #0 screwdriver, unscrew the two 6.5mm screws located in the bottom left and middle right of the panel. The screws remain in the panels.

    • Remove the panel by pulling it up towards yourself.

  5. Sony Vaio PCG-61411L Keyboard Replacement: Schritt 5, Bild 1 von 3 Sony Vaio PCG-61411L Keyboard Replacement: Schritt 5, Bild 2 von 3 Sony Vaio PCG-61411L Keyboard Replacement: Schritt 5, Bild 3 von 3
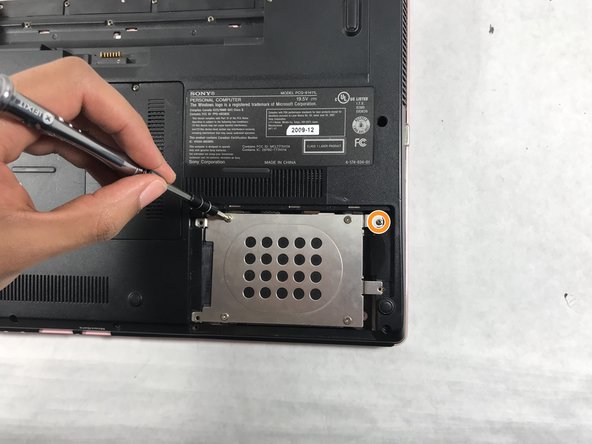
    • Using a PH0 screwdriver, remove the four 3mm silver screws located in the external hard drive cover.

    • Using a PH00 screwdriver, remove the final 3mm black screw located in the top right section of the hard drive cover.

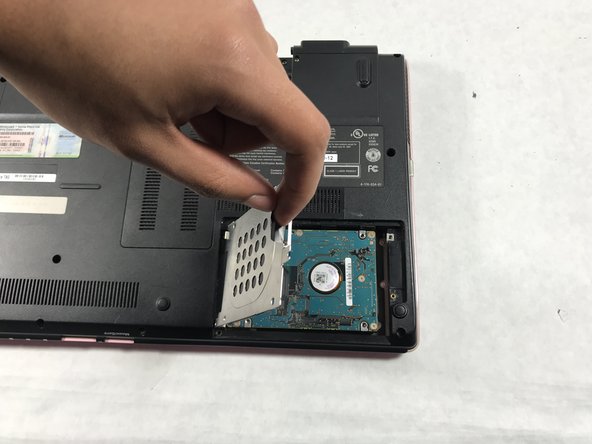
    • Carefully remove the silver hard drive cover.

  6. Sony Vaio PCG-61411L Keyboard Replacement: Schritt 6, Bild 1 von 3 Sony Vaio PCG-61411L Keyboard Replacement: Schritt 6, Bild 2 von 3 Sony Vaio PCG-61411L Keyboard Replacement: Schritt 6, Bild 3 von 3
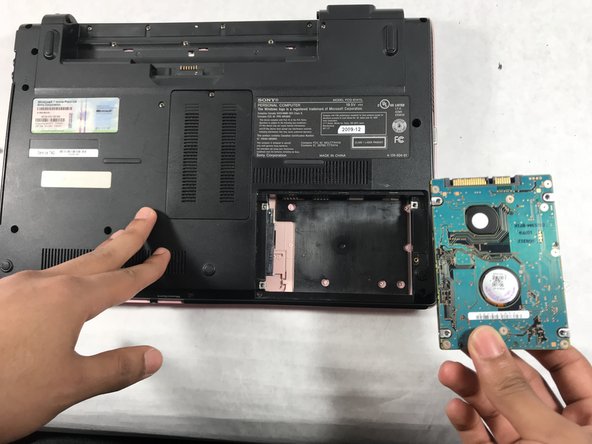
    • Detach the hard drive by disconnecting it from the motherboard, pulling it gently from left to right.

  7. Sony Vaio PCG-61411L Keyboard Replacement, Optical Disc Drive: Schritt 7, Bild 1 von 2 Sony Vaio PCG-61411L Keyboard Replacement, Optical Disc Drive: Schritt 7, Bild 2 von 2
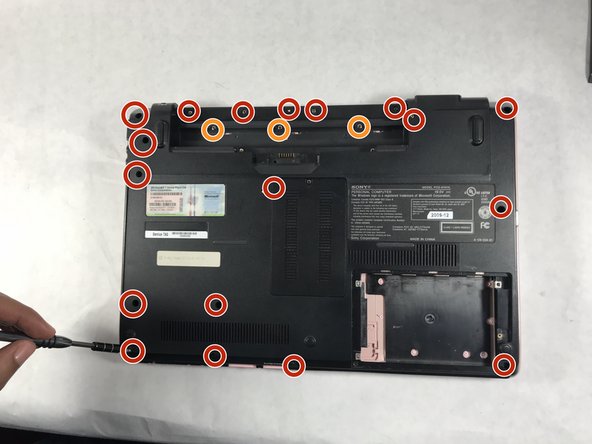
    • Remove the 5mm screws with the PH0 screwdriver.

    • Remove the 3mm screws with the PH0 screwdriver.

  8. Sony Vaio PCG-61411L Keyboard Replacement: Schritt 8, Bild 1 von 2 Sony Vaio PCG-61411L Keyboard Replacement: Schritt 8, Bild 2 von 2
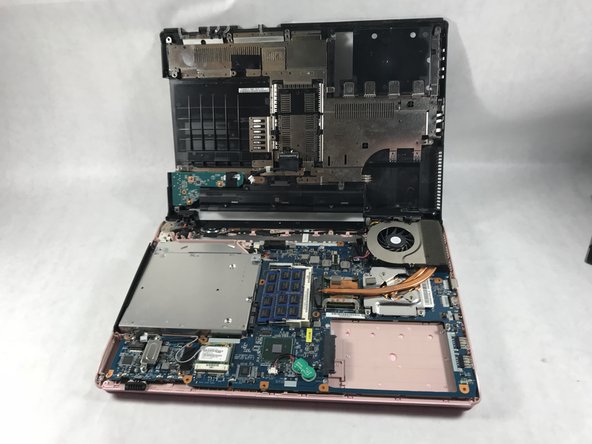
    • Lift the backplate from bottom right and left corner and remove it from the laptop.

  9. Sony Vaio PCG-61411L Keyboard Replacement: Schritt 9, Bild 1 von 2 Sony Vaio PCG-61411L Keyboard Replacement: Schritt 9, Bild 2 von 2
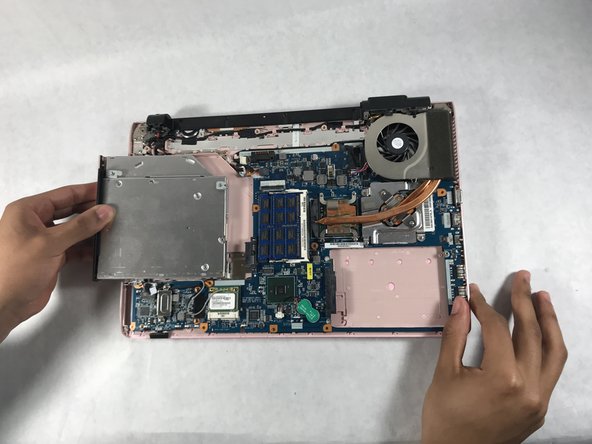
    • Slide your finger from the right of the optical disc and pull the optical disc from right to left.

  10. Sony Vaio PCG-61411L Keyboard Replacement, Keyboard: Schritt 10, Bild 1 von 2 Sony Vaio PCG-61411L Keyboard Replacement, Keyboard: Schritt 10, Bild 2 von 2
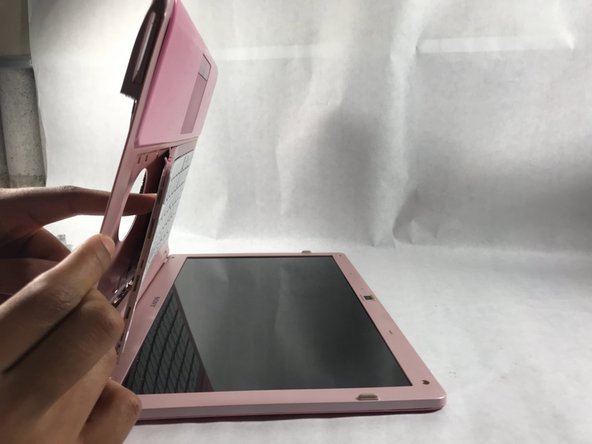
    • Push keyboard out from the hole located in the optical drives original location.

  11. Sony Vaio PCG-61411L Keyboard Replacement: Schritt 11, Bild 1 von 3 Sony Vaio PCG-61411L Keyboard Replacement: Schritt 11, Bild 2 von 3 Sony Vaio PCG-61411L Keyboard Replacement: Schritt 11, Bild 3 von 3
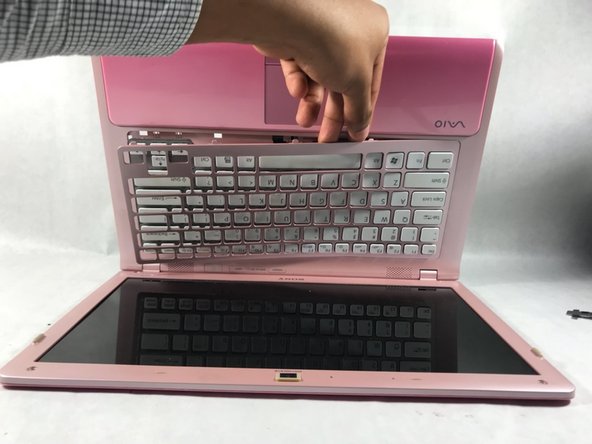
    • Remove the keyboard cover by gently pulling along the sides until it is removed completely.

  12. Sony Vaio PCG-61411L Keyboard Replacement: Schritt 12, Bild 1 von 2 Sony Vaio PCG-61411L Keyboard Replacement: Schritt 12, Bild 2 von 2
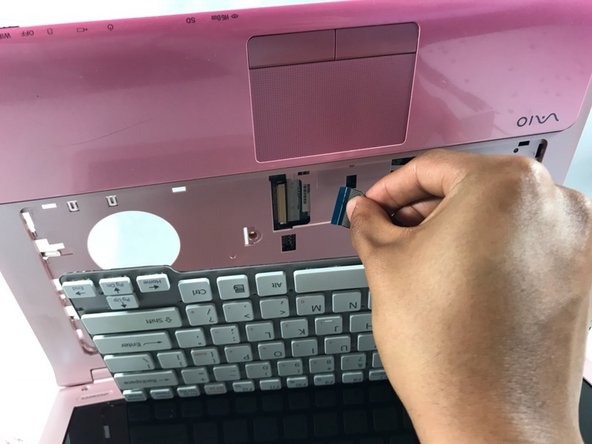
    • Disconnect the keyboard by pulling the connection wire in the opposite direction of where it's connected.

Abschluss

To reassemble your device, follow these instructions in reverse order.

Ein:e weitere:r Nutzer:in hat diese Anleitung absolviert.

Team

UMass Dartmouth, Team S2-G1, Simcock Spring 2018 Mitglied von UMass Dartmouth, Team S2-G1, Simcock Spring 2018

UMASSD-SIMCOCK-S18S2G1

3 Mitglieder

5 Anleitungen geschrieben

0 Kommentare

Kommentar hinzufügen

Seitenaufrufe:

Letzte 24 Stunden: 0

Letzte 7 Tage: 0

Letzte 30 Tage: 0

Insgesamt: 1,376