Einleitung
If your Sony Vaio VPCEB11FM has had a decrease in performance, frequent crashes, or random reboots, faulty RAM may be the culprit. The following guide will show you how to replace the RAM in your PC.
RAM is the short term memory storage of your PC and is responsible for allowing your PC to quickly access important information. Faulty RAM may limit your PC's performance by slowing down the speed at which components can share information.
You may check the current performance of the RAM in your PC by first pressing Ctrl + Shift + Esc to bring up Windows Task Manager. Then click the "Performance" tab and select "Memory" in the sidebar. This will display a graph of your RAM usage.
Prior to the first step of this guide make sure to power down your PC and disconnect it from any external power source.
Was du brauchst
-
-
While holding the release slide, use your thumb to lift the lip of the battery to pull it out.
-
-
-
-
Unscrew the RAM cover plate using the Phillips #1 Screwdriver.
-
Once the cover has been loosened, pry the cover with your finger for it to come off.
-
-
-
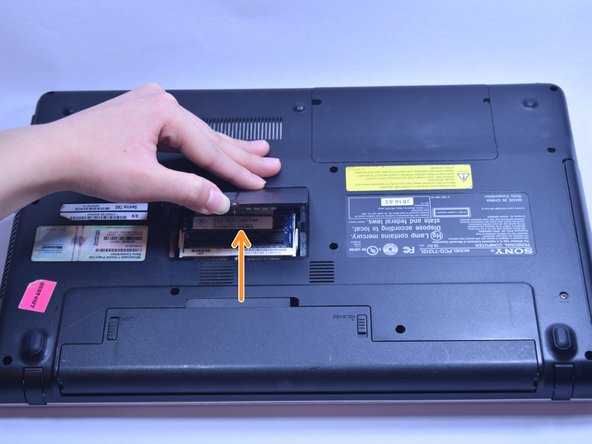
Use your fingers to gently pull the white plastic strip outward on both sides.
-
Once you pull the strip, the strip of RAM will loosen up. Once loose the strip of RAM should lift out.
-
Once done with the top strip of RAM continue for all continuous strips.
-


To reassemble your device, follow these instructions in reverse order.
To reassemble your device, follow these instructions in reverse order.
Rückgängig: Ich habe diese Anleitung nicht absolviert.
Ein:e weitere:r Nutzer:in hat diese Anleitung absolviert.
Team

UW Tacoma, Team 1-5, Rose Winter 2017 Mitglied von UW Tacoma, Team 1-5, Rose Winter 2017
UWT-ROSE-W17S1G5
4 Mitglieder
16 Anleitungen geschrieben