Zum Hauptinhalt wechseln

Sony Vaio SVT151A11L USB Port Board Replacement

Was du brauchst

  1. Sony Vaio SVT151A11L USB Port Board Replacement, Battery: Schritt 1, Bild 1 von 2 Sony Vaio SVT151A11L USB Port Board Replacement, Battery: Schritt 1, Bild 2 von 2
    • Flip the laptop over so that the battery on the underside of the device is revealed.

    • Unscrew the two 11mm slotted silver screws that can be found at the top of the battery.

  2. Sony Vaio SVT151A11L USB Port Board Replacement: Schritt 2, Bild 1 von 3 Sony Vaio SVT151A11L USB Port Board Replacement: Schritt 2, Bild 2 von 3 Sony Vaio SVT151A11L USB Port Board Replacement: Schritt 2, Bild 3 von 3
    • Wedge the plastic opening tool between the back panel and the battery on the top left side of the device.

    • Push down on the plastic opening tool until the battery lifts from the back of the laptop.

    • Grab the battery and remove it from the device.

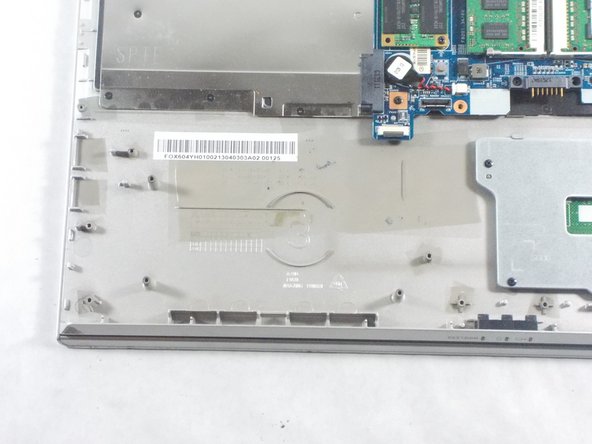
  3. Sony Vaio SVT151A11L USB Port Board Replacement, Back Panel: Schritt 3, Bild 1 von 3 Sony Vaio SVT151A11L USB Port Board Replacement, Back Panel: Schritt 3, Bild 2 von 3 Sony Vaio SVT151A11L USB Port Board Replacement, Back Panel: Schritt 3, Bild 3 von 3
    • Unscrew the three 4mm screws using a JIS #0 screwdriver.

    • Unscrew the eight 7 mm screws using a JIS #0 screwdriver.

    • Grab and lift the edge of the panel to pull it free from the rest of the computer.

  4. Sony Vaio SVT151A11L USB Port Board Replacement: Schritt 4, Bild 1 von 3 Sony Vaio SVT151A11L USB Port Board Replacement: Schritt 4, Bild 2 von 3 Sony Vaio SVT151A11L USB Port Board Replacement: Schritt 4, Bild 3 von 3
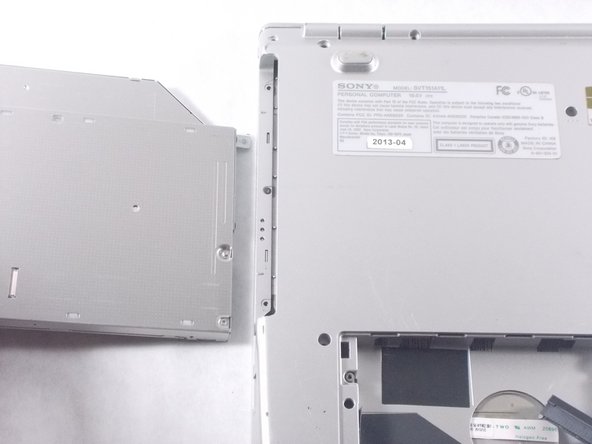
    • Grab the disk drive located at the edge of the computer and pull it it out.

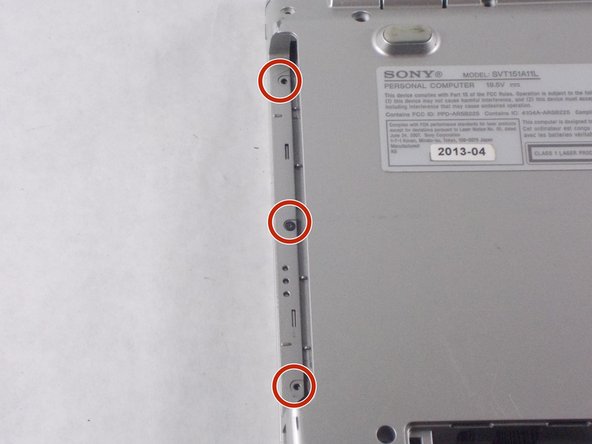
    • Unscrew the three 7 mm screws with a JIS #0 screwdriver.

  5. Sony Vaio SVT151A11L USB Port Board Replacement, USB Port Board: Schritt 5, Bild 1 von 2 Sony Vaio SVT151A11L USB Port Board Replacement, USB Port Board: Schritt 5, Bild 2 von 2
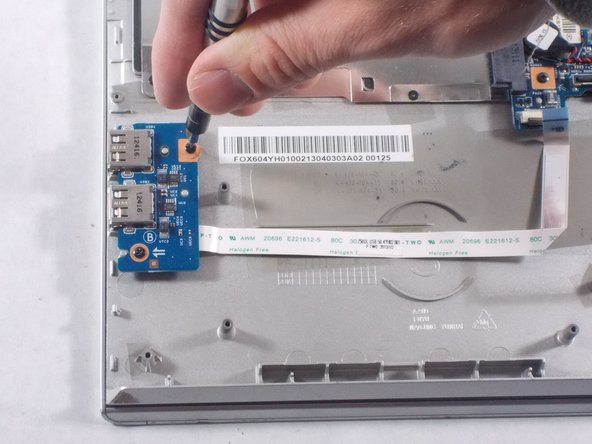
    • Use a JIS #0 screwdriver to unscrew the two 4mm screws from the board.

  6. Sony Vaio SVT151A11L USB Port Board Replacement: Schritt 6, Bild 1 von 3 Sony Vaio SVT151A11L USB Port Board Replacement: Schritt 6, Bild 2 von 3 Sony Vaio SVT151A11L USB Port Board Replacement: Schritt 6, Bild 3 von 3
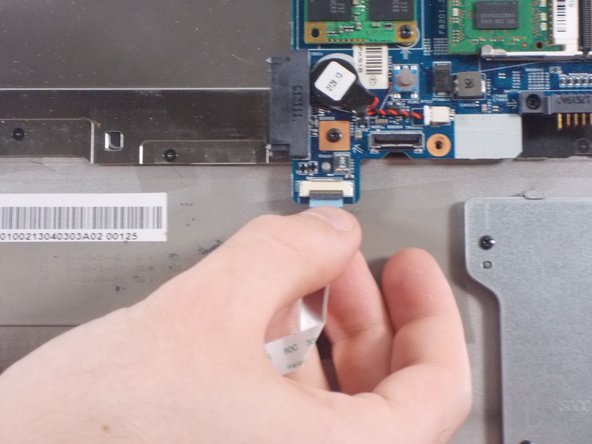
    • Lift board and peel the ribbon cable from the computer.

    • Lift and pull the end of the ribbon cable to remove it from the slot.

Abschluss

To reassemble your device, follow these instructions in reverse order.

Team

UMass Dartmouth, Team S4-G6, Julie Fall 2017 Mitglied von UMass Dartmouth, Team S4-G6, Julie Fall 2017

UMASSD-JULIE-F17S4G6

2 Mitglieder

12 Anleitungen geschrieben

0 Kommentare

Kommentar hinzufügen

Seitenaufrufe:

Letzte 24 Stunden: 0

Letzte 7 Tage: 2

Letzte 30 Tage: 4

Insgesamt: 1,015