Einleitung
How to take out the hard drive of the Sony Vaio VGN-S260 laptop
Was du brauchst
-
-
Flip the laptop over so the Vaio logo is facing down.
-
Locate the battery at the top and Find the release and unlock slides on the battery.
-
Slide the unlock tab to the unlock position.
-
Slide the release tab in the direction of the arrow, i.e. towards the unlock tab.
-
-
-
With the tabs still in the unlock position, slide the battery away from the main case.
-
-
-
Flip the computer over so the Vaio logo is facedown.
-
Unscrew the 2 screws next to the battery.
-
-
-
Press down on the outer gray shell around the keyboard.
-
Use the spudger to gently lift keyboard.
There are 2 spring-held latches, one above the F4 and one above the F12. Push a latch up into the frame of the keyboard, then lift the keyboard gently in that area so the latch doesn't spring back. Then push the other latch and the keyboard will be released.
-
-
-
-
Flip so the Vaio Logo is face down.
-
Locate and remove a total of 8 screws on the bottom.
There are 2 more screws on the bottom, one in the middle of the front next to the flash stick socket, and one under the memory door.
-
-
-
Flip the laptop over so the Vaio logo is face up.
-
Use the spudger to pop up the upper casing.
-
Remove the wires that are attaching the upper casing to the motherboard.
There are also 5 screws from the top of the uppercasing.
The are 4 cables to remove: flat cable for the power and S buttons at top center; flat cable for the touchpad at bottom center; and 2 twisted pairs for the speakers.
The speaker cable socket is very delicate. If all you are getting at is the CPU or the hard drive, it may be enough to disconnect the flat cables and gently rotate the uppercasing shifting it left to allow access to the right-hand side with the CPU fan and the hard drive.
The top panel has cutouts that allow the cables to be disconnected before the top of the case is removed. The two flat cables are not clamped and can be pulled vertically out of their connectors. The delicate speaker cables are connected to the motherboard with plugs which can be gently levered up out of their sockets.
-
-
-
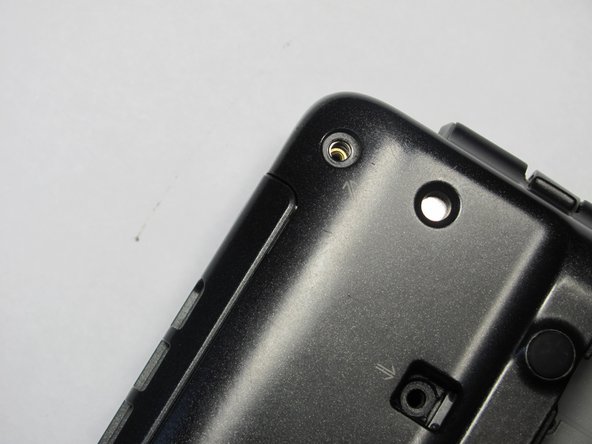
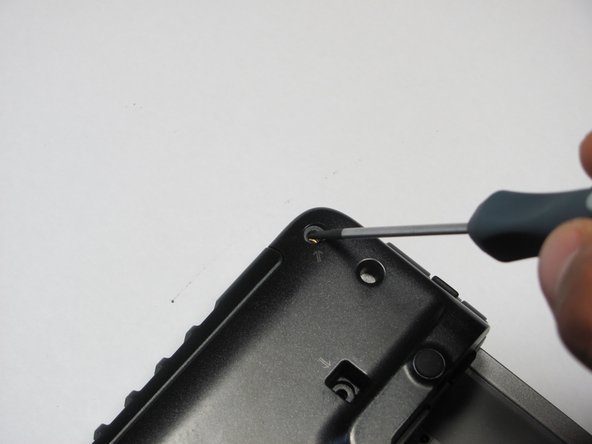
Remove the screws holding the hard drive casing in place.
Only the 2 bottom red circles have screws. The top two are open holes for screws that come in from the bottom.
Only the two bottom screws are there. The two top screws are from the bottom and would have been removed to get the uppercasing off.
-
-
-
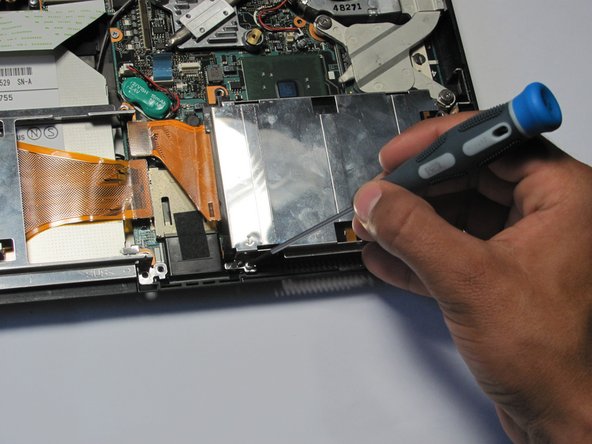
Find orange ribbon that is connected to the hard drive.
-
Find the holder of the ribbon and pop the ribbon off from it.
-


To reassemble your device, follow these instructions in reverse order.
To reassemble your device, follow these instructions in reverse order.
Rückgängig: Ich habe diese Anleitung nicht absolviert.
3 weitere Nutzer:innen haben diese Anleitung absolviert.

Team

Cal Poly, Team 16-4, Maness Spring 2010 Mitglied von Cal Poly, Team 16-4, Maness Spring 2010
CPSU-MANESS-S10S16G4
4 Mitglieder
30 Anleitungen geschrieben