Zum Hauptinhalt wechseln

Sony Vaio VGN-S260 RAM Replacement

Was du brauchst

  1. Sony Vaio VGN-S260 RAM Replacement, Battery: Schritt 1, Bild 1 von 3 Sony Vaio VGN-S260 RAM Replacement, Battery: Schritt 1, Bild 2 von 3 Sony Vaio VGN-S260 RAM Replacement, Battery: Schritt 1, Bild 3 von 3
    • Flip the laptop over so the Vaio logo is facing down.

    • Locate the battery at the top and Find the release and unlock slides on the battery.

    • Slide the unlock tab to the unlock position.

    • Slide the release tab in the direction of the arrow, i.e. towards the unlock tab.

  2. Sony Vaio VGN-S260 RAM Replacement: Schritt 2, Bild 1 von 2 Sony Vaio VGN-S260 RAM Replacement: Schritt 2, Bild 2 von 2
    • With the tabs still in the unlock position, slide the battery away from the main case.

  3. Sony Vaio VGN-S260 RAM Replacement, RAM: Schritt 3, Bild 1 von 2 Sony Vaio VGN-S260 RAM Replacement, RAM: Schritt 3, Bild 2 von 2
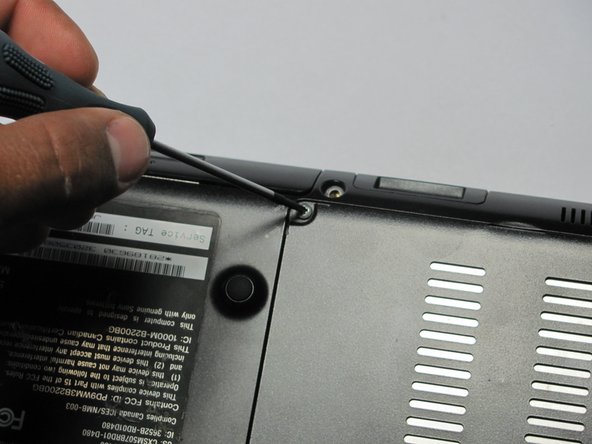
    • With the laptop still flipped over with the Vaio logo facedown, locate the screws for the RAM

    • Remove the screws

  4. Sony Vaio VGN-S260 RAM Replacement: Schritt 4, Bild 1 von 1
    • Lift off the unscrewed cover

    • Locate the RAM

  5. Sony Vaio VGN-S260 RAM Replacement: Schritt 5, Bild 1 von 3 Sony Vaio VGN-S260 RAM Replacement: Schritt 5, Bild 2 von 3 Sony Vaio VGN-S260 RAM Replacement: Schritt 5, Bild 3 von 3
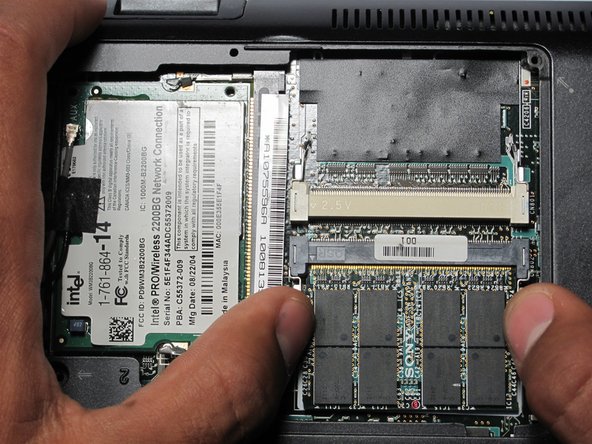
    • Locate tabs next to RAM

    • Pull the 2 tabs away from the RAM

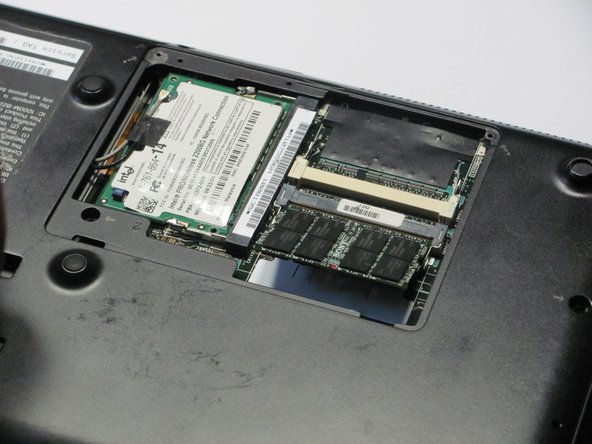
    • The RAM should pop up.

  6. Sony Vaio VGN-S260 RAM Replacement: Schritt 6, Bild 1 von 1
    • Gently slide the RAM up and out

Abschluss

To reassemble your device, follow these instructions in reverse order.

Jeffrey Bryan

Mitglied seit: 04/20/10

570 Reputation

11 Anleitungen geschrieben

Team

Cal Poly, Team 16-4, Maness Spring 2010 Mitglied von Cal Poly, Team 16-4, Maness Spring 2010

CPSU-MANESS-S10S16G4

4 Mitglieder

30 Anleitungen geschrieben

0 Kommentare

Kommentar hinzufügen

Seitenaufrufe:

Letzte 24 Stunden: 0

Letzte 7 Tage: 0

Letzte 30 Tage: 4

Insgesamt: 3,698