Diese Version enthält möglicherweise inkorrekte Änderungen. Wechsle zur letzten geprüften Version.
Was du brauchst
-
Dieser Schritt ist noch nicht übersetzt. Hilf mit, ihn zu übersetzen!
-
Remove any batteries or cassettes from the Walkman.
-
-
Dieser Schritt ist noch nicht übersetzt. Hilf mit, ihn zu übersetzen!
-
Using a spudger, separate the back cover from the front.
-
-
-
Dieser Schritt ist noch nicht übersetzt. Hilf mit, ihn zu übersetzen!
-
Gently pull the ribbon from the jack just above the film revolver, near the edge.
-
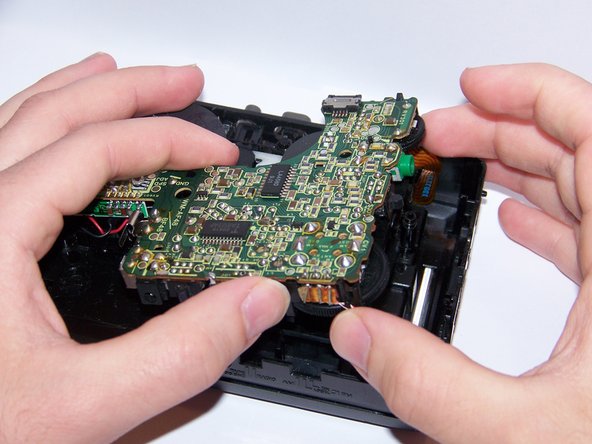
Carefully lift the motherboard out of the outer shell.
-
-
Dieser Schritt ist noch nicht übersetzt. Hilf mit, ihn zu übersetzen!
-
Locate the four metal points on the motherboard that hold the headphone jack in place.
-
Using a soldering iron, remove the headphone jack by de-soldering the four points that hold it in place.
-


Rückgängig: Ich habe diese Anleitung nicht absolviert.
7 weitere Nutzer:innen haben diese Anleitung absolviert.
Team

USF Sarasota-Manatee, Team 1-4, Stewart Fall 2014 Mitglied von USF Sarasota-Manatee, Team 1-4, Stewart Fall 2014
USFSM-STEWART-F14S1G4
4 Mitglieder
19 Anleitungen geschrieben