Diese Version enthält möglicherweise inkorrekte Änderungen. Wechsle zur letzten geprüften Version.
Was du brauchst
-
-
Erwärme die Rückplatte und den darunterlegenden Klebstoff bspw. mit einem Fön.
-
Löse die Abdeckung mit einem kleinen Saugnapf und einem Hebelwerkzeug aus Plastik vorsichtig ab.
-
Entferne etwaige Klebstoff-Rückstände, bevor du die (neue) Abdeckung mit doppelseitiger Klebefolie befestigst.
-
-
Dieser Schritt ist noch nicht übersetzt. Hilf mit, ihn zu übersetzen!
-
Disconnect the Battery Cable.
-
The battery is stuck to the phone fame. Use the white tape to remove it.
-
Li-Polymer Battery, 2230 mAh
-
Part number: LIS1551ERPC
-
-
Dieser Schritt ist noch nicht übersetzt. Hilf mit, ihn zu übersetzen!
-
Remove the SIM and the memory cards.
-
Remove x4 T5 Torx Corner screws & x2 T5 Torx Screws on the Board
-
-
-
Dieser Schritt ist noch nicht übersetzt. Hilf mit, ihn zu übersetzen!
-
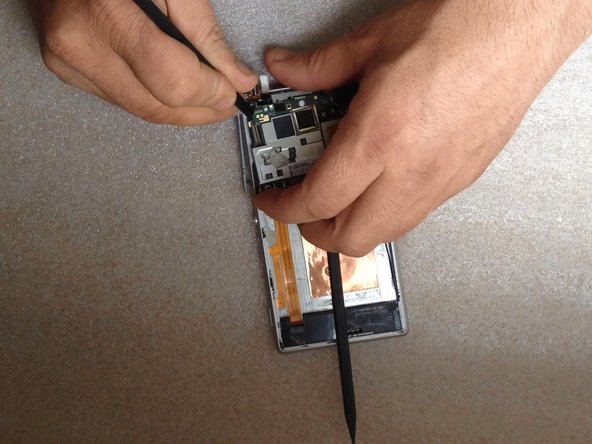
Disconnect one by one:
-
Touchscreen flex cable
-
Proximity sensor flex cable
-
Power on, Volume buttons cable
-
SIM & Micro SD flex cable
-
Coaxial antenna cable
-
-
Dieser Schritt ist noch nicht übersetzt. Hilf mit, ihn zu übersetzen!
-
Disconnect the LCD Display flex cable. The connector is on the other side of the board, under the Power/Volume buttons flex cable connector.
-
Put one plastic spudger between the Logic board and the Main frame.
-
-
Dieser Schritt ist noch nicht übersetzt. Hilf mit, ihn zu übersetzen!
-
With a plastic tool remove the Earpiece module.
-


Rückgängig: Ich habe diese Anleitung nicht absolviert.
3 weitere Nutzer:innen haben diese Anleitung absolviert.

Team
