Einleitung
This guide will replace the rear camera in the Sony Xperia Z1 Compact.
Was du brauchst
-
-
Heat along the edges of the back cover using a heat gun to soften the glue.
-
-
-
Attach the small suction cup to the back cover near the bottom of the phone.
-
Pull up on the suction cup and insert the plastic opening tool in between the back cover and the rest of the phone.
-
-
-
Move the spudger around the edge of the back cover to separate it from the black adhesive.
-
-
-
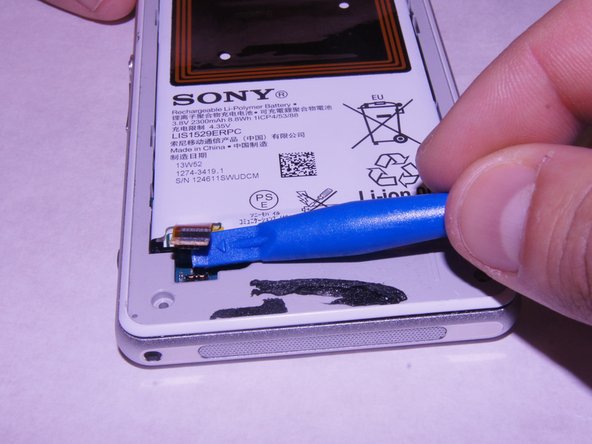
Carefully disconnect the battery from the logic board by using the plastic spudger as a lever.
-
-
-
Remove the single 1 x 3.0 mm screw holding the battery in using the JIS #00 screwdriver.
-
-
-
Pry the battery up from the ends using the plastic spudger until the battery pops out of the enclosure.
-
-
-
-
Unscrew the four screws on the corners of the back frame using the JIS #00 screwdriver.
-
-
-
Wedge the plastic opening tool under the back frame. Move the plastic opening tool around the entire frame to separate it from the adhesive.
-
-
-
Wedge the spudger underneath the external speaker. Pull up on the external speaker using the spudger.
-
-
-
Remove the square rubber gasket from the camera using the plastic spudger.
-
-
-
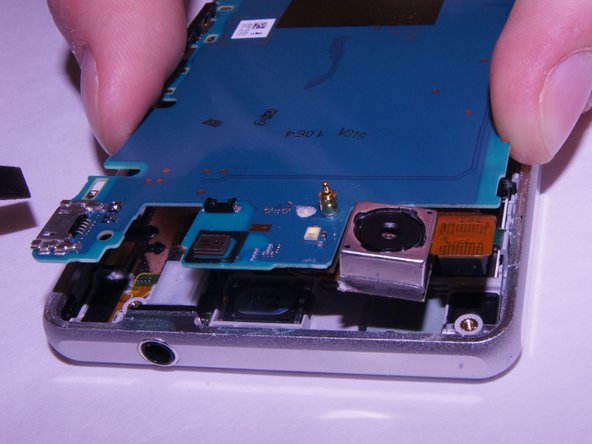
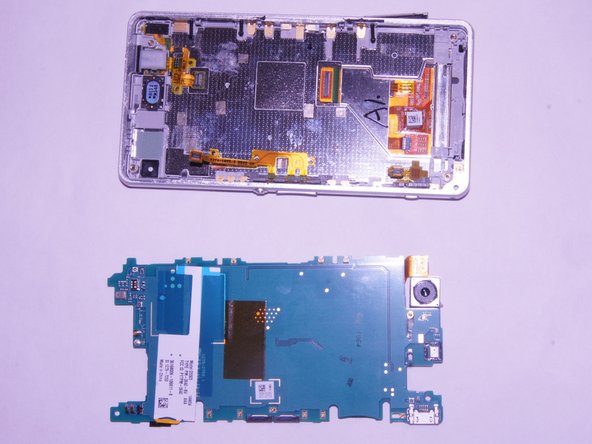
Carefully pry up on the four sides of the motherboard using the plastic spudger til it separates from the base of the phone.
-


To reassemble your device, follow these instructions in reverse order.
To reassemble your device, follow these instructions in reverse order.
Rückgängig: Ich habe diese Anleitung nicht absolviert.
Eine weitere Person hat diese Anleitung absolviert.
Team

Washington State, Team S4-G1, Phelps-Hillen Fall 2017 Mitglied von Washington State, Team S4-G1, Phelps-Hillen Fall 2017
WSU-PHELPS-HILLEN-F17S4G1
6 Mitglieder
9 Anleitungen geschrieben