Zum Hauptinhalt wechseln

Sony Xperia Z2 Loudspeaker Replacement

Was du brauchst

Einführungsvideo

  1. Sony Xperia Z2 Loudspeaker Replacement, Rear / Battery Cover: Schritt 1, Bild 1 von 3 Sony Xperia Z2 Loudspeaker Replacement, Rear / Battery Cover: Schritt 1, Bild 2 von 3 Sony Xperia Z2 Loudspeaker Replacement, Rear / Battery Cover: Schritt 1, Bild 3 von 3
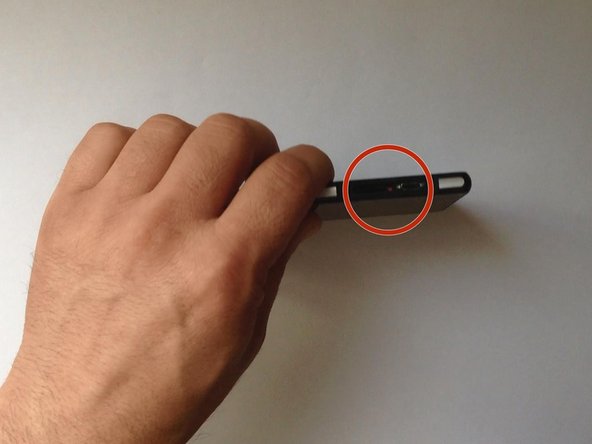
    • Switch off the phone.

    • If you can't switch it off, you can use the OFF button near to the SIM card Tray.

    • Warm the Back Cover. You can use a hairdryer.

    • Be careful, the Back Cover is plastic.

  2. Sony Xperia Z2 Loudspeaker Replacement: Schritt 2, Bild 1 von 3 Sony Xperia Z2 Loudspeaker Replacement: Schritt 2, Bild 2 von 3 Sony Xperia Z2 Loudspeaker Replacement: Schritt 2, Bild 3 von 3
    • Use a small suction cup and plastic tools for separating the Rear panel.

    • There is Adhesive tape on the edges of the phone and some between the Battery and the Back Cover, as well. I found a small tab to pull just inside the top of the cover that removed the adhesive and released the back panel from the battery. Its that same style adhesive strip as used in the Iphone 5/5c/5s.

  3. Sony Xperia Z2 Loudspeaker Replacement: Schritt 3, Bild 1 von 2 Sony Xperia Z2 Loudspeaker Replacement: Schritt 3, Bild 2 von 2
    • Before installing the new cover, you must clean the phone from the old adhesive tape and install a new one (if your spare part has come without double sided adhesive tape).

  4. Sony Xperia Z2 Loudspeaker Replacement, Battery: Schritt 4, Bild 1 von 3 Sony Xperia Z2 Loudspeaker Replacement, Battery: Schritt 4, Bild 2 von 3 Sony Xperia Z2 Loudspeaker Replacement, Battery: Schritt 4, Bild 3 von 3
  5. Sony Xperia Z2 Loudspeaker Replacement, Loudspeaker: Schritt 5, Bild 1 von 3 Sony Xperia Z2 Loudspeaker Replacement, Loudspeaker: Schritt 5, Bild 2 von 3 Sony Xperia Z2 Loudspeaker Replacement, Loudspeaker: Schritt 5, Bild 3 von 3
    • Remove the Loudspeaker metal bracket.

  6. Sony Xperia Z2 Loudspeaker Replacement: Schritt 6, Bild 1 von 3 Sony Xperia Z2 Loudspeaker Replacement: Schritt 6, Bild 2 von 3 Sony Xperia Z2 Loudspeaker Replacement: Schritt 6, Bild 3 von 3
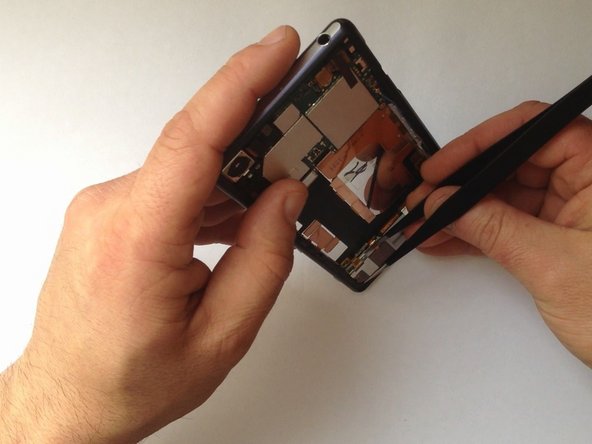
    • Part of the Volume/PowerON/Mic flex cable is affixed onto the Loudspeaker/Vibro motor module.

    • Under the Flex cable is the Loudspeaker.

    • You can change only the Loudspeaker or or the Loudspeaker & Holder module.

    • Loudspeaker & Holder module Part No: 1282-2013

    • .

    • Please SUBSCRIBE to my channel ツ

Abschluss

To reassemble your device, follow these instructions in reverse order.

4 weitere Nutzer:innen haben diese Anleitung absolviert.

ZFix

Mitglied seit: 12/09/13

191.182 Reputation

330 Anleitungen geschrieben

Team

Master Techs Mitglied von Master Techs

Community

322 Mitglieder

2.521 Anleitungen geschrieben

0 Kommentare

Kommentar hinzufügen

Seitenaufrufe:

Letzte 24 Stunden: 0

Letzte 7 Tage: 0

Letzte 30 Tage: 4

Insgesamt: 9,606