Einleitung
This guide will walk you through the disassembly of the Steam Link device made by Valve from 2015 to 2018
Was du brauchst
-
-
Start by unplugging your device
-
Power cord
-
Ethernet
-
HDMI
 Frag FixBot
-
-
-
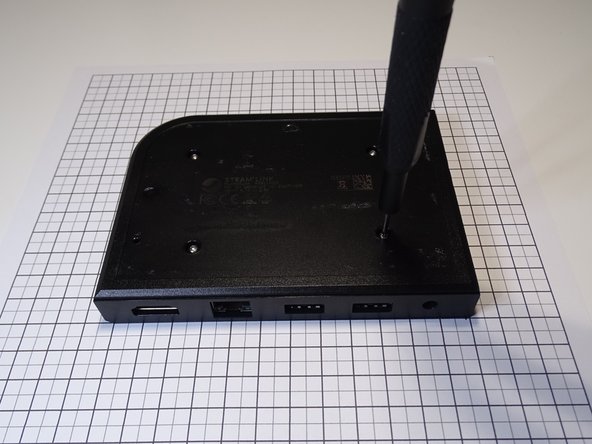
Start by removing the rubber bottom using the Guitar Pick or the Jimmy
-
-


To reassemble your device, follow the steps in the opposite order
Rückgängig: Ich habe diese Anleitung nicht absolviert.
10 weitere Personen haben diese Anleitung absolviert.

4 Kommentare zur Anleitung
bonjour esque cette carte peu servire comme raspberry merci
Non, seule une image signée par Valve peut être lancée. Elle a un accès SSH comme indiqué sur la page du SDK cependant. Notez qu'elle n'est plus fabriquée depuis décembre, donc elle n'est plus vraiment disponible.
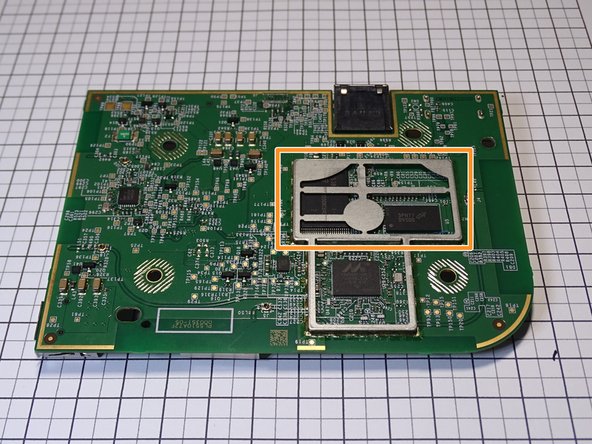
Somewhat unworthy Teardown. Naming the CPU brand wrong and not giving any relevant information like schematics or ICs used. THIS is by far better: https://www.allaboutcircuits.com/news/te...
EDIT: Oh, it is a community post, sry. But more information would be nice. E.g. where is the massive heat sink? There are lots of parts missing.
Hello, this is my first (and only) teardown. I made it just for fun, really. I opened my Steam Link once and then decided to put it on the internet, because I found they weren’t that much photos of it around.
The heat sink is a large piece of aluminum, and now I realize I forgot to add it, my mistake.