Diese Version enthält möglicherweise inkorrekte Änderungen. Wechsle zur letzten geprüften Version.
Was du brauchst
-
Dieser Schritt ist noch nicht übersetzt. Hilf mit, ihn zu übersetzen!
-
Grab the back of the calculator with one hand and the cover with the other.
-
Pull the cover off from one of the sides for easy removal.
-
-
Dieser Schritt ist noch nicht übersetzt. Hilf mit, ihn zu übersetzen!
-
Orientate the calculator with the top facing towards you.
-
Slide the locking tab,found on the top part of the calculator, to the unlock position.
-
-
Dieser Schritt ist noch nicht übersetzt. Hilf mit, ihn zu übersetzen!
-
"Locking Tab"
-
To remove the back cover, slide the cover away from the locking tab towards the bottom of the calculator until the cover no longer slides.
-
Then with the front of the calculator facing down, pull up on the back cover.
-
The calculator should now be orientated with the front facing down, as shown in picture 2.
-
-
-
Dieser Schritt ist noch nicht übersetzt. Hilf mit, ihn zu übersetzen!
-
Using a #00 Philip Screwdriver remove the 19mm screw located near the center of the back of the calculator on the panel with words "Test Access"
-
-
Dieser Schritt ist noch nicht übersetzt. Hilf mit, ihn zu übersetzen!
-
Remove the screw and lift the panel to access battery.
-
-
Dieser Schritt ist noch nicht übersetzt. Hilf mit, ihn zu übersetzen!
-
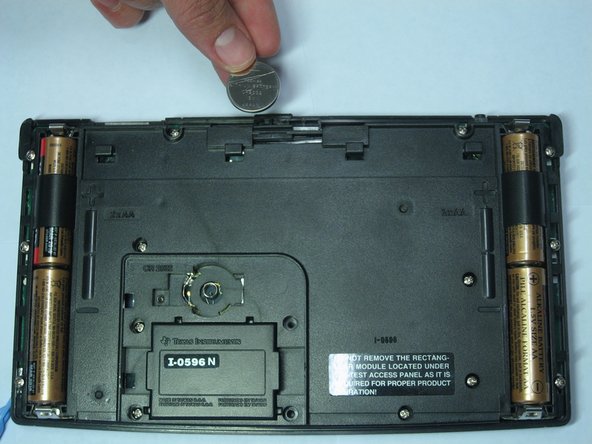
The backup battery can now be seen underneath a small metal cover held by a screw.
-
Using the same screwdriver, unscrew the 4.6mm screw located under the panel and left of the backup battery.
-
-
Dieser Schritt ist noch nicht übersetzt. Hilf mit, ihn zu übersetzen!
-
Remove the metal cover keeping the backup battery in place.
-
-
Dieser Schritt ist noch nicht übersetzt. Hilf mit, ihn zu übersetzen!
-
Use an Ipod Opening Tool or a similar tool to pull up on the right side of the backup battery.
-
The battery should pop out of position.
-
-
Dieser Schritt ist noch nicht übersetzt. Hilf mit, ihn zu übersetzen!
-
After the battery has been tilted out of its socket, simply remove it with your hands.
-


Rückgängig: Ich habe diese Anleitung nicht absolviert.
2 weitere Nutzer:innen haben diese Anleitung absolviert.
Team

Cal Poly, Team 15-51, Garner Spring 2010 Mitglied von Cal Poly, Team 15-51, Garner Spring 2010
CPSU-GARNER-S10S15G51
5 Mitglieder
9 Anleitungen geschrieben