Was du brauchst
-
-
Before starting the repair, contact repairs@timbuk2.com and request a replacement handle.
-
Also obtain a Phillips screw driver and an Allen wrench (here an Allen wrench attachment bit was added to a drill)
-
-
-
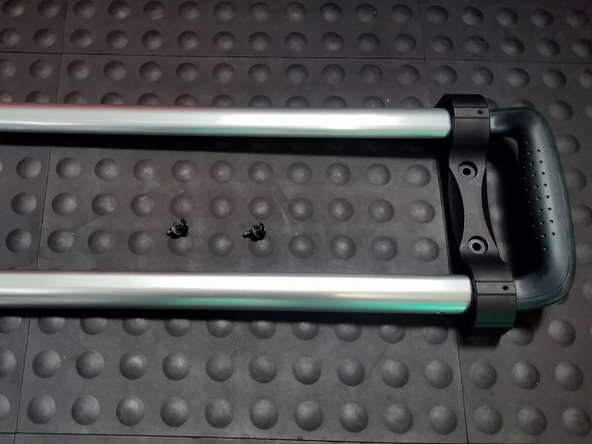
When you get your new handle, use the Phillips screw driver to remove the 2 screws at the bottom of the handle.
-
Once both screws are removed, pull off the black piece on the end.
-
Then set aside the major piece of the new roller to be used shortly and discard the black piece that detaches from the handle.
-
-
-
-
Open major part of the luggage and locate the zipper of the liner on the bottom of the bag.
-
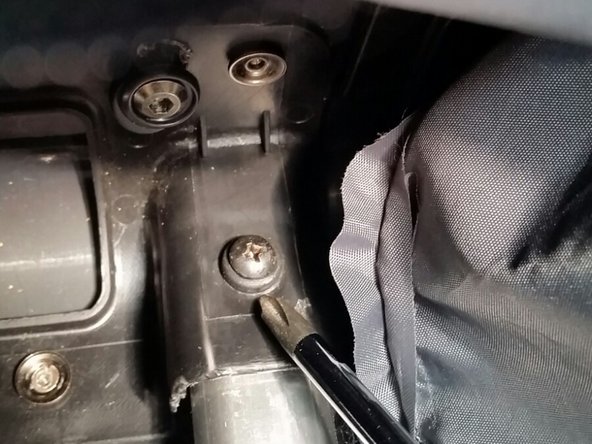
Unzip the liner and locate the 2 screws.
-
Use the Philips screw driver to unscrew the 2 screws and set them aside.
-
-
-
Now locate the smaller section of the luggage on the top of the bag and unzip the pocket that exposes the handle grip.
-
Next, unzip the liner uncovering 2 bolts.
-
Use the Allen wrench to remove these 2 bolts and set them aside.
-
Then pull out the old handle from the luggage and discard.
-
-
-
Next, insert the new handle through the same opening the old one was removed.
-
*frustration reducing tip* Although the handle can reach all the way back to the base, push the new handle ALMOST to the end and line up the smaller hole with the bigger hole as shown in the picture.
-
THEN screw the 2 screws at the base and then screw back the bolts near the top of the handle.
-


To reassemble your device, follow these instructions in reverse order.
To reassemble your device, follow these instructions in reverse order.
Rückgängig: Ich habe diese Anleitung nicht absolviert.
Eine weitere Person hat diese Anleitung absolviert.
