Zum Hauptinhalt wechseln

Toaster Oven Toasting Knob Replacement

Was du brauchst

  1. Toaster Oven Toasting Knob Replacement, Toasting knob: Schritt 1, Bild 1 von 3 Toaster Oven Toasting Knob Replacement, Toasting knob: Schritt 1, Bild 2 von 3 Toaster Oven Toasting Knob Replacement, Toasting knob: Schritt 1, Bild 3 von 3
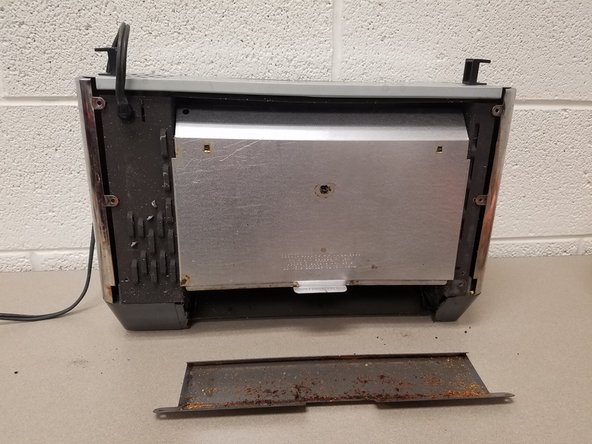
    • Remove the two 4mm by 8mm screws from the back of the toaster oven.

  2. Toaster Oven Toasting Knob Replacement: Schritt 2, Bild 1 von 3 Toaster Oven Toasting Knob Replacement: Schritt 2, Bild 2 von 3 Toaster Oven Toasting Knob Replacement: Schritt 2, Bild 3 von 3
    • Remove the four 4mm by 8mm screws from the black supports from the base of the toaster oven.

    • Take the two supports off of the bottom.

  3. Toaster Oven Toasting Knob Replacement: Schritt 3, Bild 1 von 2 Toaster Oven Toasting Knob Replacement: Schritt 3, Bild 2 von 2
    • Remove the two 4mm by 4mm screws from the base in order to remove the tray.

  4. Toaster Oven Toasting Knob Replacement: Schritt 4, Bild 1 von 1
    • Slide the back panel off of the oven.

  5. Toaster Oven Toasting Knob Replacement: Schritt 5, Bild 1 von 1
    • Grip the sides of the metal cover and lift the cover up off the toaster oven top.

  6. Toaster Oven Toasting Knob Replacement: Schritt 6, Bild 1 von 3 Toaster Oven Toasting Knob Replacement: Schritt 6, Bild 2 von 3 Toaster Oven Toasting Knob Replacement: Schritt 6, Bild 3 von 3
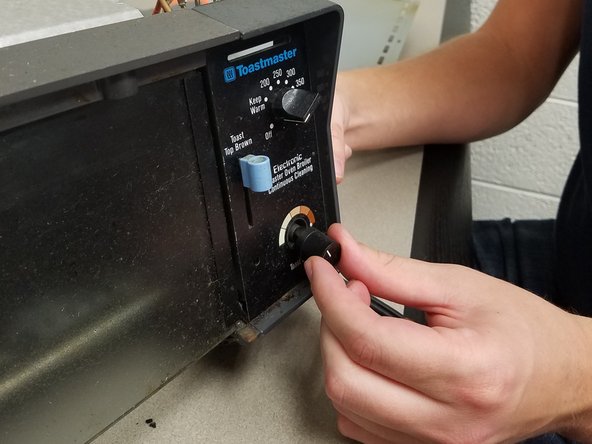
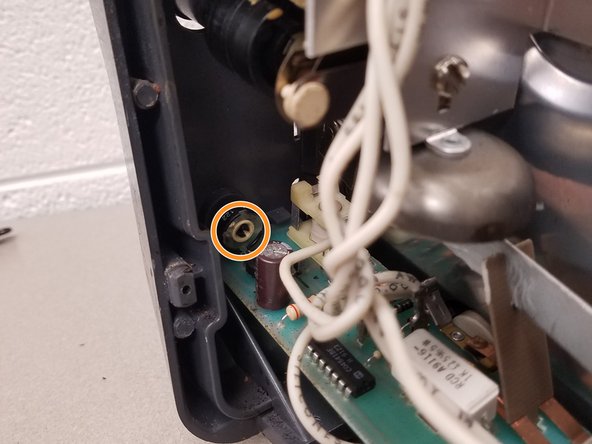
    • The knob is missing in the first picture.

    • Push the knob into the hole.

    • The knob is now back in place in the last picture.

Abschluss

To reassemble your device, follow these instructions in reverse order.

Alissa Mell

Mitglied seit: 09/26/17

101 Reputation

1 Anleitung geschrieben

Team

Michigan Tech, Team S5-G25, Galliah Fall 2017 Mitglied von Michigan Tech, Team S5-G25, Galliah Fall 2017

MTU-GALLIAH-F17S5G25

1 Mitglied

1 Anleitung geschrieben

0 Kommentare

Kommentar hinzufügen

Seitenaufrufe:

Letzte 24 Stunden: 0

Letzte 7 Tage: 3

Letzte 30 Tage: 16

Insgesamt: 1,834