Diese Version enthält möglicherweise inkorrekte Änderungen. Wechsle zur letzten geprüften Version.
Was du brauchst
-
Dieser Schritt ist noch nicht übersetzt. Hilf mit, ihn zu übersetzen!
-
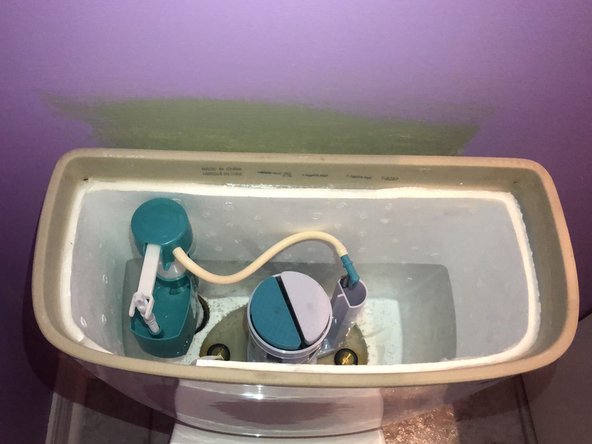
Before any work is done, inspect the hardware carefully and note any concerns. Locate the shut off valve underneath the toilet and turn it clockwise until it cannot turn any further. Do not turn past the stop point as this could damage the hardware completely.
-
-
Dieser Schritt ist noch nicht übersetzt. Hilf mit, ihn zu übersetzen!
-
If water is active in the line when the turn action is complete the, a complete shut off of water from the main value of the home might be necessary.
-
-
Dieser Schritt ist noch nicht übersetzt. Hilf mit, ihn zu übersetzen!
-
Next, hold down the flush lever/button until all the water in the tank is drained from the tank.
-
-
-
Dieser Schritt ist noch nicht übersetzt. Hilf mit, ihn zu übersetzen!
-
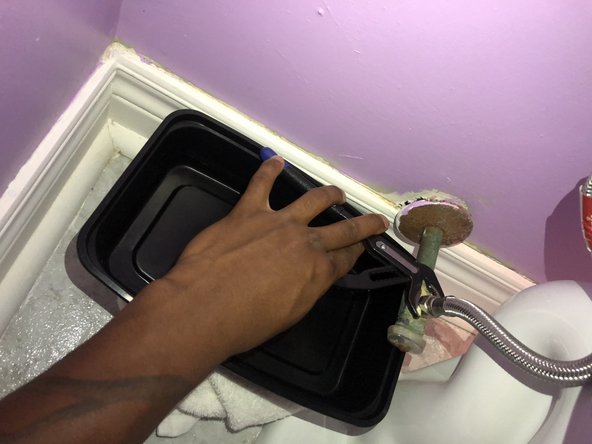
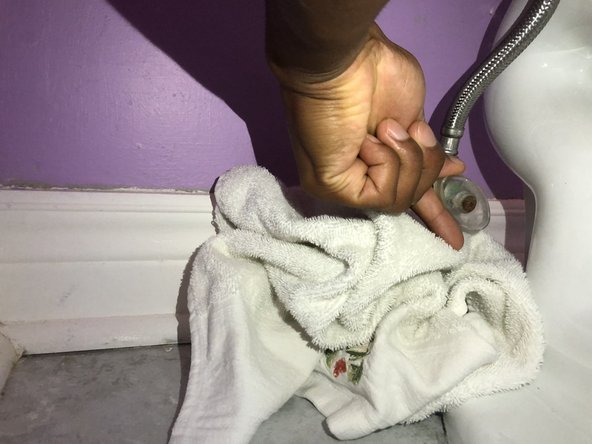
To remove any excess water from the tank. Place a container to catch the water that might drain by placing a bucket with a towel underneath the toilet to catch any water.
-
-
Dieser Schritt ist noch nicht übersetzt. Hilf mit, ihn zu übersetzen!
-
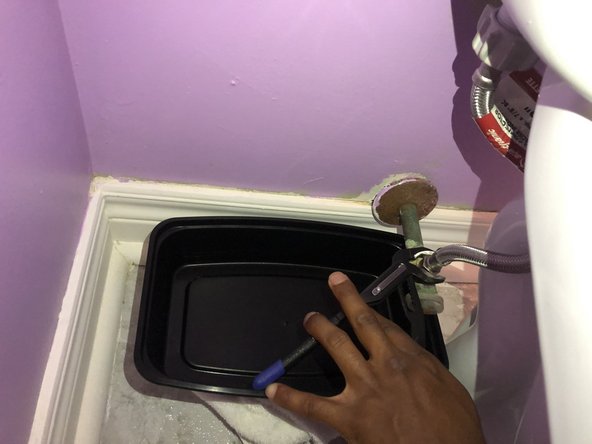
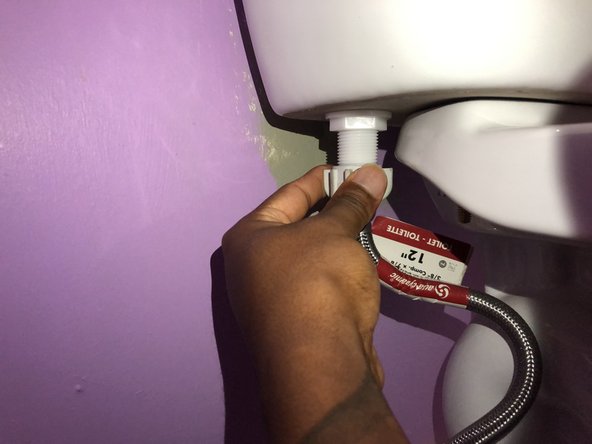
Use a vice grip to loosen the nut attached to the main waterline.
-
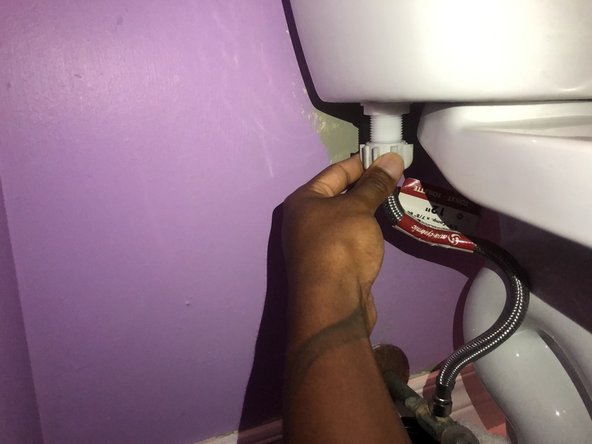
Use your hand to loosen the Bullock Nut attached to the toilet tank.
-
-
Dieser Schritt ist noch nicht übersetzt. Hilf mit, ihn zu übersetzen!
-
Attach the nut of the new flex water supply line to the main water line.
-
Using your vice grips, tighten the nut counter-clockwise.
-
-
Dieser Schritt ist noch nicht übersetzt. Hilf mit, ihn zu übersetzen!
-
Attach the Bullock Nut to the threads on the bottom of the toilet tank and hand tighten the nut counter-clockwise.
-
-
Dieser Schritt ist noch nicht übersetzt. Hilf mit, ihn zu übersetzen!
-
Turn the knob attached to the main water line on, counter-clockwise.
-
Once the water is restored be sure to check for any leaks.
-


Rückgängig: Ich habe diese Anleitung nicht absolviert.
Ein:e weitere:r Nutzer:in hat diese Anleitung absolviert.
Team

York University, Team S3-G58, Melo-Thaiss Fall 2020 Mitglied von York University, Team S3-G58, Melo-Thaiss Fall 2020
YORK-MELO-THAISS-F20S3G58
1 Mitglied
1 Anleitung geschrieben
Ein Kommentar
I have a rigid supply line and afraid of damaging faucet because when I use an open end wrench it shakesi used steel wool on supply line to clean up - I used a metal brush on top of nut to clean it up I sprayed lubricating oil on suppply line going into nut and top of nut. Any suggestions?