Einleitung
Batteries do not last forever, so this guide is to show you how to replace the battery.
Was du brauchst
-
-
Use a T-9 Torx screwdriver to unscrew the four screws on the back cover.
-
-
-
Using a spudger, gently pry apart the back case from the front case. It is easier to start on a side and work your way around the device.
-
-
-
-
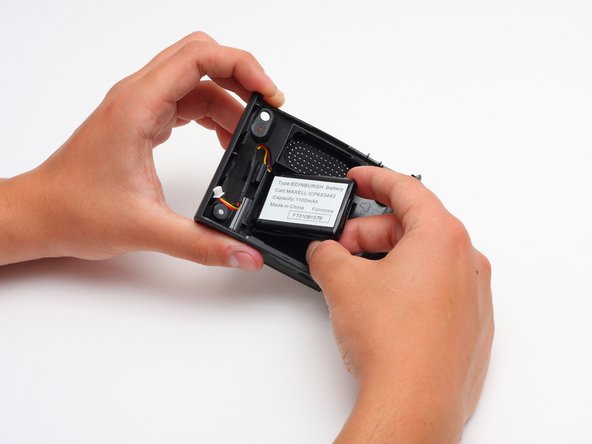
Once the two covers are separated, use the tweezers, or even your fingers, to gently disconnect the two sets of wires that are connected to the motherboard from the back cover. You may have to wiggle the wires a little bit to get them to disconnect.
-


To reassemble your device, follow these instructions in reverse order.
To reassemble your device, follow these instructions in reverse order.
Rückgängig: Ich habe diese Anleitung nicht absolviert.
3 weitere Personen haben diese Anleitung absolviert.
Team

Cal Poly, Team 7-7, Maness Spring 2010 Mitglied von Cal Poly, Team 7-7, Maness Spring 2010
CPSU-MANESS-S10S7G7
4 Mitglieder
6 Anleitungen geschrieben