Zum Hauptinhalt wechseln

TomTom VIA 1530 TM Screen Replacement

Was du brauchst

  1. TomTom VIA 1530 TM Screen Replacement, Back: Schritt 1, Bild 1 von 2 TomTom VIA 1530 TM Screen Replacement, Back: Schritt 1, Bild 2 von 2
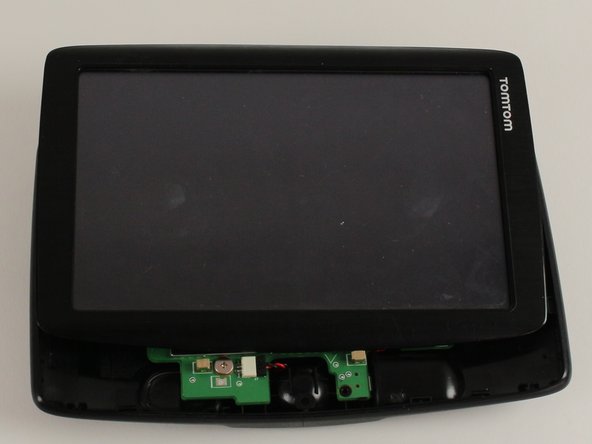
    • Position the device so that the underside is facing up.

    • Tilt the EasyPort Mount slightly upward and rotate it counterclockwise 180 degrees from the initial position.

    • Firmly grab the EasyPort Mount and remove it.

    • If it does not dislodge easily, gently twist the EasyPort Mount, applying increasing pressure until it does.

  2. TomTom VIA 1530 TM Screen Replacement: Schritt 2, Bild 1 von 2 TomTom VIA 1530 TM Screen Replacement: Schritt 2, Bild 2 von 2
    • Turn the device 180 degrees so the screw in the EasyPort Mount compartment is on top.

    • Remove the 2mm screw beneath the EasyPort Mount compartment with the Torx T-5 head Screwdriver.

  3. TomTom VIA 1530 TM Screen Replacement: Schritt 3, Bild 1 von 2 TomTom VIA 1530 TM Screen Replacement: Schritt 3, Bild 2 von 2
    • Flip the device over so that the screen is facing up.

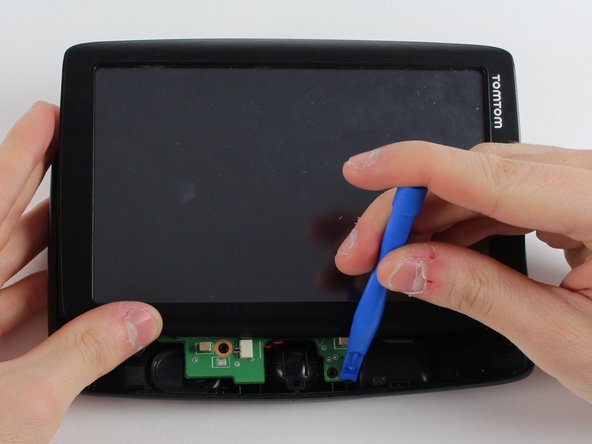
    • Wedge the plastic opening tool between the top and bottom of the device's frame, gently sliding it around the outside edge.

    • It may be easier to start at one of the corners.

    • The gold ribbon cable connecting the screen to the motherboard is fragile and tears easily.

    • This specific device's ribbon cable is torn.

  4. TomTom VIA 1530 TM Screen Replacement: Schritt 4, Bild 1 von 2 TomTom VIA 1530 TM Screen Replacement: Schritt 4, Bild 2 von 2
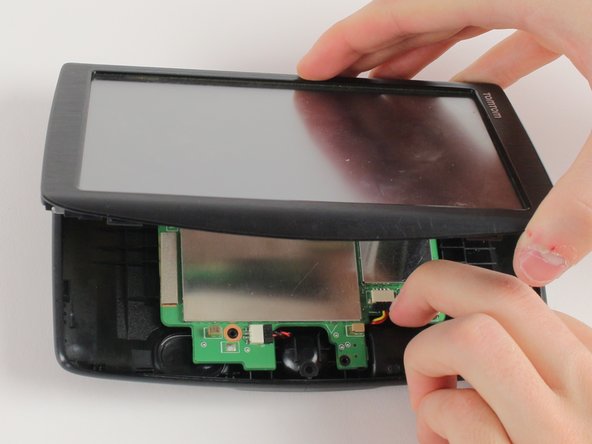
    • Carefully slide the screen forward, revealing the lower portion of the motherboard.

    • Remove the 3.6mm screw using the JIS #00 Screwdriver.

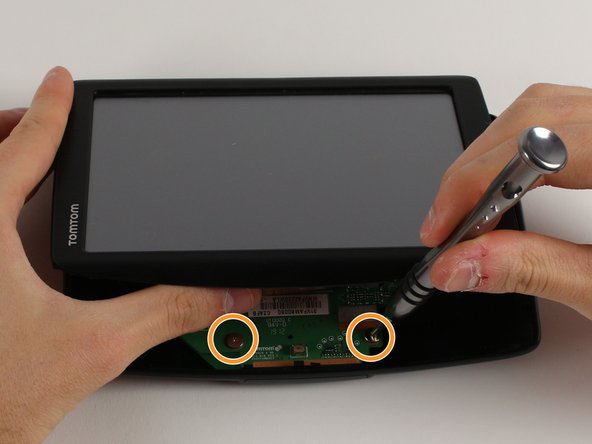
    • Rotate the device 180 degrees, carefully slide back the screen, and remove the remaining two screws.

  5. TomTom VIA 1530 TM Screen Replacement: Schritt 5, Bild 1 von 3 TomTom VIA 1530 TM Screen Replacement: Schritt 5, Bild 2 von 3 TomTom VIA 1530 TM Screen Replacement: Schritt 5, Bild 3 von 3
    • Disconnect the battery and speaker cables.

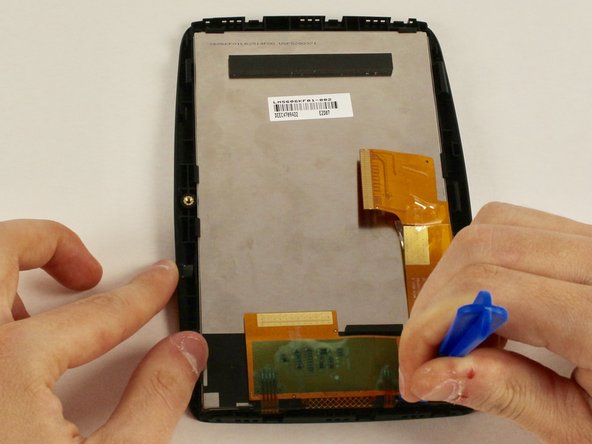
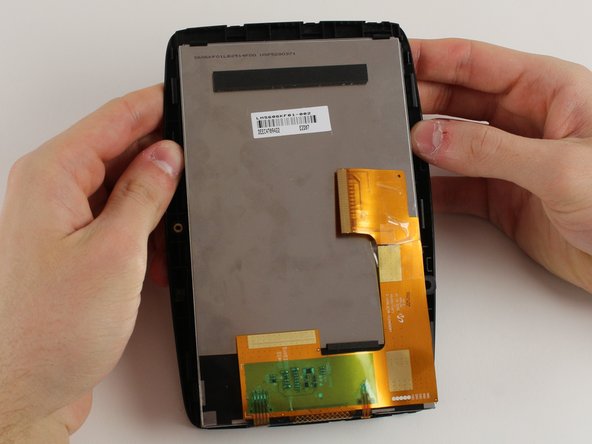
    • Unlatch the motherboard from the case.

  6. TomTom VIA 1530 TM Screen Replacement, Motherboard: Schritt 6, Bild 1 von 2 TomTom VIA 1530 TM Screen Replacement, Motherboard: Schritt 6, Bild 2 von 2
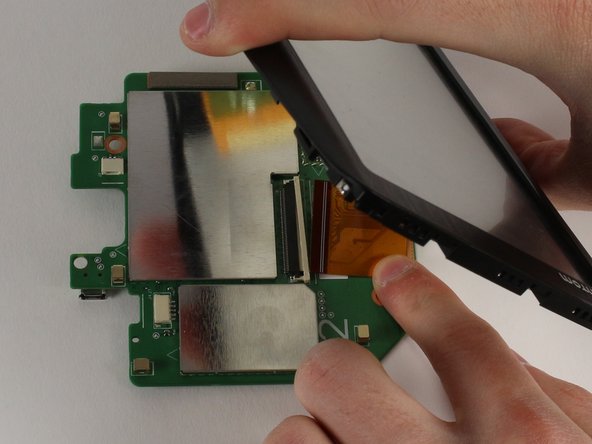
    • Wedge a spudger between the white plastic latch and the black connection port, disconnecting the gold ribbon cable.

    • Slide the gold ribbon cable out of the port.

  7. TomTom VIA 1530 TM Screen Replacement, Screen: Schritt 7, Bild 1 von 3 TomTom VIA 1530 TM Screen Replacement, Screen: Schritt 7, Bild 2 von 3 TomTom VIA 1530 TM Screen Replacement, Screen: Schritt 7, Bild 3 von 3
    • Use a plastic opening tool to unlatch the screen from its case.

    • We recommend starting on the side with the gold ribbon cable as the latches are more tricky.

    • Unlatch the screen corner by corner instead of an entire side at one time.

    • The tearing sound is the adhesive holding the screen to the case. It will re-stick when you put the screen together.

Abschluss

To reassemble your device, follow these instructions in reverse order.

Team

Cal Poly, Team S12-G2, Banghart Winter 2018 Mitglied von Cal Poly, Team S12-G2, Banghart Winter 2018

CPSU-BANGHART-W18S12G2

3 Mitglieder

6 Anleitungen geschrieben

0 Kommentare

Kommentar hinzufügen

Seitenaufrufe:

Letzte 24 Stunden: 0

Letzte 7 Tage: 0

Letzte 30 Tage: 1

Insgesamt: 330