Einleitung
The first step of disassembling the mouse is to remove the outer shell and main top component of the mouse without damaging any parts.
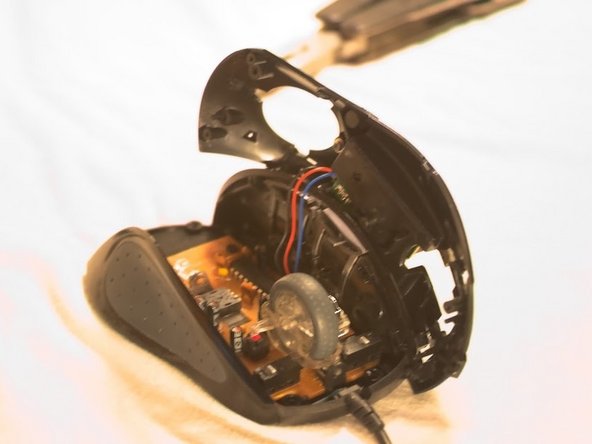
Note that the circuit board has capacitors. Though they aren't very dangerous, you may wish to discharge them before handling the circuit board. A tool to accomplish this can be found here.
Was du brauchst
-
-
Flip the mouse over and peel off the stickers on the perimeter of the bottom of the mouse
-
-
-
Use the Phillips #1 screwdriver to unscrew the six round head screws on the bottom of the mouse. Those marked with squares are 9 mm in length, the rest are 5 mm in length.
-
-
-
-
Touch your capacitor discharge tool to the capacitor leads on the board to release the stored energy. If leads are inaccessible, wait until you've removed the board from the mouse body.
-
-
-
To remove the white wire connector on the bottom board, use a spudger underneath the white plug and pop it out (this disconnects the upper board from the lower board).
-


To reassemble your device, follow these instructions in reverse order.
To reassemble your device, follow these instructions in reverse order.
Rückgängig: Ich habe diese Anleitung nicht absolviert.
2 weitere Nutzer:innen haben diese Anleitung absolviert.
Team

Cal Poly, Team 18-36, Regan Winter 2013 Mitglied von Cal Poly, Team 18-36, Regan Winter 2013
CPSU-REGAN-W13S18G36
3 Mitglieder
30 Anleitungen geschrieben